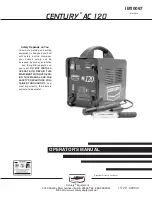
Lincoln Electric CENTURY AC 120 Operator'S Manual Download Page 10

A-3

INSTALLATION   

CENTURY® AC 120

A-3

IDENTIFY AND LOCATE COMPONENTS

(See Figure A.1)

If  you  have  not  already  done  so,  unpack  the  AC  120
from  its  carton  and  remove  all  packing  material
around the unit.

1) INPUT CORD CONNECTION

This machine is intended to operate off a standard
household  type  receptacle  (20A,  120V,  60Hz,  sin-
gle  phase,  grounded).  Refer  to  the  Technical
Specifications  at  the  beginning  of  this  manual.    If
connected to a circuit protected by fuses, use time
delay fuses marked "D".

2)  WORK CLAMP

The  work  clamp  and  cable  is  attached  to  the
welder  at  the  factory.    The  work  clamp  must  be
directly  connected  to  the  workpiece  or  the  work
bench.  Make  sure  the  contact  to  the  workpiece  is
adequate  by  avoiding  painted  or  nonmetallic  sur-
faces.

3)  ELECTRODE HOLDER

The  Electrode  holder  and  cable  is  attached  to  the
welder at the factory.  It has special contact jaws to
grasp the bare part of the welding electrode.

4)  INSTRUCTION MANUAL

5)  POWER SWITCH

INPUT CONNECTIONS

CODE REQUIREMENTS FOR INPUT

CONNECTIONS

• This  welding  machine  must  be  connected  to  a

power supply in accordance with applicable elec-
trical codes.

• If  there  is  any  question  about  the  installation

meeting applicable electrical code requirements,
consult a qualified electrician.

------------------------------------------------------------------------

Do not connect the AC 120 to an input power sup-
ply  with  a  rated  voltage  that  is  greater  than  125
volts.

Do not remove the power cord ground prong.

------------------------------------------------------------------------

WARNING

FIGURE A.1

1

2

3

5

4

CENTURY AC 120

1

2

3

5

4

CENTURY AC 120

Summary of Contents for CENTURY AC 120

Page 1: ...sed by proper installation and thoughtful operation on your part DO NOT INSTALL OPERATE OR REPAIR THIS EQUIPMENT WITHOUT READ ING THIS MANUAL AND THE SAFETY PRECAUTIONS CON TAINED THROUGHOUT And most...

Page 2: ...KER WEARERS SHOULD CONSULT WITH THEIR DOCTOR BEFORE OPERATING Read and understand the following safety highlights For additional safety information it is strongly recommended that you purchase a copy...

Page 3: ...Never simultaneously touch electrically hot parts of electrode holders connected to two welders because voltage between the two can be the total of the open circuit voltage of both welders 3 i When w...

Page 4: ...eas Avoid welding near hydraulic lines Have a fire extinguisher readily available 6 b Where compressed gases are to be used at the job site special precautions should be used to prevent hazardous situ...

Page 5: ...inflammables 4 Des gouttes de laitier en fusion sont mises de l arc de soudage Se prot ger avec des v tements de protection libres de l huile tels que les gants en cuir chemise paisse pan talons sans...

Page 6: ..._____________________ Date Purchased___________________________________________________________________________ Where Purchased_________________________________________________________________________...

Page 7: ...__________________________ Operation Section B Thermal Protection B 1 Making A Weld B 1 Electrode Selection B 1 Learning to Weld B 1 Thru B 4 __________________________________________________________...

Page 8: ...skin Wear eye ear and body protection GENERAL DESCRIPTION The AC 120 is composed of a single phase trans former and is suitable for welding in alternate current using stick electrodes type 6013 with...

Page 9: ...5 64 Fleetweld 37 E6013 INPUT SINGLE PHASE ONLY RATED OUTPUT OUTPUT RANGE Height Width Depth Weight 11 00 in 7 00 in 11 00 in 24 5 Ibs 280 mm 178 mm 280 mm 11 kg PHYSICAL DIMENSIONS RECOMMENDED ELECTR...

Page 10: ...the work bench Make sure the contact to the workpiece is adequate by avoiding painted or nonmetallic sur faces 3 ELECTRODE HOLDER The Electrode holder and cable is attached to the welder at the factor...

Page 11: ...LD The serviceability of a product or structure utiliz ing this type of information is and must be the sole responsibility of the builder user Many vari ables beyond the control of The Lincoln Electri...

Page 12: ...trode is composed of a core of metal wire with an extruded chemical covering The core wire melts in the arc and tiny droplets of molten metal shoot across the arc into the molten pool The electrode pr...

Page 13: ...ing lift the electrode 1 8 3 2mm and the arc is estab lished NOTE If you stop moving the electrode while scratching the electrode will stick NOTE Most beginners try to strike the arc by a fast jabbing...

Page 14: ...ortant to hold the electrode at a 45 angle between the two sides or the metal will not distribute itself evenly See Figure B 8 To make it easy to get the 45 angle it is best to put the electrode in th...

Page 15: ...abeled POSSIBLE CAUSE lists the obvious external possibilities that may contribute to the machine symptom Step 3 RECOMMENDED COURSE OF ACTION This column provides a course of action for the Possible C...

Page 16: ...e before you proceed CAUTION PROBLEMS SYMPTOMS POSSIBLE CAUSE RECOMMENDED COURSE OF ACTION Power source stops Power switch on but no weld cur rent Unstable arc Porous weld Thermal Overload Protection...

Page 17: ...l codes L1 N G NOTE This diagram is for reference only It may not be accurate for all machines covered by this manual The specific diagram for a particular code is pasted inside the machine on one of...

Page 18: ...h electrically live parts or electrode with skin or wet clothing Insulate yourself from work and ground No toque las partes o los electrodos bajo carga con la piel o ropa moja da Aislese del trabajo y...

Page 19: ...te Be und Entl ftung des Arbeitsplatzes Mantenha seu rosto da fuma a Use ventila o e exhaust o para remover fumo da zona respirat ria Turn power off before servicing Desconectar el cable de ali mentac...

Page 20: ...Century Equipment 2345 Murphy Blvd Gainesville GA 30504 TEL 866 236 0044 Web Site www centuryequipment net...

Reviews: