background image


2. Menu Settings 

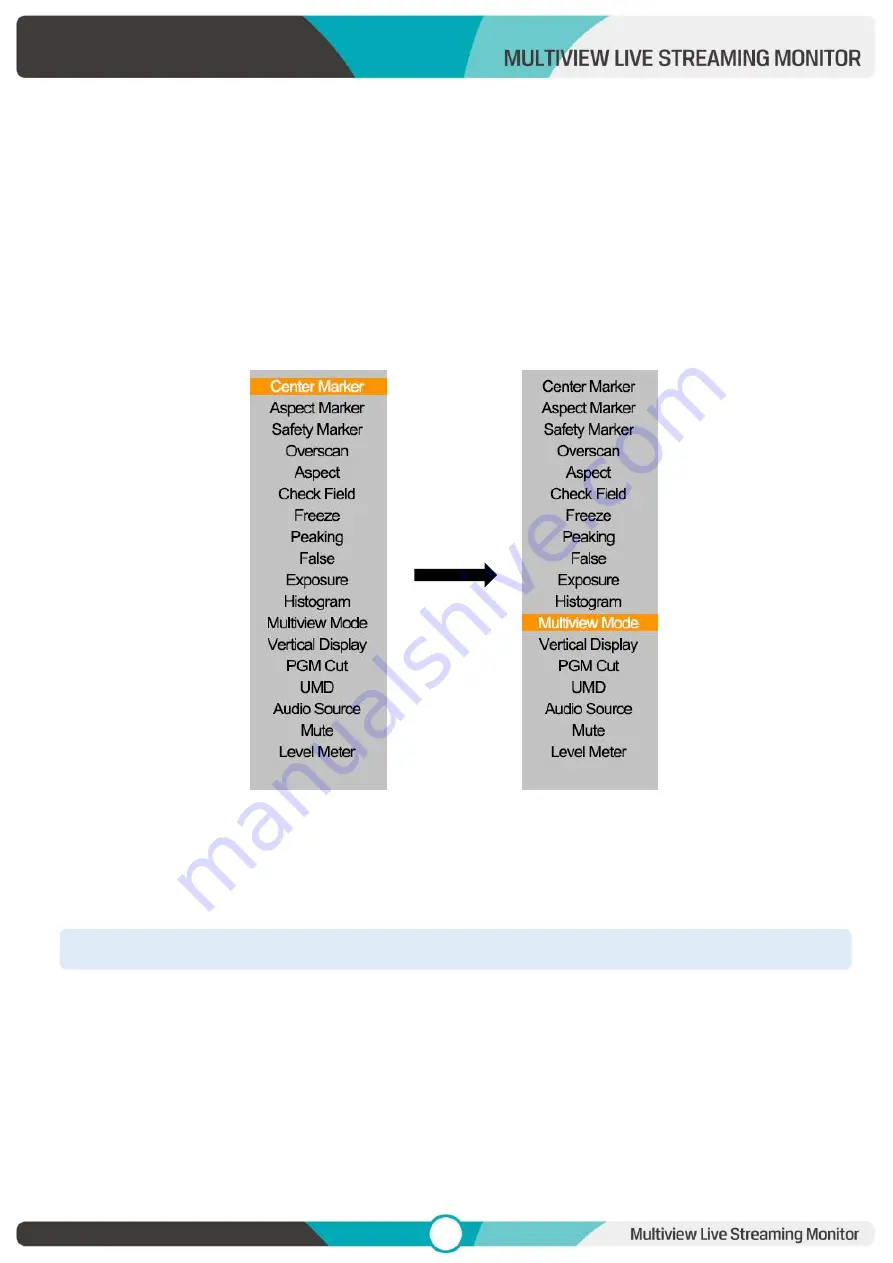
2.1 User-definable Function Buttons 

Press either F1, F2 for 3-5 seconds to bring up the function setting. Press [

] or [

] to select the desired 

option;  Press  [MENU]  to  confirm  the  option  and  set  it  as  a  shortcut  function.


Press  [EXIT]  to  close  the 

function setting. 


User  settable  function  buttons  to  suit  individual  needs:  Center  Marker,  Aspect  Marker,  Safety  Marker, 

overscan, Aspect Ratio, Check Field, Freeze, Peaking, False Color, Exposure, Histogram, Multiview Mode, 

Vertical Display, PGM Cut, UMD, Audio Source, Mute, Level Meter. 


Note! 

F1 default: [Multiview Mode], F2 default: [PGM Cut], [PGM Cut] is only available in shortcut function 


2.2 MENU and 

  / 

  Buttons


Turn  on  the  power,  press  [MENU]  to  display  the  OSD;  Press  [

]  or  [

]  to  select  between  Information, 

Multiview, UMD, Picture, Marker, Function, Audio and System; Press [MENU] again after selection to enter 

Summary of Contents for PVM220S

Page 1: ...LCD...

Page 2: ...multiple video signal input 3G SDI 2 HDMI 2 USB TYPE C Supports PGM SDI HDMI output Supports HDMI and SDI signal cross conversion Output 1080p60 50 30 25 24 through PGM Automatic backlight adjustment...

Page 3: ...ted Installations 5 2 Menu Settings 6 2 1 User definable Function Buttons 6 2 2 MENU and Buttons 6 2 3 Menu Operation 7 2 3 1 Information 7 2 3 2 Multiview 8 2 3 3 UMD 10 2 3 4 Picture 11 2 3 5 Marker...

Page 4: ...lable only in Full Screen or Vertical mode 3 MENU Bring up the menu or confirm the options 4 Select option in the menu Decrease the option value 5 Select option in the menu Increase the option value 6...

Page 5: ...loop output interface 3 3G SDI 2 input interface 4 3G SDI 1 loop output interface 5 3G SDI 1 input interface 6 HDMI output interface PGM output 7 HDMI 2 input interface 8 HDMI 1 input interface 9 3 5...

Page 6: ...ket Mounting through standard VESA 75mm 100mm holes on the back of monitor The bracket is an optional part and supports multi angle rotation and height adjustment Base stand bracket Mounting through t...

Page 7: ...vidual needs Center Marker Aspect Marker Safety Marker overscan Aspect Ratio Check Field Freeze Peaking False Color Exposure Histogram Multiview Mode Vertical Display PGM Cut UMD Audio Source Mute Lev...

Page 8: ...e option switched to by using or 2 3 Menu Operation 2 3 1 Information Showing the resolution and fresh rate of each video signal 3G SDI supported signal formats 1080p60 59 94 50 30 29 97 25 24 23 98 1...

Page 9: ...fault value is SDI1 SDI2 HDMI1 HDMI2 TYPE C select PVW preview signal source through the PGM Cut function can realize the PGM source and PVW source signal switch each other Note The PGM source is mark...

Page 10: ...ayed in full screen MV1 source selectable from SDI1 SDI2 HDMI1 HDMI2 TYPE C default is SDI1 MV2 source selectable from SDI1 SDI2 HDMI1 HDMI2 TYPE C default is SDI2 MV3 source selectable from SDI1 SDI2...

Page 11: ...llow cyan magenta default is green Current demo UMD color is yellow characters are typed as CAM1 4 Character Editing Method Select SDI1 press MENU to switch the character object Press or to change the...

Page 12: ...to 100 Sharpness selectable from 0 to 100 Color Temperature Adjustable color temperature level 6500K 7500K 9300K User Note User can only adjust the gain or offset values for red green and blue in Use...

Page 13: ...en Aspect Marker The Aspect Marker provides various aspect ratios Selectable from 16 9 1 85 1 2 35 1 4 3 3 2 1 3X 2 0X 2 0X MAG Safety Makrer Used to select and control the size and availability of th...

Page 14: ...a of the outside of Marker The degrees of darkness are between 0 to 7 Thickness Thickness of marker line is selectable from 1 to 7 default value is 2 Note The Marker function is not available in Multi...

Page 15: ...Off Peaking Used to assist in tracking the focus of subject Default is Off Peaking Color Available colors red green blue white black Default is red Peaking Level Use this setting to adjust the level o...

Page 16: ...to be achieved without the use of costly complicated external equipment Selectable from Off Spectrum ARRI RED Default Default is Off False Color Table Turn on or off False Color reference tables Expos...

Page 17: ...xels from less to more The higher the histogram bumps in a certain luminance range the more pixels there are in that luminance range For example if the histogram s bumps are mainly on the left side th...

Page 18: ...ot reach 0 This is the maximum level meaning that any audio that exceeds this level will be clipped resulting in distortion Ideally peak audio levels should fall in the upper end of the green zone If...

Page 19: ...ghtness Manual adjustment of the backlight value in Custom mode Back Light Adjusts the level of the back light from 0 100 Default is 100 OSD Timer Select the displaying time of the OSD It has 10s 20s...

Page 20: ...1080i 60 59 94 50 720p 60 59 94 50 Backward compatible with other signals USB Type C 1080p 60 59 94 50 30 29 97 25 24 23 98 1080i 60 59 94 50 720p 60 59 94 50 Backward compatible with other signals V...

Page 21: ...er Adapter 1 pair 2 Base Stand 1 pair 3 USB Type C Cable 1 pc 4 Electronic User Manual 1 pc Optional Accessories 1 V mount or Anton Bauer Battery Plate 1 pc 2 D tap Cable 1 pc 3 Swivel Bracket 1 pc 4...

Page 22: ...isplayed on the screen for an extended period of time part of that image or text may burn into the screen and leave a ghost image which is not a quality issue but a characteristic of some screens It i...

Reviews: