


2. Installation
MX2-8x8-HDMI20 series – User's Manual
8
INFO: The method is the same when the matrix would be mounted
to a wall.
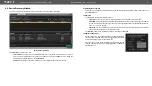
Standard Rack Installation (Default)
Two rack ears are supplied with the
product, which are fixed on left and
right side as shown in the picture.
The default position allows mounting
the device as a standard rack unit
installation.
ATTENTION! Always use all the four screws for fixing the rack shelf
ears to the rack rail. Choose properly sized screws for mounting.
Keep minimum two thread left after the nut screw.
Mounting the device to the rack rail
min. 2
thread left
rack rail
rack shelf mounting ear
rack screw
flat washer
cage nut
2
Installation
The chapter is about the installation of the device and connecting to other
appliances, presenting also the mounting options and further assembly steps.
2.1.
Mounting Options
The matrix can be mounted in several ways by the supplied two rack
ears. Allen head screws fix them to the housing:
WARNING! M4x8 size is the longest allowed screw for fixing the
ears to the housing. A longer screw may touch internal parts.
Mounting with Front and Rear Rack Ears
ATTENTION!
Two rack ears are assembled on the matrix as default,
thus, you will need two more rack ears for this kind of installation,
which can be purchased separately.
The matrix can be easily mounted under the desk by rack ears. This
mounting option means
the top of the matrix is parallel with the base
surface
. Please do the following steps:
Step 1.
Release and remove the fixing screws of the rack ears on the
matrix (both sides).
Step 2.
Rotate the rack ears by 90° to the desired direction.
Step 3.
Insert the screws into the holes and fix the front ears to the
matrix.
Step 4.
Fix the two additional rear ears (not supplied with the product)
by the screws on both sides of the matrix.
Step 5.
Fix the matrix through the holes of the rack ears to the desired
surface (screws are not supplied).
Ý
Ý