BASIC SETUP INSTRUCTIONS
13 |
P a g e
Need more help?
Contact us
any time at:
[C]
S)
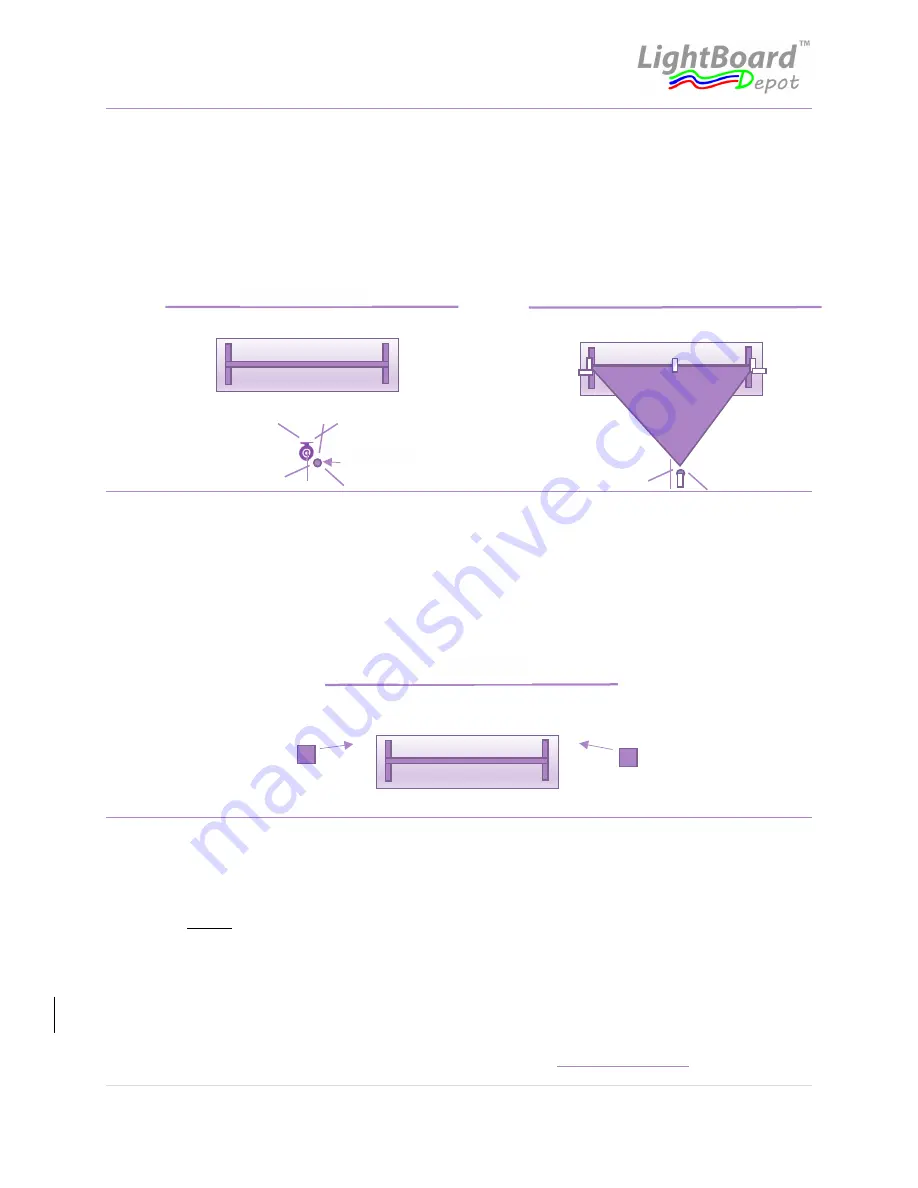
STE P 8
Attach the camera-tent fabric (long-side) to the top of the LightBoard frame using the clips provided. Center the
fabric so there is an equal length on either side. Position the camera tent-pole just behind the camera tripod and
adjust the height of the pole so the top of the pole is approximately the same height as the top of the LightBoard
frame. Carefully lift the free-end of the fabric and drape it over the top of the pole; use a clip to connect the fabric
to the pole a few inches from the top of the pole. Check the video-feed to make sure the tent-fabric is not
obstructing the camera; adjust accordingly. Use clips to connect the fabric on the sides of the frame as required.
The fabric should be reasonably tight, but not to the extent that it topples the tent-pole.
T)
STE P 9
Position the two presenter lights on either side of the LightBoard desk. The lights should be 2 to 3-ft away from
the LightBoard frame, and they should be aimed at the presenter. Turn on the lights and adjust their position to
illuminate the presenter but minimize the illumination of the backdrop. This should be done with the ‘room’
overhead lights turned off and any blinds or curtains closed. The brightness and colour of the presenter lights are
adjustable. If there is a glare from the lights in the video-feed, make sure the camera-tent is properly positioned.
If there is a reflection from the laptop screen or additional monitor screen, adjust them accordingly.
U)
STE P 10
The basic physical setup is now complete. The remainder of the setup involves recording or streaming software, as
well as the software that controls your camera. As a quick-start guide, the following settings are recommended:
turn camera brightness down to about 60-70% of the default value (this is what makes the black-backdrop
‘disappear’),
disable
auto-focus, auto white-balance, auto-exposure, and auto low-level light adjustment. A
resolution of 1280x720 works well for streaming and recording, although higher resolutions may be preferred for
recording-only. For smaller writing on the LightBoard the ‘sharpen’ feature of the camera software can be useful.
If colour is important in your videos, you may also wish to customize the related settings in your camera and/or
recording software.
PRO-TIP: When your camera is centered, there will be about a 1-inch strip at the top & bottom of your LightBoard canvas
which the camera will not see; This can be used as a writing space for Personal/Private notes during your session!
Backdrop Wall
Tent Pole
Camera Tent
Clips
Backdrop Wall
Backdrop Wall
Presenter Light
Presenter Light


