background image

Recording 

7.3 Schedule Recording 

 
You can access Schedule Recording from 
the Settings Menu as described in Chapter 
5.1.2 and Chapter 5.2.4. 
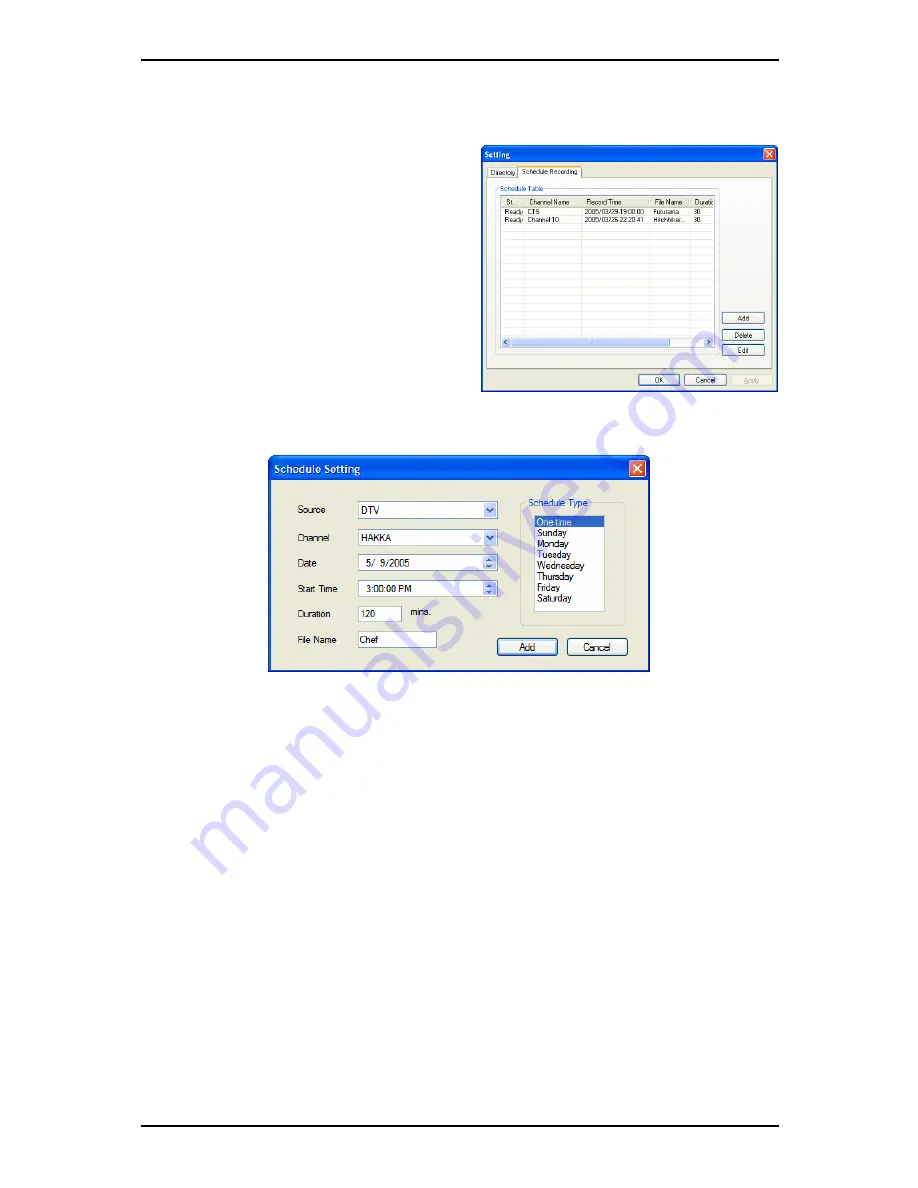
Here you can see a list of items scheduled 
to record. 
By clicking on the 

Add

 Button, you are able 

to add a new scheduled recording, the 

Delete

 button cancels the highlighted 

scheduled recording and the 

Edit

 button 

lets you change the settings of a scheduled 
recording. 


The 

Add

 and 

Edit

 buttons open a second menu: 

 
First, select the 

Schedule Type

 from the right side of the screen.  Click “One time” if 

this is a one-time only recording.  To make a weekly recording, click on the days you 
want the program to record on.  Select the 

Source

 you want to record from, then the 

Channel

.  Select the 

Date

 if this is a one time recording.  Enter the 

Start Time

 and 

Duration

 of the program you want to record.  Finally, enter a 

File Name

 for the 

recorded file – if this is a weekly recording, a number will be added to this name for 
each recording. (Example: FileName01.mpg, FileName02.mpg, etc.) 
 
Click on the 

Add

 button to finish scheduling the recording. 

 
You can also schedule recordings on digital TV using EPG information.  For more 
details, refer to section 4.9. 

28 

Summary of Contents for FlyDVB-T Duo CardBus

Page 1: ...FlyDVB T Duo CardBus FlyDVB T Hybrid CardBus User Manual Animation Technologies Inc www lifeview com Ver 1 9...

Page 2: ...ation of such revision or change In no event shall Animation Technologies Inc be liable to you or any third party for any consequential incidental direct indirect special punitive or other damages inc...

Page 3: ...dows XP 6 3 4 Installation of LifeView DTV 7 4 LifeView DTV 8 4 1 DTV Interface Overview 8 4 2 Scanning for TV Channels Digital 9 4 3 Scanning and editing channels Analog 11 4 4 Choosing your source 1...

Page 4: ...t Button 27 7 3 Schedule Recording 28 7 4 Snapshots 29 7 5 Play Mode 29 8 The Remote Control and Keyboard Shortcuts 30 8 1 Remote Control optional 30 8 2 Keyboard Shortcuts 31 9 Technical Support 32 9...

Page 5: ...a high quality TV viewing experience with true stereo sound 1 2 Features Antenna ready DVB T Silicon Tuner Universal Analog TV Silicon Tuner S Video composite video inputs PIP Picture in Picture Real...

Page 6: ...Antenna optional Note The included antenna is only suitable for areas with a strong DVB T signal If you have reception problems first try to move or reorient the antenna Otherwise you may need to use...

Page 7: ...onnector of the FlyDVB T Duo Hybrid CardBus S Video S Video input for external devices like VCRs or camcorders Audio L Connects to the left audio channel of an external audio device Audio R Connects t...

Page 8: ...V input You can use a house antenna or the included portable antenna for digital TV reception and you can use a house antenna cable TV line or another source for your analog TV input If you use a hous...

Page 9: ...lation CD and an installation menu should load automatically Note If the Autostart program does not appear automatically when you insert your LifeView Installation CD start it manually by running the...

Page 10: ...s fully seated 3 3 Driver Installation for Windows 2000 Windows XP Windows 2000 XP will automatically detect the FlyDVB T Duo Hybrid card and brings up the Found New Hardware Wizard window If you have...

Page 11: ...ows will now find the drivers on the Installation CD and install them automatically After installing the driver Windows will inform you that it has done so successfully Click Finish 3 4 Installation o...

Page 12: ...VB TV 18 Skip to end 6 Start Stop PIP mode 19 Mute on off 7 Start Stop Twin mode 20 Volume bar 8 Open Scan settings 21 Show hide channel list 9 Switch to Play mode 22 Snapshot button 10 Swap main and...

Page 13: ...You can change this setting in DVB Settings in Chapter 5 1 3 Services Information This shows information about the currently selected channel when available During a scan this will show information o...

Page 14: ...channel so it does not appear in your channel list or you can select it and click Delete to remove the channel entirely You can also import channel lists into your current list by clicking Import you...

Page 15: ...TV Standard directly by using the dropdown boxes You can change the Input Type to designate whether you use an antenna Air or cable TV Cable You can edit your channel list by using the checkboxes nex...

Page 16: ...es to Digital Terrestrial TV selected by default Turns on and off PIP Mode which lets you watch both digital TV and an analog input analog input only for Hybrid model at the same time in separate wind...

Page 17: ...t clicking on a channel will give you the option to sort the list by Name Frequency Network Provider or Transponder ID 4 6 Volume controls At the bottom of the interface is the volume bar Click on the...

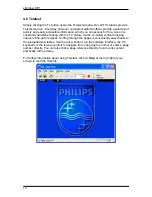
Page 18: ...icture via the so called vertical blanking interval of the picture signal Surfing through the pages is conveniently easy thanks to the preloaded text tables Use the arrow buttons on the software inter...

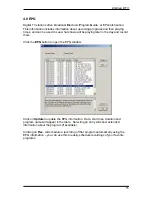
Page 19: ...r in the day and record them Click the EPG button to open the EPG window Click on Update to update the EPG information Date start time duration and program name will appear in the table Selecting an e...

Page 20: ...ck Browse go to the folder you want and click OK Capture Size Setting When checked this will split recorded files into parts at the size entered as the File split size This is useful if you want to sa...

Page 21: ...Setting 5 1 2 Schedule Recording Here you find programs scheduled to be recorded Please refer to Chapter 7 3 for a description how to use Scheduled Recording 17...

Page 22: ...ke Brightness Contrast Hue Saturation and Sharpness Clicking on Default will put the settings back to the factory default 5 2 2 Record Settings Record Settings let you adjust how you record files from...

Page 23: ...Modify an existing one Duplicate a profile and Remove one or all of the existing profiles Create Profile General Here enter a name for the profile and a comment to help identify it Select MPEG 1 or M...

Page 24: ...Rate and how many Channels to use for recorded audio 1 mono 2 stereo Record SYSTEM By selecting SYSTEM in the Record Setting window you can access the codecs already installed in your system Depending...

Page 25: ...ve long recordings in more manageable files For example setting the file split size to 650 MB would make the files easy to burn to CDs Always on top You can also choose to always have the DTV window o...

Page 26: ...V settings Select your country and TV standard to get proper reception in your area You can also select whether to receive Mono or Stereo for the currently selected channel and what Language you wish...

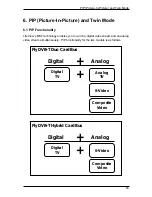
Page 27: ...MST technology enables you to watch a digital video stream and an analog video stream simultaneously PIP functionality for the two models is as follows FlyDVB T Duo CardBus Digital Digital TV Analog T...

Page 28: ...t When you click on the PIP Button you will see a second live stream at the bottom right When you are in PIP Mode you can switch between analog TV S Video and AV in sources depending on which connecti...

Page 29: ...ows will be locked and cannot be individually resized or moved Clicking on the Swap button will swap the main and second windows so digital TV will be in the second window and your analog source will...

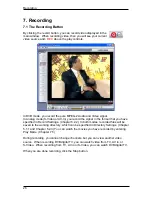
Page 30: ...at you have specified in Record Settings Chapter 5 2 2 In both modes recorded files will be saved to the working directory which can be specified in Directory Settings Chapter 5 1 1 and Chapter 5 2 3...

Page 31: ...o Clicking it again will begin playback right where you left it You will see a green bar at the bottom of the screen with a slider that shows your current position You can rewind or fast forward by us...

Page 32: ...m the right side of the screen Click One time if this is a one time only recording To make a weekly recording click on the days you want the program to record on Select the Source you want to record f...

Page 33: ...Chapter 7 5 7 5 Play Mode You can see the files you have already recorded by clicking on Play on the left side of the interface Here you can select the file you wish to view on the right and it will...

Page 34: ...nel 9 VOL VOL Decreases increases the volume 10 Enter Confirms a selection 11 PIP Enables disables the PIP Mode and to switch between the main and second window 12 Source Switch between the different...

Page 35: ...Space Recall Previous Channel M Mute on off T Switch between TV Radio reception A Switch to Second Audio Language Channel Up Channel Down Volume Up Volume Down Enter NumPad Enter Enter Confirm P Enabl...

Page 36: ...esolve any problems with your FlyDVB T Duo Hybrid CardBus and still require assistance contact us by e mail at support lifeview com tw You can also see our technical support page on our website at www...

Reviews: