58
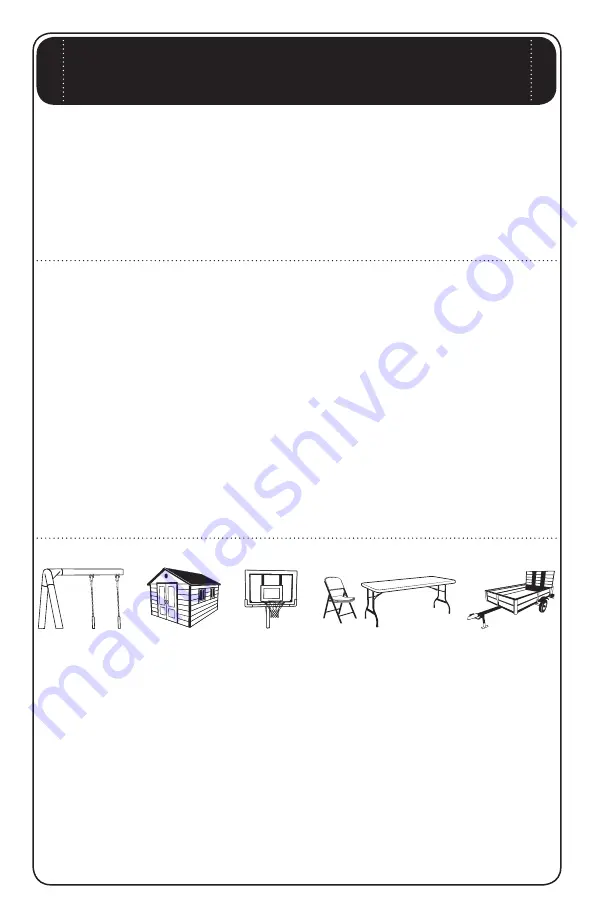
ENHANCE YOUR LIFETIME
®
PURCHASE BY ADDING
ACCESSORIES OR OTHER GREAT PRODUCTS:
Or call: 1-800-424-3865
To purchase accessories or other Lifetime Products, visit us at:
www.lifetime.com
Page 1: ...1 Keep this Product ID Number and use when contacting Customer Service OWNER S MANUAL MODEL N 90191 C O P Y ...
Page 2: ...UR NEW ONLINE PRODUCT REGISTRATION FORM IT S FAST AND EASY 2EGISTER WITH US AT WWW LIFETIME COM AND ENJOY THESE GREAT BENElTS s 2ECEIVE EXCLUSIVE MONEY SAVING OFFERS FROM UY IFETIME COM OUR ONLINE STORE AS WELL as NEW product notifications and special closeout promotions s N THE UNLIKELY EVENT OF A PRODUCT RECALL OR SAFETY MODIlCATION WE WILL NOTIFY YOU s 2EGISTERING YOUR PRODUCT GUARANTEES YOU WAR...
Page 3: ...rve damage paralysis brain injury or death Failure to comply may also result in property damage Please heed all warnings and cautions 52 4 7 4 3 7 2 3 9 2 35 4 3 2 53 529 2 02 0 249 7 6 7 22 49 s 4HREE CAPABLE ADULTS ARE RECOMMENDED FOR THIS OPERATION s F USING A LADDER DURING ASSEMBLY USE EXTREME CAUTION s EFORE DIGGING CONTACT UTILITY COMPANY TO LOCATE UNDERGROUND POWER CABLES GAS and water line...
Page 4: ...LD SET UP THE PRODUCT O NOT ALLOW CHILDREN IN THE SETUP AREA UNTIL ASSEMBLY IS COMPLETE Phillips Screwdriver 1 v 7RENCH 2 7 7OOD LOCK 1 included 1 Pliers Rubber Mallet 1 v 7RENCH 2 v 7RENCH 2 1 Electric Drill v 7RENCH 2 30 Rebar Shovel Tape Measure Cement Mix Level 1 1 1 1 x7 80 lb bags Hammer 1 ...
Page 5: ... the assembly process 4HIS AREA IS USUALLY LOCATED IN THE bottom left hand corner of a step and indicates that special attention is needed to perform a particular part of a step 4HESE AREAS ARE USUALLY LOCATED IN the bottom right hand corner of a step and indicate that damage to THE PRODUCT OR SERIOUS INJURY MAY occur if the caution or warning is not heeded 7 2 ASSEMBLY GUIDES TOOLS AND HARDWARE R...
Page 6: ... Inner Channel 1 Outer Tube 1 AJS Channel Stop 1 AKI Handle Grip 2 AMN Trigger 2 CNF OCK 4AB 1 CNG Handle Brace 1 CNJ Outer Tube Bushing 1 AJY Counterbalance Spring 2 AMW Wood Block 1 Pole Cap 1 AKP Height Sticker 1 AMT Warning Sticker Applied to Middle Pole 1 ID Item Description Qty Pole Assembly Hardware 1068524 ADS 1 4 x 3 4 Screw 2 ABZ X v 3ELF 4APPING 3CREW 2 AAF 3 8 Washer 2 ABB 3 8 Centerlo...
Page 7: ...r Plate 1 AAV 5 16 Jam Nut 2 Backboard to Pole Assembly Hardware 1046466 AAD 1 2 x 7 1 8 Hex Bolt 4 69 x 59 Black Spacer 4 AAX 1 2 Centerlock Nut 4 ABN 1 2 x 1 8 Spacer 4 Handle Assembly Hardware 1069824 AAJ v EX 4 UT 4 CNI 5 16 x1 Pan Head Screw 4 AQH Trigger Spring 2 AAN 5 16 Cap Nut 1 AAX 1 2 Centerlock Nut 1 AZP 1 4 Nylock Nut 2 ABB 3 8 Centerlock Nut 1 ADR 7 x 3 8 Phillips Screw 4 AAC 5 16 x ...
Page 8: ... x1 Bottom Pole PARTS IDENTIFIER x1 EFT ACKBOARD RACKET x1 Right Backboard Bracket 43 3 8 43 3 8 AKC x2 Short Extension Arm 7ARNING 3TICKER 30 1 16 AKB x2 ONG XTENSION RM AKQ x1 Inner Channel ALB x1 Outer Tube 8 x2 Corner Frame Guard 1 x1 Center Frame Guard 21 1 8 43 3 8 ...
Page 9: ...l Size PARTS IDENTIFIER ALD x1 Plastic Guard 3 x1 Channel Stop 9 x2 Counterbalance Spring ALM x1 Pole Cap ALL x1 Pole Bracket AKP x1 Height Sticker AKI x2 Handle Grip AMN x2 Trigger x1 Handle Brace x1 OCK 4AB x1 Outer Tube Bushing ...
Page 10: ...10 AKZ x1 Net 8 x1 Rim x1 Backboard Parts shown at 5 of Actual Size Parts shown at 10 of Actual Size PARTS IDENTIFIER ...
Page 11: ... X v 3ELF 4APPING 3CREW ABB x2 3 8 Centerlock Nut x2 3 8 Washer ABE x2 3 8 x 4 Hex Bolt ABR x2 1 2 x 3 41 Spacer AAS x2 1 4 x 2 3 4 Hex Bolt ABC x2 5 16 x 1 1 4 Carriage Bolt CIH x2 Domed Counter sink Washer AAB x2 1 4 Centerlock Nut x2 5 16 x 2 1 2 Tap Bolt AAV x2 5 16 Jam Nut ABS x2 1 2 x 2 5 16 Galvanized Spacer ACS x2 38 x 1 Steel Spacer ...
Page 12: ...ate AAD x4 1 2 x 7 1 8 Hex Bolt x2 v EX 4 UT ABD x2 5 16 Washer x2 7 16 Rubber Washer ABK x6 5 16 Nylock Flange Nut 8 x4 1 2 Centerlock Nut ABL x4 69 x 59 Black Spacer ABN x4 1 2 x 1 8 Spacer 2 4 0 33 9 2 7 2 Hardware shown at Actual Size 7 1 8 Not actual length 33 9 2 7 2 Hardware shown at Actual Size 7 Not actual length ABO x2 1 2 x 1 Poly Spacer AAZ x1 3 8 x 7 Hex Bolt ...
Page 13: ...Y EIGHT OF THE 3CREWS WILL BE USED ADR x4 7 x 3 8 Phillips Screw AQH x2 Trigger Spring CNI x4 5 16 x 1 Pan Head Screw AAC x1 5 16 x 1 3 4 Hex Bolt AAN x1 5 16 Cap Nut 8 x1 1 2 Centerlock Nut ABB x1 3 8 Centerlock Nut AAD x1 1 2 x 7 1 8 Hex Bolt 7 1 8 Not actual length AZP x2 1 4 Nylock Nut CNE x1 4WO EAD 3NAP UTTON CNH x2 v X v 5 3CREW x4 v EX 4 UT ...
Page 14: ...5 02 0 2 4 HARDWARE REQUIRED SEC 1 PARTS REQUIRED TOOLS REQUIRED Part shown at 10 of Actual Size ALE x1 Bottom Pole 1 2 x 36 Rebar Shovel Tape Measure Cement Mix x7 80 lb Bags Level 2 7 2 2 15 2 2 4 3 3 4 ...
Page 15: ... hole should be flush with the edge of the playing surface SEC 1 1 Note A Ground Sleeve is available as an alternative to cementing the Pole into the ground Please contact Customer Service or visit Lifetime com online for more information 2 7 2 2 15 2 2 4 3 0 Mix 6 1 2 bags of concrete Save 1 2 bag of concrete mix to use later in the assembly Pour the mixed concrete into the hole until it is filled ...
Page 16: ...rk 14 5 inches from the dimpled end of the Bottom Pole ALE do not scratch the powder coating SEC 1 2 Slide the dimpled end of the Bottom Pole ALE into the cement up to THE INCH MARK 0OSITION THE POLE NEXT TO THE PLAYING SURFACE SEC 1 3 4 3 2 2 7 2 2 15 2 2 4 3 0 ...
Page 17: ...etc through the slots in the Bottom Pole Rotate the pole until the straight object is parallel to the playing surface SEC Note Use a Level to make sure the Bottom Pole is standing vertical Form the cement into a downward slope away from the pole to allow water runoff Failure to do so may result in premature rusting of the Pole 0LAYING 3URFACE 4 3 2 2 7 2 2 15 2 2 4 3 0 ...
Page 18: ...e ALE so it is about 15 from the top of the pole Check the pole several times within the first hour to make sure that all sides are vertical and THAT THE INCH MARK REMAINS LEVEL WITH THE SURFACE SEC 1 5 Note Allow 1 4 hours for the concrete to set before continuing 1 2 x 36 Rebar 2 7 2 2 15 2 2 4 3 0 Rebar ...
Page 19: ...ir pockets Clean all concrete off the outside of the pole Allow the concrete to set for at least 72 hours before installing the rest OF THE SYSTEM ONTO THE OTTOM 0OLE SEC 1 6 Cement Level Inside Pole Rebar Note STOP HERE The concrete must cure for at least 72 hours 3 days before installing the rest of the system In humid climates or wet weather allow additional time for the concrete to cure Do not...
Page 20: ...4APPING 3CREW ABB x2 3 8 Centerlock Nut x2 3 8 Washer ABE x2 3 8 x 4 Hex Bolt ABR x2 1 2 x 3 41 Spacer CIH x2 Domed Countersink Washer OTE NLY ONE X v 3ELF 4APPING 3CREW ONE OMED OUNTER SINK 7ASHER AND ONE v X v 0AN EAD 3CREW 3 WILL BE USED FOR THIS SECTION 3AVE THE REMAINING HARDWARE FOR LATER IN THE ASSEMBLY ...
Page 21: ...OLS REQUIRED Parts shown at 10 of Actual Size Phillips Screwdriver 7OOD LOCK ALH x1 Top Pole x1 Middle Pole 43 3 8 7ARNING 3TICKER ALL x1 Pole Bracket Part shown at 25 of Actual Size v 7RENCH x2 Electric Drill POLE ASSEMBLY SEC 2 ...
Page 22: ...D FOR THIS PAGE Insert the v X v EX OLTS with the v 7ASHERS into the IDDLE 0OLE as shown Then slide the v X v 3PACERS 2 onto the Hex Bolts SEC 2 1 ABE ABR 7ARNING 3TICKER Large Holes Small Holes x2 ABE x2 ABR x2 4 3 2 15 2 2 4 3 0 ...
Page 23: ...23 TOOLS AND HARDWARE REQUIRED FOR THIS PAGE Place the 0OLE RACKET onto the v X v EX OLTS and attach it to the IDDLE 0OLE with the hardware shown SEC 2 2 ABB ALL ABE 9 16 x2 ABB x2 ...
Page 24: ...nsert a v X v 3CREW 3 through a Domed Countersink Washer CIH into the small hole in the Top Pole and into the slot in the Middle Pole as shown The Screw head should fit into the Countersink Washer SEC 2 3 ALH Note The 1 4 x 3 4 Screw should be flush with the Pole but will spin freely once installed Do not jam the Poles together until instructed ALH ADS CIH CIH x1 ...
Page 25: ...property damage Note Do not hit your feet with the Pole sections as serious injury could occur 7OOD LOCK If the Top Pole ALH does not completely cover the slots on the Middle Pole after seating DO NOT COMPLETE ASSEMBLY Call our Customer Service Department In order to seat the Poles strike each end of the Pole very hard five to six times on a piece of scrap wood or cardboard This must be done even i...
Page 26: ...fter the Poles have been seated insert a X v3ELF 4APPING 3CREW ABZ into the back of the Pole as shown SEC 2 5 Note Chuck the 14 x 1 Self Tapping Screw ABZ directly into an Electric Drill for easy installation or use a 3 8 Hex Driver ALH ABZ ABZ x1 ...
Page 27: ...BC x2 5 16 x 1 1 4 Carriage Bolt ACS x2 38 x 1 Steel Spacer AAB x2 1 4 Centerlock Nut x2 v EX 4 UT ABD x2 5 16 Washer x2 7 16 Rubber Washer x2 5 16 x 2 1 2 Tap Bolt Hardware shown at 25 of Actual Size ABK x6 5 16 Nylock Flange Nut 7 x2 Compression Spring AOU x1 v 5 OLT 7 x1 Spring Retainer Plate AAV x2 5 16 Jam Nut HARDWARE REQUIRED ...
Page 28: ... REQUIRED x1 Backboard 8 x1 Rim x1 EFT ACKBOARD RACKET x1 Right Backboard Bracket Parts shown at 10 of Actual Size Part shown at 5 of Actual Size Pliers v 7RENCH v 7RENCH x2 TOOLS REQUIRED ALD x1 Plastic Guard Part shown at 25 of Actual Size ...
Page 29: ...MUST REST IN THE NOTCHES OF THE ACKBOARD RACKETS as shown Connect the Backboard Brackets together using two v X v Hex Bolts AAS two v X v ALVANIZED 3PACERS 3 and two v ENTERLOCK UTS SEC 3 1 SEC 3 2 Not to scale AOU x1 AAS x2 ABS x2 AAB x2 7 16 x2 AAB ABS AAB AAS AAS Note Tighten the hardware securely now AOU Notch AOU ...
Page 30: ...HERS through the bottom holes in the back of the Rim 8 as shown and secure the hardware with two v EX 4 UTS SEC 3 3 Note Do not overtighten the hardware so that the 7 16 Rubber Washers bulge outward as shown Note Make sure that the 5 16 x 2 1 2 Tap Bolts are positioned on the outside edge of the holes as shown Correct Incorrect 8 x2 ...
Page 31: ...onnect the 2IM 8 and 0LASTIC UARD to the ACKBOARD with the hardware shown Thread the v AM UTS 6 all the way down on the v 5 OLT 5 On the underside of the Backboard place 38 x 1 Steel Spacers ACS onto the v X v 4AP OLTS and secure the 5 16 YLOCK LANGE UTS onto the Tap Bolts SEC 3 5 1 2 ACS x2 ABK x2 AAV x2 AOU ABK Underside View ABK ACS ALD AAV AAV 8 ...
Page 32: ...d place the 3PRING 2ETAINER 0LATE 7 over the Compression Springs Tighten the v YLOCK LANGE UTS until the 2IM 8 does not wobble to complete this step SEC 3 6 Note DO NOT COMPLETELY TIGHTEN THE 5 16 NYLOCK FLANGE NUTS IN THIS STEP Only tighten the Nuts until the Rim ALX does not wobble Tightening the Nuts will adjust the Rim tension ABK 7 7 AOU 8 ...
Page 33: ...annel as shown SEC 3 7 Bend the Backboard Brackets outward by hand and gently lift them over the v X v ARRIAGE OLTS Then securely fasten the Backboard Brackets to the Backboard Channels with the hardware shown SEC 3 8 Note Tighten the 5 16 Nylock Flange Nuts ABK until they are flush with the ends of the Bolts ABC ABC ABK ABK ABC ABC ...
Page 34: ...arts shown at 10 of Actual Size Hardware shown at Actual Size 8 x4 1 2 Centerlock Nut ABL x4 69 x 59 Black Spacer Rubber Mallet v 7RENCH x2 AAD x4 1 2 x 7 1 16 Hex Bolt Not actual length ABN x4 1 2 x 1 8 Spacer AKC x2 Short Extension Arm 30 1 16 AKB x2 ONG XTENSION RM 21 1 8 7 1 16 ...
Page 35: ...BL x2 Secure the Short Extension Arms AKC to the Backboard Brackets in the location shown with the hardware indicated SEC Note Tighten the 1 2 Centerlock Nut AAX until it is flush with the end of the Bolt AAD x1 Not actual length 8 ABL AAD AKC ABL AKC 7 1 16 ...
Page 36: ...Extension Arms AKB that only have one hole to the Backboard Brackets in the location shown with the hardware indicated SEC v x2 8 x1 ABL x2 AAD x1 Not actual length 8 ABL AAD AKB ABL AKB Note Tighten the 1 2 Centerlock Nut AAX until it is flush with the end of the Bolt 7 1 16 ...
Page 37: ...Not actual length ABN x4 AY THE ACKBOARD AND 2IM ASSEMBLY NEXT TO THE 0OLE ASSEMBLY 2EST THE Rim on cardboard to prevent scratching Then secure the Short and Long Extension Arms AKC AKB to the Top Pole ALH with the hardware shown CAUTION HAVE ONE ADULT HOLD THE BACKBOARD IN PLACE UNTIL ASSEMBLY HAS BEEN COMPLETED 8 ABN AAD AKC 8 AKC AKB AKB ABN ABN ABN AAD ALH ...
Page 38: ...x1 5 16 x 1 3 4 Hex Bolt AAN x1 5 16 Cap Nut 7 Not actual length 8 x1 1 2 Centerlock Nut ABO x2 1 2 x 1 Poly Spacer ABB x1 3 8 Centerlock Nut AAD x1 1 2 x 7 1 16 Hex Bolt 7 1 16 Not actual length AAZ x1 3 8 x 7 Hex Bolt Hardware shown at Actual Size AZP x2 1 4 Nylock Nut CNE x1 4WO EAD 3NAP UTTON CNH x2 v X v 5 3CREW x4 v EX 4 UT ...
Page 39: ...annel ALB x1 Outer Tube Parts shown at 25 of Actual Size AKI x2 Handle Grip 3 x1 Channel Stop 9 x2 Counterbalance Spring AMN x2 Trigger TOOLS REQUIRED Phillips Screwdriver v v v 7RENCH x 2 Each v 7RENCH x1 AKP x1 Height Sticker x1 Handle Brace x1 OCK 4AB x1 Outer Tube Bushing Rubber Mallet ...
Page 40: ...ith the hardware shown and slide the Trigger Spring AQH onto the Triggers in the locations shown SEC 5 1 AMN AQH ADR ADR x4 Position the Trigger Assembly onto the ANDLE RACE as shown Place the ANDLE RIPS on the Handle Brace over the Triggers SEC 5 2 AKI AQH x2 AQH AMN ADR ADR ADR AKI ...
Page 41: ...C 5 3 Attach the Handle Assembly to the Outer Tube ALB with the hardware shown Fit the OCK 4AB into the notch on the Outer Tube SEC CNH AZP ALB Notch CNI x4 x4 CNH x2 CNH AZP x2 AZP CNI CNI CNI CNI CNH CNH Note Make sure that the Inner Channel AKQ has been removed from the Outer Tube before performing this step 7 16 ...
Page 42: ...f the Inner Channel AKQ Orient the EIGHT 3TICKER 0 as shown and place it within THE GROOVES OF THE NNER HANNEL INE UP THE BOTTOM END OF THE STICKER with the edge of the Inner Channel SEC 5 6 7 5 10 AKQ AKP Note Wipe off any grease that may be on the Inner Channel before attaching the Height Sticker CNE CNE AKQ Button snaps into hole ALB 4 3 2 15 2 2 4 3 0 CNE x1 ...
Page 43: ...of the Inner Channel AKQ into the Outer Tube ALB as shown Slide the Inner Channel into the Outer Tube until the 10 mark has been reached Then release the Trigger so it clicks into place ALB AKQ ALB 10 SEC 5 8 Insert the HANNEL 3TOP 3 into the top of the Outer Tube ALB as shown 4 3 2 2 7 2 2 15 2 2 4 3 0 ALB 3 AMN ...
Page 44: ...the 0OLE RACKET with the hardware shown SEC 5 9 AKQ ALL AAC x1 AAN x1 AAN AAC 1 2 x2 7 2 Do not overtighten the Cap Nut If the end of the Bolt breaks through the plastic cap call our Customer Service Department Exposed threads on the end of the Bolt may cause serious injuries ...
Page 45: ...Tighten the 1 2 Centerlock Nut AAX until it is flush with the end of the Bolt 8 x1 ABO x2 AAD x1 v x2 SEC 5 10 Secure the Outer Tube ALB to the Long Extension Arms AKB with the hardware shown If needed use a Rubber Mallet to tap the hardware into place 7 1 16 Not actual length ...
Page 46: ...16 x2 Note Tighten the 3 8 Centerlock Nut until it is flush with the end of the Bolt AAZ ABB AKC AKC Insert the 3 8 x 7 Hex Bolt AAZ through the holes in the Short Extension Arms AKC that are closest to the Pole Secure the 3 8 x 7 Hex Bolt to the Short Extension Arms with the v ENTERLOCK UT ...
Page 47: ... 5 13 Using the closed end of a Wrench stretch the 3PRINGS 9 up and over the 3 8 x 7 Hex Bolt AAZ one at a time as shown Note Make sure all hardware has been securely tightened before moving to the next section 7RENCH 2 7 2 2 15 2 2 4 3 0 Note Repeat this step to hook the end of the other Spring into the 3 hole in the Right Backboard Bracket AJK 9 3 9 AAZ ...
Page 48: ...uard Hardware shown at Actual Size ADP x10 X v 3ELF RILLING 3CREW Electric Drill NLY EIGHT OF THE 0 3CREWS WILL BE USED ABZ x1 X v 3ELF RILLING 3CREW BOVE ARDWARE TAKEN FROM THE 3ECTION HARDWARE BAG Hammer CIH x1 Domed Countersink Washer 7OOD LOCK ADS x1 1 4 x 3 4 Pan Head Screw Phillips Screwdriver Parts shown at 25 of Actual Size ALM x1 Pole Cap ...
Page 49: ... RAME 0AD 1 to the Backboard in the location shown with the hardware indicated Make sure that the Center Frame Pad is centered on the metal piece of the Backboard as shown SEC 6 2 Attach the ORNER RAME 0ADS 8 to the ACKBOARD in the locations shown with the hardware indicated ADP 8 ADP 8 8 1 ADP ADP ADP ADP ADP x8 ...
Page 50: ...le in the IDDLE 0OLE with the correct slot in the Bottom Pole ALE Slide the Middle Pole over the Bottom Pole Insert the remaining 1 4 x 3 4 Screw PA through the small hole in the Middle Pole and into the Bottom Pole ALE ALE ADS CIH Note There are two screw holes at the bottom of the pole The correct hole will be slightly higher up on the pole The Screw will spin freely once installed ADS x1 CIH x1...
Page 51: ... DO NOT COMPLETE ASSEMBLY Call our Customer Service Department WARNING The Poles must be seated together Even if the Poles cover the slots before seating they must be struck on a hard surface five to six times Failure to seat the Poles correctly could allow the Poles to separate during use which could lead to serious personal injuries or property damage ATTENTION THIS STEP CANNOT BE REVERSED Note I...
Page 52: ...ave been seated insert a X v3ELF 4APPING Screw ABZ into the back of the Pole as shown Note Chuck the 14 x 1 Self Tapping Screw directly into an Electric Drill for easy installation or use a 3 8 Hex Driver ABZ ALM ALH Insert the Pole Cap ALM into the Top Pole ALH as shown SEC 6 6 ...
Page 53: ... FOR THIS PAGE 8 AKZ Attach Net AKZ to the 2IM 8 Note If a replacement Net is needed please call our Customer Service Department Our Nets are shorter than average to reduce the risk of entanglement SEC 6 7 4 3 2 2 7 2 2 15 2 2 4 3 0 ...
Page 54: ...wing preventive measures a Check all Nuts and Bolts If any are loose tighten them b Check all parts for excessive wear and tear If necessary replace any parts that have been worn or damaged through usage Check the Pole Cap for cracks or tears that could let water in the Pole Contact our Customer Service Department for replacement parts c Inspect the Warning Sticker on the Pole If it is ripped fade...
Page 55: ...55 NOTES ...
Page 56: ...56 NOTES ...
Page 57: ...57 NOTES ...
Page 58: ...58 ENHANCE YOUR LIFETIME PURCHASE BY ADDING ACCESSORIES OR OTHER GREAT PRODUCTS Or call 1 800 424 3865 To purchase accessories or other Lifetime Products visit us at www lifetime com ...
Page 59: ...u ni au filet Le joueur risque de graves blessures si ses dents ou son visage entrent en contact avec le panneau l anneau ou le filet Les joueurs doivent toujours porter un protège dents lorsqu ils jouent Ne glissez pas ne grimpez pas et ne jouez pas sur la base ou le poteau Lorsque vous ajustez la hauteur ou l équipement gardez vos mains et doigts loin des pièces mobiles N autorisez pas les enfan...
Page 60: ... result from normal usage In addition defects resulting from intentional damage negligence unreasonable use or hanging from the net or rim will void this warranty IABILITY FOR INCIDENTAL OR CONSEQUENTIAL DAMAGES IS EXCLUDED TO THE EXTENT PERMITTED BY LAW 7HILE every attempt is made to embody the highest degree of safety in all equipment freedom from injury cannot be guaranteed The user assumes all...