background image


NOTE: This manual may be subject to updates or changes. Up to date manuals are available through our website at www.lifespanonline.com.au 


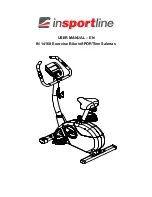
Product may vary slightly from the item pictured due to model upgrades


Read all instructions carefully before using this product. Retain this owner’s manual for 
future reference. 

EXER 55 OWNER’S MANUAL 

Summary of Contents for exer 55

Page 1: ...uals are available through our website at www lifespanonline com au Product may vary slightly from the item pictured due to model upgrades Read all instructions carefully before using this product Ret...

Page 2: ...2 EXER 55 TABLE OF CONTENTS 1 IMPORTANT SAFETY INSTRUCTIONS 3 2 ASSEMBLY INSTRUCTIONS 4 3 EXERCISE GUIDE 13 4 EXPLODED DIAGRAM 15 5 WARRANTY 16...

Page 3: ...enings The pulse sensors are not medical devices Various factors including the user s movement may affect the accuracy of heart rate readings The pulse sensors are intended only as exercise aids in de...

Page 4: ...4 EXER 55 2 ASSEMBLY INSTRUCTIONS...

Page 5: ...MPUTER 1 G SCREW M5 15 2 19 HANDLE PULSE WIRE 1 H KNOB 1 20 SCREW 1 I BOLT M8 94 1 21 HANDLE 1 1 MAIN FRAME 1 22 END CAP 2 2 FRONT BOTTOM TUBE 1 23 SPONGE TUBE 2 3 END CAP WITH WHEEL 2 24 PULSE COMPUT...

Page 6: ...6 EXER 55 STEP 1 Attach the Front Rear Stabilizer 2 4 onto the Main Frame 1 with Bolt A Arc Washer C and Cap Nut B then tighten...

Page 7: ...P 2 1 Attach the Saddle 9 to Saddle Post 8 with Nylon Lock Nut 28 and Washer 29 and tighten 2 Insert the Saddle Post 8 through the Extent Cover 7 3 Attach the Saddle Post 8 to Main Frame 1 with Knob F...

Page 8: ...ire Connector 11 and Trunk Line 13 Tension Cable 10 and Tension Wire 14 2 Insert the Handlebar Post into the Main Frame 1 with Handlebar Post 15 3 Attach the Handlebar Post 15 into the Main Frame 1 wi...

Page 9: ...9 EXER 55 STEP 4 1 Connect the Trunk Line 13 and Computer Wire 27 2 Place the Computer 18 onto the Handlebar Post 15 3 Attach the Computer 18 to Handlebar Post 15...

Page 10: ...10 EXER 55 STEP 5 1 Attach the Handle 21 to the Handlebar Post 15 with Bolt I Arc Washer E and Knob H and tighten 2 Connect the Handle Pulse Wire s circinal pin and Computer hole...

Page 11: ...11 EXER 55 STEP 6 1 Tighten the Pedals R L 25 to Main Frame 1 Ensure that the pedals are in the correct position and properly tightened to prevent injury...

Page 12: ...gnetic resistance Seat Height Adjustment 1 Turn the knob approximately three circles anti clockwise 2 Pull the knob out with one hand and move the seat post to the desired place with the other 3 Let g...

Page 13: ...cess is to make exercise a regular and enjoyable part of your everyday life The condition of your heart and lungs and how efficient they are in delivering oxygen via your blood to your muscles is an i...

Page 14: ...5 to 10 minutes of stretching to cool down This will increase the flexibility of your muscles and will help prevent post exercise problems Workout Guidelines TARGET ZONE THIS IS HOW YOUR PULSE SHOULD...

Page 15: ...15 EXER 55 4 EXPLODED DIAGRAM...

Page 16: ...nt or refund for a major failure and compensation for any other reasonably foreseeable loss or damage You are entitled to have the goods repaired or replaced if the goods fail to be of acceptable qual...

Reviews: