


H
SI
L
G
N
E
3
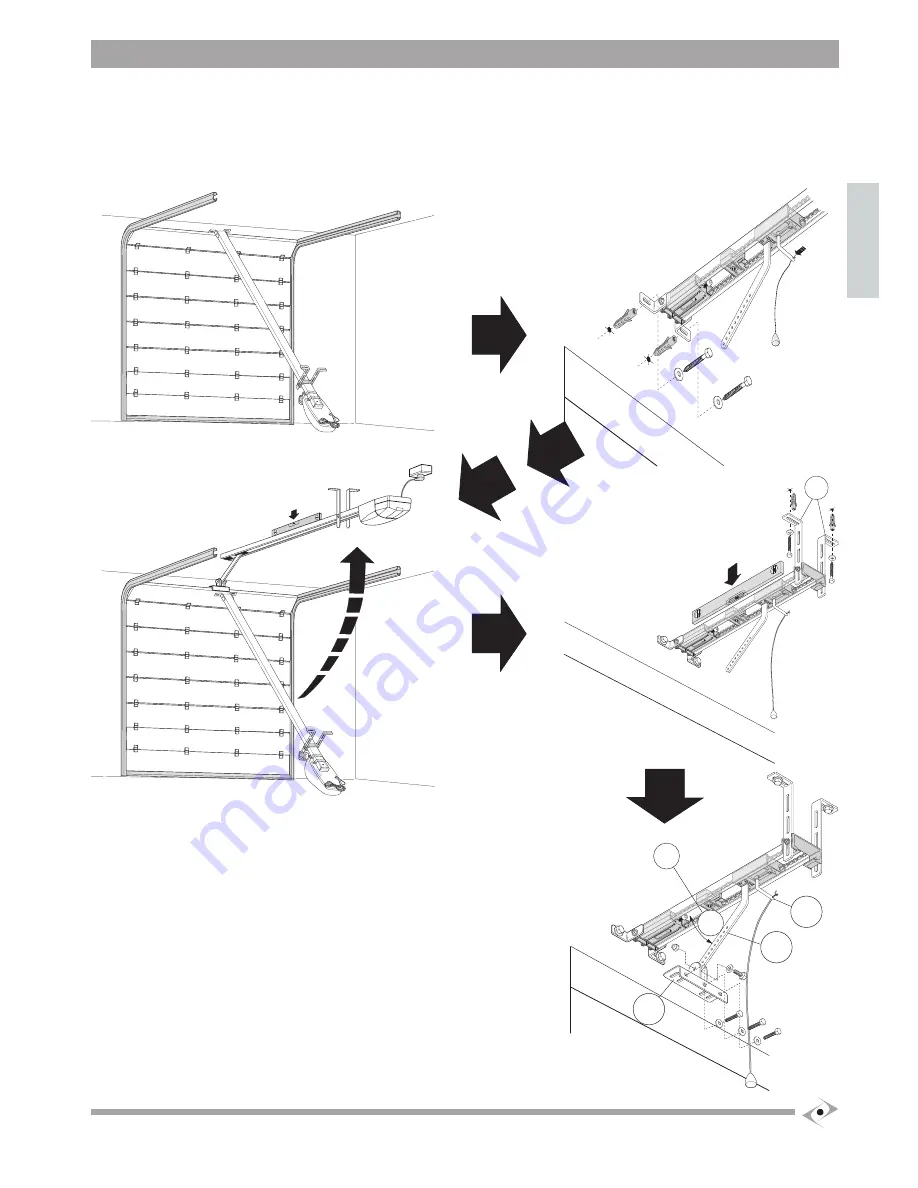
e) Lift the front part of the runner leaving the operator resting on the floor and firmly fix the front brackets onto the screw anchors arranged previously
using suitable screws and washers.
f) Completely lift the runner with the operator and position it ensuring that it is parallel to the ceiling.
g) Adjust the position of the rear brackets
(8)
so that they rest well on the ceiling, then mark the centres for the fixing holes.
h) Drill the holes, insert the screw anchors and firmly fasten the two rear brackets
(8)
to the ceiling using suitable screws and washers.
i) Ensure that the runner is perfectly aligned and level; if necessary adjust the position in relation to the rear brackets.
j) Lock all the front and rear bracket clamping screws.
k) Release the drive trolley
(9)
by pulling the cord and take it forward to allow the installation
of the drive bracket
(10)
on the sectional door.
l) Position the drive bracket
(10)
on the upper edge of the sectional door and fasten using
suitable screws or rivets.
m) C
onnect the drive bracket
(10)
to the thrust arm
(11)
using the screws and self-locking
nut provided.
ATTENTION: in order for the mechanism to work properly the angle between the runner (12)
and the thrust arm (10) must not be greater than 30°.
n) Release the operator and manually perform a number of opening and closure manoeuvres
in order to verify that it is correctly balanced: the manoeuvres must be performed with ease
and the door must move without catching or swinging.
Up and over door:
The APRB curved oscillating arm is required, refer to the instruction manual provided.
8
10
0
11


