background image


--SAVE THESE INSTRUCTIONS--   

6


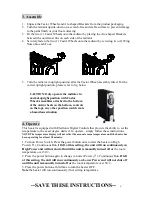
3. Assemble 

 
1.


Unpack the Castor Wheels and Arc-shaped Brackets from the product packaging. 

2.


Turn the radiator upside-down on a scratch-free and stable surface to prevent damage 
to the paint finish or your floor surfacing. 

3.


Fit the two (2) Castor Wheels onto the radiator by placing the Arc-shaped Brackets 
between the outermost fins on each side of the radiator. 

4.


Securely fasten the two (2) Castor Wheels onto the radiator by screwing two (2) Wing 
Nuts onto each Foot. 


5.


Turn the radiator in upright position after the Castor Wheel Assembly fitted. For the 
correct upright position, please refer to fig. below 


4. Operate 

This heater is equipped with Electronic


Digital Controls that provide the ability to set the 

temperature to the exact degree desired .To operate , simply follow these instructions.


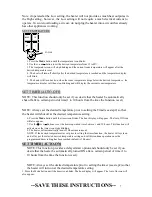
NOTE:The temperature display will not reflect the accurate room temperature until the heater has 
been operating for at least 20 minutes.  

1. Turn on Power Switch, Press the power button once to start the heater on High 
Power(


), Continuous Run. 

If left at this setting , the unit will run continuously on 

High Power and will not shut off until the unit is manually turned off or

 the room 

temperature over 30

.


2. Press the power button again to change to Lower Power (  ), Continuous Run. 

If left 

at this setting, the unit will run continuously on Lower Power and will not shut off 
until the unit is manually turned off or

 the room temperature over 30

3. Press the power button a third time to turn the heater OFF. 

Note

:the heater


will run continuously if not setting temperature. 


CAUTION: Only operate the radiator in 
normal upright position with Castor 
Wheel Assemblies attached to the bottom 
of the unit (wheels on the bottom, controls 
on the top), any other position could create 
a hazardous situation


Summary of Contents for YAA02E-11

Page 1: ...ructions Model YAA02E 5 YAA02E 7 YAA02E 9 YAA02E 11 YAA02E 13 YL A02LCD WARNING TO REDUCE THE RISK OF FIRE ELECTRIC SHOCK OR PERSONAL INJURY READ ALL THE INSTRUCTIONS BEFORE USING THIS HEATER AND FOLLOW THESE INSTRUCTIONS BE SURE TO SAVE THIS MANUAL FOR FUTURE REFERENCE ...

Page 2: ...ts Identification 5 Mode and Technical data 5 Safety Control 5 3 Assemble 6 4 Operate 6 Set temperature Set timer auto off Set timer auto on Timer function examples Fahrenheit Celsius function 5 Care and Cleaning 7 Conformity with Directives 7 Environmental Protection 7 ...

Page 3: ... steady stable heat resistant surface 9 Do not place the product on or near surfaces that may be damaged by heat i e delicate rugs wall paper floor coverings not made of heat resistant material etc 10 Do not place this product near flammable materials surfaces or substances i e curtains draperies walls gasoline paint flammable liquids etc as there may be a risk of fire 11 Do not insert or place fl...

Page 4: ...tripped over or pulled 31 Do not put any stress on the Power Cord where it connects to the product as the Power Cord could fray and break 32 Do not plug or unplug the product from the electrical outlet with a wet hand 33 Keep the Power Cord and product away from heated surfaces 34 When scrapping the heater follow the regulations concerning the disposal of oil 35 The heater should not be used in a ...

Page 5: ... to operate the heater has a further safety device This is a non resettable switch which will require the unit be returned to an Approved Service Agent for replacement If overheating or malfunctions continue return the heater to an Approved Service Agent for examination SPECIFICATIONS Model No Rated Voltage Frequency Wattage YAA02E 5 220 240V 50 Hz 1000W I II 600W II 400W I YAA02E 7 220 240V 50 Hz...

Page 6: ... these instructions NOTE The temperature display will not reflect the accurate room temperature until the heater has been operating for at least 20 minutes 1 Turn on Power Switch Press the power button once to start the heater on High Power Continuous Run If left at this setting the unit will run continuously on High Power and will not shut off until the unit is manually turned off or the room tem...

Page 7: ...urs from the time the function is set NOTE Always set the desired temperature prior to setting the Timer see step2 so that the heater will shut off at the desired temperature setting 6 Press the Mode button until the timer icon blinks The hour display will appear The Auto Off icon will also appear 7 Use the and buttons to set the heater operation time between 1 and 10 hours This function will acti...

Page 8: ...ut off after 7hours has elapsed FAHRENHEIT CELSIUS FUNCTION NOTE This heater offers the option to read the temperature setting in either Fahrenheit or Celsius 1 F C feature functions from only the power or set temperature screens 2 Press F C button to toggle between Fahrenheit and Celsius 5 Care and Cleaning CAUTION Allow the product to completely cool before handling or cleaning it Ensure the pro...

Page 9: ...tes that this product should not be disposed with other household wastes throughout the EU To prevent possible harm to the environment or human health from uncontrolled waste disposal recycle it responsibly to promote the sustainable reuse of material resources To return your used device please use the return and collection systems or contact the retailer where the product was purchased They can t...

Page 10: ... SAVE THESE INSTRUCTIONS 10 ...

Reviews: