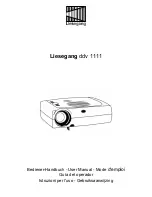
Liesegang ddv 1111
Bediener-Handbuch - User Manual - Mode
d'emploi
Guía del operador
Istruzioni per l'uso - Gebruiksaanwijzing
Page 1: ...Liesegang ddv 1111 Bediener Handbuch User Manual Mode d emploi Guía del operador Istruzioni per l uso Gebruiksaanwijzing ...
Page 2: ...3 3 Projector Power Down 13 4 Using System Menu 4 1 Main Menu 14 4 2 Sub Menus 14 4 3 Menu Adjustments Settings 15 5 Infrared Remote Control 5 1 How to use the Infrared Remote Control 19 5 2 Meaning of Icons 21 5 3 Battery Replacement 22 6 Replacing the Air Filter 23 7 Replacing Projection Lamp 24 7 1 Lamp Life Indicator 25 8 Cleaning the Projector 25 9 Troubleshooting Problems and Solutions 26 10...
Page 3: ...able place such as a weak base an inclined floor etc This may cause the projector to drop or fall over resulting in injury Do not remodel this unit Do not remodel this unit It may cause a fire an electric shock etc Never use the projector in a humid environment Never use the projector in a humid environment e g bathroom or close to cookers or humidifiers This could cause a fire an electric shock e...
Page 4: ...to repair the unit Do not repair it yourself as it is very dangerous Do not use this unit as it is after trouble has occurred Immediately turn off the power switch and pull out the power plug then contact your dealer to have it repaired If water etc enters the unit turn it off pull out the power plug and contact your dealer to have it repaired Be careful with the power cord Do not scratch damage o...
Page 5: ...lamp is used it could damage your vision etc Do not put a container etc with liquid on this unit Do not put a vase flower pot cosmetic container medicine or water on this unit If liquid spills and enters the unit it may cause fire electric shock etc Never leave the projector switched on unsupervised Never leave the projector switched on unsupervised or let children play with it as unusual conditio...
Page 6: ...d do any other device with glass components Avoid impact or dropping Before cleaning the device disconnect the mains plug The worktop is covered with a scratch resistant glass plate If necessary the glass can be cleaned with a soft cloth and a conventional glass cleaner The casing can be cleaned with a soft slightly moistened cloth and mild detergent Avoid the ingress of moisture into the inside o...
Page 7: ...ters set the caster stoppers If the table moves it may fall over causing an injury If you do not use the unit for a long time If you do not use the unit for an extended period of time be sure to pull out the power plug from the power outlet Replacing the lamp Switch off the projector and disconnect the mains plug before replacing the lamp Let the device cool down as the lamp and other components i...
Page 8: ...ce a year Ask your dealer to clean the unit inside once a year If the unit is left with too much dust inside it may cause fire Use of batteries Do not use batteries not specified for this unit Do not use new batteries mixed with old ones This may cause a fire injury due to burst of battery liquid leakage When inserting batteries in this unit pay attention to the direction of the and polarities and...
Page 9: ...and USB mouse adapter separate USB mouse adapter connecting cables for workstations Important note The projector features its own electronic multi range power supply with automatic switching It must only be operated with 100 V 240 V AC with a frequency of 50 Hz to 60 Hz The unit must only be connected to a properly installed network with protective conductor Please check immediately whether the su...
Page 10: ...e audio and computer video input cables to the projector input terminals 4 For mouse emulation connect the mouse and in case of PS 2 and USB the appropriate adapter Apple Macintosh computers require an additional adapter or connecting cable 5 Power up the projector then the computer and the video sources 6 Move the projector nearer or further away from the screen to obtain the best image size or a...
Page 11: ...projector control 7 USB USB mouse emulation output 8 Interface for Kensington Security Lock 2 3 Control Panel Keypad The control panel keypad is located on the top of the projector It has the following buttons Standby Switch between standby mode and projection mode Menu Display remove menus Joystick Move cursor up down left right Increase decrease menu value Increase decrease volume outside menu m...
Page 12: ...ADB port on the computer The Mac ADB adapter is an accessory item that must be ordered separately USB Mouse Connect 4 pin USB mouse cable to the computer USB hub port On first time startup of the computer will ask for device driver installation and configuration The USB mouse cable is an accessory item that must be ordered separately 4 First power on the projector then power on the computer Note F...
Page 13: ... exhaust and intake air vents clear of obstructions to allow proper cooling Note Allow a projector that has been stored in a cold place to warm up to room temperature before applying power 1 Press the Main Power switch 1 to ON The button 2 will illuminate red to indicate there is power ON O OFF 2 Press the standby button to illuminate the lamp The red LED indicator will turn green as an image appe...
Page 14: ...rojector cools down and then the fan will turn off 3 Press again the Standby button to illuminate the lamp and project an image on the screen 3 3 Projector Power Down 1 Press the Standby button to place the projector in standby mode The Standby button is illuminated red 2 Wait until the cooling fan motor cycles off 3 Press the Main Power switch to OFF 4 Turn off the power to your input devices 5 T...
Page 15: ... e g VESA 1024x768 60 Hz Press the Disc Pad Joystick up or down to highlight select the menu line Then press the Disc Pad Joystick to the right or the Select button to display a drop down window of all the possible values Use the Disc Pad Joystick to select a value and press Select to initiate the selection Change a slider bar value Press the Disc Pad Joystick up or down to highlight select the va...
Page 16: ...nced Setup Display advanced setup submenu Info Display information window press Select In active PC RGB mode Picture PC RGB Submenu Items Description Action Default setting Brightness Adjust the brightness Contrast Adjust the contrast Optimize Set best brightness for image Hor Position Adjust horizontal position of image Ver Position Adjust vertical position of image Tracking Adjust number of pixe...
Page 17: ... Adjust the brightness Contrast Adjust contrast Colour Adjust colour saturation Tint Adjust hue for NTSC Tools Submenu Items Description Action Default Setting Volume Adjust volume Audio Audio mute on Freeze Freeze frame off Magnify Magnify mode off Factor Adjust magnification factor Speaker Speaker on Timer drop down window Select timer mode off small large off Minutes Adjust time countdown 1 to ...
Page 18: ...s to default Help drop down window Select Help window mode immediate 1 3 or 5 seconds off 3 seconds In active PC RGB mode Advanced Setup Submenu Items Description Action Default Setting Projection drop down window Select projection orientation standard rear standard Colour Manager Display Colour Manager submenu Remote control Remote control receiver on off on Sync mode drop down window Select Sync...
Page 19: ...ightness red Adjust brightness for red portion Contrast red Adjust contrast for red portion Brightness green Adjust brightness for green portion Contrast green Adjust contrast for green portion Brightness blue Adjust brightness for blue portion Contrast blue Adjust contrast for blue portion Default Set settings to default values Test Submenu Items Description Default Setting Parameter display Para...
Page 20: ...e and operation mode Toggle on off the audio sound BRIGHT Decrease or increase brightness of displayed image PC Switch displayed image to PC RGB input VIDEO Switch displayed image to video input In video mode toggles between Video SVHS AUX VOLUME Decrease or increase speaker volume JOYSTICK Move the cursor on the projected image Navigate menus In mouse emulation mode right mouse button Not in mous...
Page 21: ...return the projection of the current image TIMER Display timer window in lower part of screen or full screen Repeated operation of key toggles between BLACK Replace projected image with preselected background blank colour Press again to return image MAGNIFY Magnification mode on off Press buttons to increase decrease the magnification factor Move Joystick to displace the magnified area within the ...
Page 22: ... mode will be turned off Reveal mode Activate with Reveal key on IR remote control In the reveal mode the picture will be covered by a grey sheet You now can reveal the covered image by using Joystick Pressing the Reveal key on the remote control a second time the reveal mode will be turned off Muting mode Activate with Mute key on IR Remote control In the muting mode the sound output of the proje...
Page 23: ... ve selected on the PC If there is no matching mode you must select a User mode In a User mode you can manually select the Resolution which is normally not choosable It may be necessary to correct the Horizontal and Vertical Position and the Tracking and Sync values in the Picture menu These values will be stored so the mode can be recognized the next time If you ve accidently misadjusted the valu...
Page 24: ...1 Switch off the unit 1 and unplug the power cord of the projector 2 Remove the back panel 2 Press the left and the right tabs of the back panel with your finger tips to the middle of the back panel Pull the lower end of the back panel towards yourself Pull out the back panel with air filter 4 Separate the air filter from the back panel 3 5 Vacuum 4 the air filter to remove the dust and dirt 6 Ins...
Page 25: ... minutes Lamp and adjacent metal parts become extremely hot and can cause burns to your fingers 1 Press the Standby button on the projector s panel or the remote control Wait for the fan to cycle off Turn the main power switch to OFF and unplug the power cord 2 Set the projector on a sturdy surface with the front of the projector facing you 3 Press the lock tab 1 of the lamp door 2 with your finge...
Page 26: ...u using the Disc Pad or Joystick 3 Select Reset lamp display and press the Select button 4 The following message will display Really reset lamp life display OK Cancel 5 Using the Disc Pad or Joystick select OK and press Select to acknowledge the change 6 Press Menu to exit the menu system Note To view the used remaining lamp life 1 Go to the Main Menu 2 Select INFO 3 Press Select button 8 Cleaning...
Page 27: ...Check video picture on TV Mouse does not work Loose cable Wrong connection Wrong power up sequence Check and secure cable connections For PS 2 USB and ADB Apple mouse a special adapter is necessary Only use adapters from the original manufacturer The mouse emulation operates correctly only if the correct power up sequence has been used Image off center Image position Center image with the Disc Pad...
Page 28: ...ely and the message Standard Parameter wiederhergestellt Parameter factory settings restored displayed in the starting screen will indicate the default settings are reset 10 Service Hotline In case of technical problems please feel free to call Liesegang at 49 211 39 01 444 For information about Liesegang products and if you have problems with operation of Liesegang products please do not hesitate...
Page 29: ... The factory default settings of the projector can be restored by pressing Select and Menu simultaneously on the control panel when switching on the main power switch of the projector and pressing the Standby button afterwards The projector will start immediately and the message Parameter factory settings restored displayed in the starting screen will indicate the default settings are reset If you...
Page 30: ... for television signals and other video equipment signals The standard uses interlaced scans and 525 horizontal lines per frame at a rate of 30 frames per second PAL Phase Alternate Line The format for colour television signals used in Germany England and many other countries PAL is an interlaced format with 25 frames per second and 625 lines per screen Pixel word coined from Picture Element This ...
Page 31: ...mage brightness Infinite magnification up to 8 times Image section may be changed Parameters can be freely adjusted by the user for connecting the projector to computers which deviate from the pre programmed standards Automatic setting of tracking and synchronization Automatic adaptation of brightness and contrast with OPTIMIZE Current settings are saved and also remain saved after switching off M...
Page 32: ... x 600 35 156 56 250 36 VESA 800x600 60Hz 800 x 600 37 879 60 317 40 VESA 800x600 72Hz 800 x 600 48 077 72 188 50 VESA 800x600 75Hz 800 x 600 46 875 75 000 50 VESA 800x600 85Hz 800 x 600 53 674 85 062 56 VESA 1024x768 43Hz 1024 x 768 35 522 86 957 45 VESA 1024x768 60Hz 1024 x 768 48 363 60 004 65 VESA 1024x768 70Hz 1024 x 768 56 476 70 069 75 VESA 1024x768 75Hz 1024 x 768 60 023 75 029 79 VESA 102...
Page 33: ... filter 22 23 B Batteries 7 8 21 29 F Factory default settings 15 16 17 18 26 Frame test picture 9 18 L Lamp 4 6 13 17 18 23 24 28 29 Lumen 28 29 R Reset see factory default settings Resolution 27 28 29 S Standby 10 12 13 Switching off 13 Switching on 12 T Troubleshooting 25 U User mode 15 17 27 V Video mode 18 25 27 ...
Page 34: ...such circumstances the user may be asked to take appropriate steps and be responsible for these Note The European standards EN 55022 and EN 50082 differentiate between equipment of class B for use in living areas and equipment of class A Residential quarters are defined as those areas where a radio or television receiver is operated within a radius of 10 m Equipment of class A may produce a higher...