


A3
Connecting the Display
Important
This illustration depicts the general model of connection. Your monitor may differ from
the items shown in the picture.
Do not carry the product upside down holding only the stand base. The product may
fall and get damaged or injure your foot.
Before setting up the monitor, ensure that the power to the monitor, the computer
system, and other attached devices is turned off.
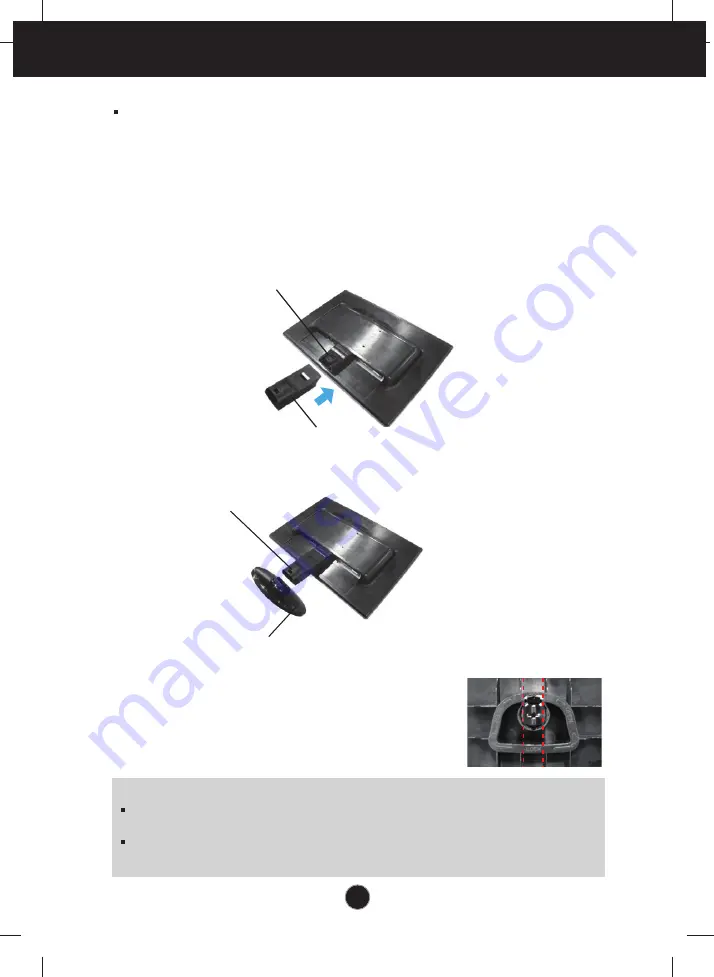
Connecting the stand
1
.
Place the monitor with its front facing downward on a soft cloth.
2
.
Assemble the Stand Body into the product in the correct direction as shown in the picture.
Make sure you push it until you hear it “click”.
3
.
Assemble the Stand Base(Front, Rear) into the Stand Body in the correct direction.
4
.
Tie down the base lock to perpendicularity direction.
5
.
Once assembled take the monitor up carefully and face
the front side
Stand Body
Stand Base
Stand Body
Hinge Body
Summary of Contents for W1942SK
Page 24: ...Digitally yours ...


