8
a
1
1
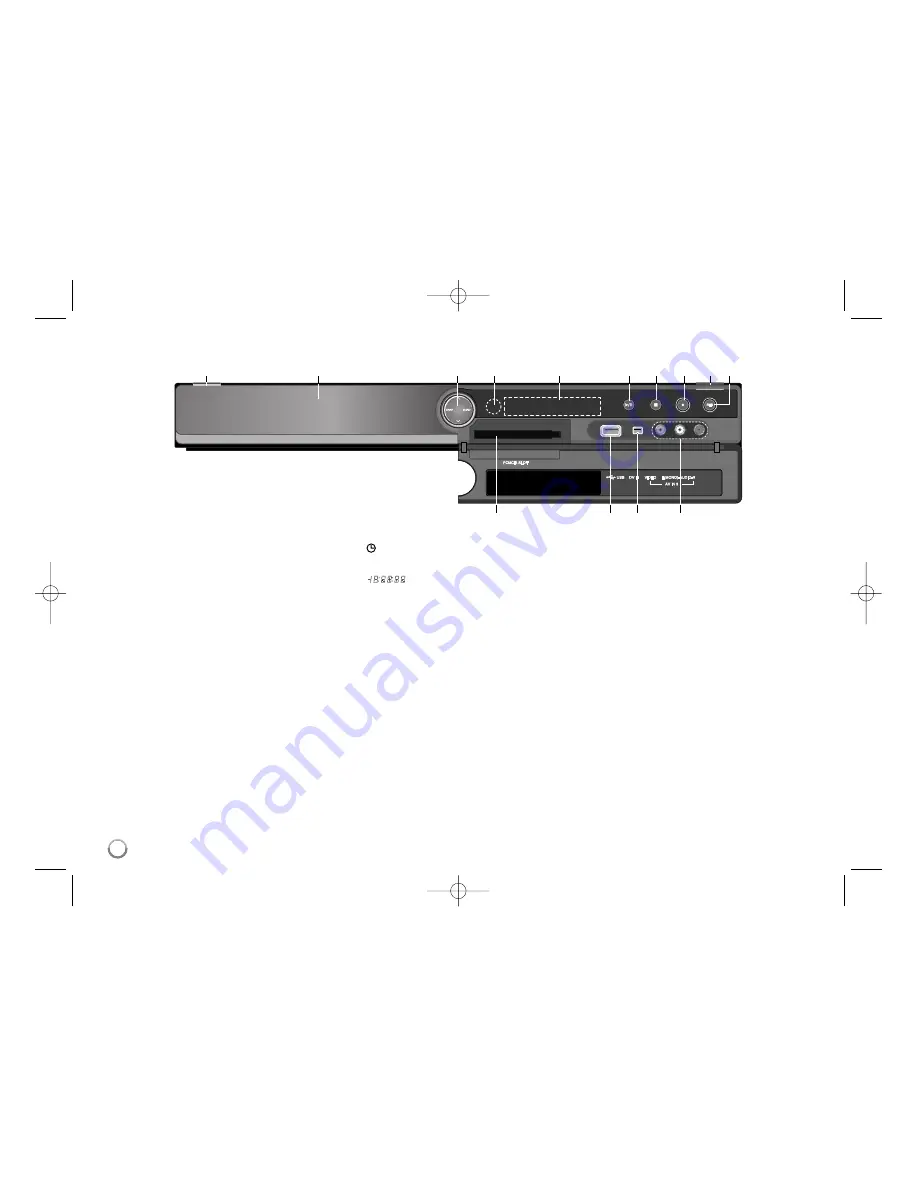
/ I (POWER button)
Switches the unit ON or OFF.
b
Disc Tray
Insert a disc here.
c
DVD
Set the recorder’s mode to DVD.
HDD
Set the recorder’s mode to HDD.
v
/
V
:
Scans up or down through memorized
channels.
d
Remote Sensor
Point the remote control here.
e
Display window
Shows the current status of the unit.
T/S:
Indicates the timeshift mode.
REC:
The unit is recording.
HDD:
The unit is in HDD mode.
DVD:
The unit is in DVD mode.
HDD
b B
DVD:
The unit is dubbing.
:
Indicates when the unit is in timer record-
ing or a timer recording is programmed.
:
Indicates clock, total playing time,
elapsed time, title number, chapter/track num-
ber, channel, etc.
f
N
/
X
(PLAY / PAUSE)
Starts playback.
Pause playback or recording temporarily,
press again to exit pause mode.
g
x
(STOP)
Stops playback or recording.
h
z
(REC)
Starts recording. Press repeatedly to set the
recording time.
i
OPEN/CLOSE (
Z
)
Opens or closes the disc tray.
j
RESOLUTION
Sets the output resolution for HDMI and COM-
PONENT OUTPUT jacks.
- HDMI: 576i, 576p, 720p, 1080i, 1080p
- COMPONENT: 576i, 576p
k
COMMON INTERFACE(CI) SLOT
Slot for external Conditional Access (CA)-mod-
ule and smart card used to decode scrambled
channels. (page 10)
l
USB Port
Connect an USB Flash memory.
m
DV IN
Connect the DV output of a digital camcorder.
n
AV IN 3 (VIDEO IN/AUDIO IN (Left/Right))
Connect the audio/video output of an external
source (Audio system, TV/ Monitor, VCR,
Camcorder, etc.).
Main Unit
a
b
c
d
e
f
g h i j
k
l
m
n
RH499C-P-BESPLLT-ENG 1/29/10 5:04 PM Page 8
Ofrecido por www.electromanuales.com


