background image

67

REFERENCE

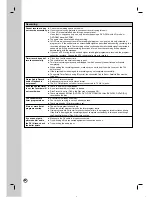
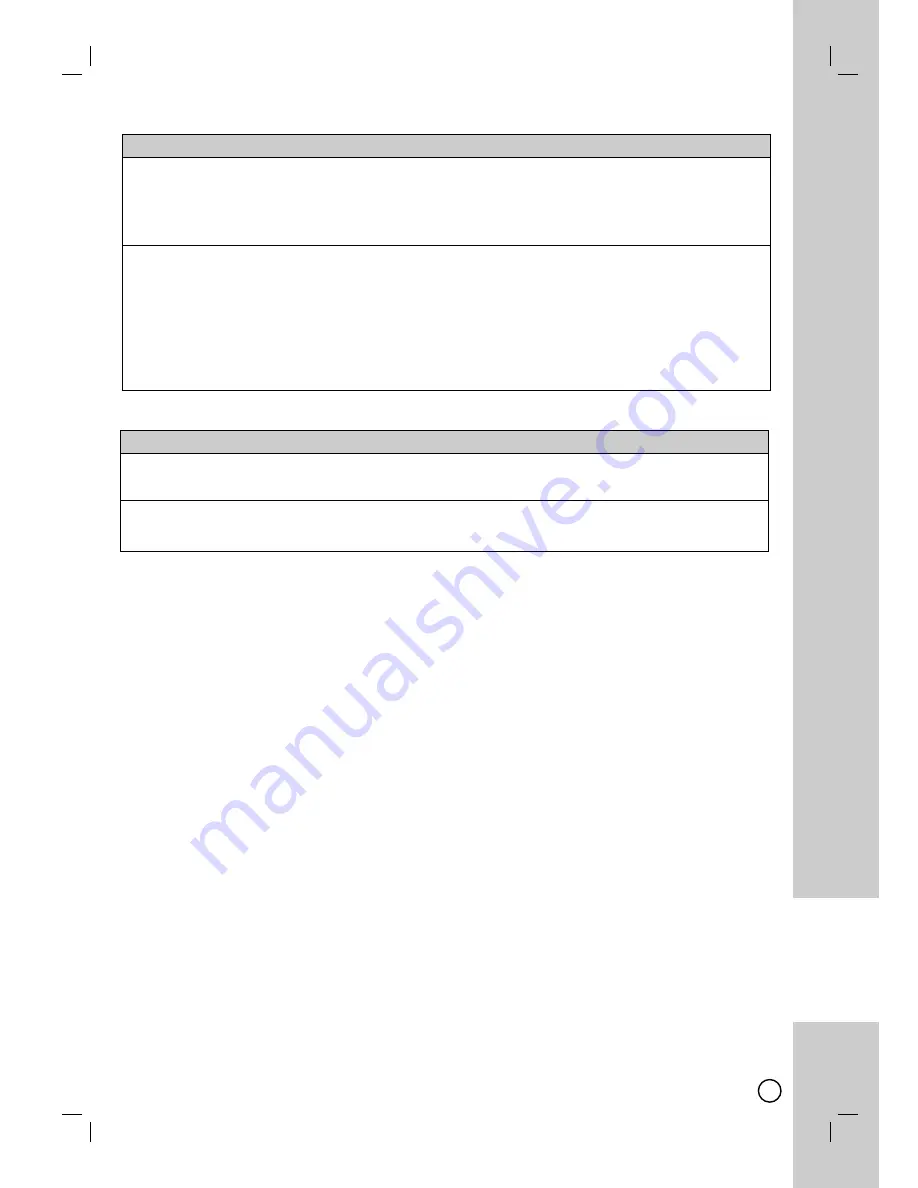
HDMI

The connected HDMI 

b

Try disconnecting then reconnecting the HDMI cable.

device does not display

b

Try switching the power of the HDMI device off then back on.

any picture.

b

The video input of the connected device is set correctly for this unit.

b

The HDMI cable you are using is fully HDMI-compliant. 
Using a non-standard cable may result in no picture being output.

b

Not all HDCP-compatible DVI devices will work with this unit.

The connected HDMI 

b

Some HDMI-compatible devices do not output sounds 

device does not 

(check the manual that came with the connected device).

output sounds.

b

If your TV is not capable of handling 96 kHz sampling frequency, set the [Sampling Freq.] option 
to [48 kHz] on the setup menu. When this choice is made, this unit will automatically convert any 
96 kHz signals to 48 kHz so your system can decode them.

b

If your TV is not equipped with Dolby Digital and MPEG decoder, set the [Dolby Digital] and 
[MPEG] options to [PCM] on the setup menu.

b

If your TV is not equipped with DTS decoder, set the [DTS] options to [OFF] on the setup menu. 
To enjoy DTS multi channel surround, you must connect this unit to a DTS compatible receiver via 
one of this unit’s digital audio outputs.

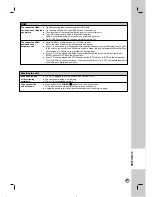
Resetting the unit

If you observe any

b

The unit is plugged in, but the power will not turn on or off.

of the following

b

The front panel display is not working.

symptoms.

b

The unit is not operating normally.

You can reset the 

b

Press and hold the 

POWER (

1

1

)

button for at least five seconds. 

unit as follows.

This will force the unit to power off then turn the unit back on.

b

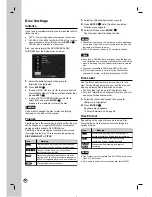
Unplug the power cord, wait at least five seconds, and then plug it in again.

Summary of Contents for RC897T - - DVDr/ VCR Combo

Page 1: ...ead this owner s manual carefully and completely DVD RECORDER VIDEO CASSETTE RECORDER OWNER S MANUAL MODEL RC897T Copyright 2008 LG Electronics U S A Inc Call us and we will guide you through your first recording for free 1 800 243 0000 http us lgservice com CH I ...

Page 2: ...amaged wall outlets extension cords frayed power cords or damaged or cracked wire insulation are dangerous Any of these conditions could result in electric shock or fire Periodically examine the cord of your appliance and if its appearance indicates damage or deterioration unplug it dis continue use of the appliance and have the cord replaced with an exact replacement part by an authorized service...

Page 3: ... Servicing is required when the apparatus has been damaged in any way such as power supply cord or plug is damaged liquid has been spilled or objects have fallen into the apparatus the appara tus has been exposed to rain or moisture does not operate normally or has been dropped Copyrights Recording equipment should be used only for lawful copying and you are advised to check carefully what is lawf...

Page 4: ...List Menu Overview 34 VR Mode Original and Playlist Editing 35 Adding Chapter Markers 35 Changing the Title Thumbnails 35 Making a New Playlist 36 Adding Additional Title Chapters to the Playlist 36 Deleting an Original or Playlist Title Chapter 37 Deleting a Part 37 Naming a Title 38 Time Search 38 Moving a Playlist Chapter 39 Hide a Chapter Title 39 Protect a Title 39 Divide One Titles Into Two ...

Page 5: ...rked car exposed to direct sunlight Cleaning Discs Fingerprints and dust on the disc can cause poor pic ture quality and sound distortion Before playing clean the disc with a clean cloth Wipe the disc from the cen ter out Do not use strong solvents such as alcohol benzine thinner commercially available cleaners or anti static spray intended for older vinyl records Caution Caution Tip Tip Note Note...

Page 6: ...in this manual RAM RWVideo RWVR RW R R Formatting new discs Automatically formatted Automatically formatted in Video Mode Automatically formatted Manual format in VR mode using Setup Automatically formatted in Video Mode Automatically formatted in VR Mode Compatibility with other DVD Players finalizing Playable on DVD R compatible players Finalization necessary Playable on most DVD Players Finaliz...

Page 7: ... of recordable disc formats including CD R containing MP3 or WMA files and these require certain pre existing conditions see above to ensure compatible playback Customers should note that permission is required in order to download MP3 WMA files and music from the Internet Our company has no right to grant such permission Permission should always be sought from the copyright owner Notes Notes Disc...

Page 8: ...n Antenna or Cable TV Antenna or Cable TV a a Antenna Connect the Terrestrial TV antenna to the ANTENNA IN jack on the unit If your antenna cable is flat wire type use a 300 ohm to 75 ohm antenna adapter b b Cable TV If a cable box is required for reception the cable channels connect a coaxial cable from the wall jack to the IN connector on the cable box and a coaxial cable from the OUT connector ...

Page 9: ... have RF modulated output function RF CH3 or CH4 You cannot watch this recorder with TV tuner Video connection Connect the VIDEO OUTPUT jack on the Recorder to the video in jack on the TV using the video cable supplied V If you use this connection set the TV s source selector to VIDEO Audio connection Connect the Left and Right AUDIO OUTPUT jacks on the Recorder to the audio left right in jacks on...

Page 10: ... again If your TV does not accept your resolution setting abnormal picture appears on the screen Please read TV s owner s manual then set the reso lution that your TV can accept HDMI the HDMI logo and High Definition Multimedia Interface are trademarks or registered trademarks of HDMI licensing LLC Additional Information for HDMI When you connect a HDMI or DVI compatible device make sure of the fo...

Page 11: ...ution possible Connect the COMPONENT OUTPUT jacks on the Recorder to the corresponding in jacks on the TV using an optional Y PB PR cable C Set the resolution to 480p using RES button on the front panel for progressive signal Progressive Scan does not work with the RF Video or S Video connections If your TV does not accept the Progressive Scan format the picture will appear scrambled Audio connect...

Page 12: ...ack on the TV using the supplied 75 ohm Coaxial Cable R S Video connection Connect the S VIDEO OUTPUT jack on the Recorder to the S Video in jack on the TV using the optional S Video cable S Audio connection Connect the Left and Right AUDIO OUTPUT jacks on the Recorder to the audio left right in jacks on the TV using the supplied audio cables A2 Rear of Recorder Rear of TV L R AUDIO INPUT S VIDEO ...

Page 13: ...and power switch of non LG TVs as well If your TV is listed in the table below set the appropriate manufacturer code 1 While holding down TV POWER 1 1 button press the number buttons to select the manufacturer code for your TV Refer to table on the right column 2 Release TV POWER 1 1 button Code numbers of controllable TVs If more than one code number is listed try entering them one at a time unti...

Page 14: ...put does not match the capabilities of your receiver the receiver will produce a strong distorted sound or no sound at all Six Channel Digital Surround Sound via digital connection can only be obtained if your receiver is equipped with a Digital Multi channel decoder To see the audio format of the current DVD in the on screen display press AUDIO This Recorder does not perform internal 2 channel de...

Page 15: ... 33 for Recording from External Components Connecting a Digital Camcorder Connecting a Digital Camcorder Use a DV cable not supplied to connect the DV in out jack of your DV Digital Camcorder to the front panel DV IN jack of this Recorder This jack is for connection to DV equipment only It is not compatible with digital satellite tuners or D VIDEO video decks Disconnecting the DV cable while recor...

Page 16: ...supplied IR control cable to the IR TRANSMITTER jack Do not cover the transmitter Not all Set Top Box devices will work with this Recorder Refer to the owner s manual of the connected Set Top Box as well Do not use RF coaxial cable to connect the Set Top Box Caution Caution Notes Notes ANTENNA OUT VIDEO OUT AUDIO OUT Front Rear of Recorder Cable Box Satellite Box Digital Video Recorder or Other Se...

Page 17: ...r antenna reception CATV is for cable subscribers Press b to go back to the previous level 4 Press ENTER to begin the channel search You can skip the analog channel scanning by pressing B Press b to go back to the previous level 5 Enter the necessary information for year date and time b B left right Moves the cursor to the previous or next column v V up down Changes the setting at the cur rent cur...

Page 18: ...List Displays the Channel List menu See page 19 Timer Record Displays Timer Record menu See page 31 45 Movie VCR Plays back Video tape page 42 43 DISC Displays TITLE LIST menu for recordable disc page 34 Plays back DVD Video disc page 21 23 USB Displays Movie List menu for USB Flash Drive Photo See page 26 27 DISC Displays Photo List menu for disc USB Displays Photo List menu for USB Flash Drive M...

Page 19: ...ection with Channel List menu Channel List menu Displaying Channel List and Changing Channel 1 Press HOME and the Home menu appears 2 Select TV Channel List and press ENTER The channel list menu will appear 3 Select your desired channel using the v V and press ENTER to change the channel Switching Channel List Four types of channel lists are provided for easy and quick channel searching You can sw...

Page 20: ...ITLE to select a DTV caption language TV Aspect Indicates that the current channel is wide or 4 3 picture format DTV Multiple Audio Icon Indicates that the current channel contains the DTV multiple audio languages Press AUDIO to select an audio language Displaying Disc Information on screen You can display various information about the disc or tape loaded on screen Some items can be changed using ...

Page 21: ...the stopped point depending on the disc Xx appears on the screen briefly Press PLAY N N to resume playback from the scene point If you press STOP x x again or unload the disc x appears on the screen the unit will clear the stopped point 5 Press EJECT OPEN CLOSE Z Z to remove the disc Press EJECT OPEN CLOSE Z Z to close disc tray or press POWER 1 1 the disc tray closes automatically and unit turns ...

Page 22: ...ayback to select the next chapter track or to return to the beginning of the current chapter track Press SKIP twice in quick successions to step back to the previous chapter track To go directly to any chapter track during playback press DISPLAY twice and use v V to select the chapter or track icon Input the chapter track number or use b B On an Audio CD to go directly to any track enter the track...

Page 23: ... TITLE Repeats the current title ALL Repeats the all titles tracks Track Repeats the current track Folder Repeats all the tracks on a folder of a disc OFF Does not play repeatedly If you press SKIP once during Repeat Chapter Track playback the repeat playback cancels AUDIO Press AUDIO then press b B repeatedly to hear a different audio language audio track or encoding method Some discs feature bot...

Page 24: ...playback starts from the marked scene Or Press CLEAR and use b B to select OK then press ENTER to delete marked scene from the list 4 To remove the Marker Search menu press RETURN O O Camera Angle If the disc contains scenes recorded at different camera angles you can change to a different camera angle during playback Press DISPLAY twice then select the Angle icon during playback Use b B to select...

Page 25: ...y If you are in a file list and want to return to the Folder list use the v V to highlight and press ENTER to return to the previous menu screen Music List menu options 1 Press v V to select a track file or folder on the Music List menu then press ENTER 2 Use v V to select an option then press ENTER Play Start playback the selected track or file Open Opens the folder and a list of files in the fol...

Page 26: ...t and press ENTER to return to the previous menu screen On CDs DVDs or USB Flash Drive with mixed content Audio tracks MP3 WMA files or JPEG files you can select between the Music List menu and Photo List menu by pressing TITLE repeatedly Photo List menu options 1 Use v V b B to select a file then press ENTER The menu options appear 2 Use v V to select an option then press ENTER to confirm your se...

Page 27: ...ER A check mark appears on the file Press MARKER again to cancel the marked file 2 Repeat step 1 to mark additional file Use the CLEAR button to select all files or cancel all marked files Notes on JPEG format Progressive and lossless compression JPEG image files are not supported Depending on the size and number of the JPEG files it may take several minutes to read the contents of the media Notes...

Page 28: ...ear 2 Press v V b B to select an option and press ENTER Play Start playback the selected title Open Opens the folder and a list of files in the folder appears Notes on MPEG4 format The MPEG4 subtitle file name has format to be identified with the MPEG4 file name to be display on the unit If the number of the screen frame is over 29 97 frames per second this unit may not operate normally If the vid...

Page 29: ...corded on the disc The Delete Title option in the Title List Original menu only hides the title it does not actually erase the title from the disc and increase the recording time available except for the last recorded title on a DVD RW disc in Video mode Overwrite recording is available using DVD RW discs When using a DVD R RW the recorder will execute the Menu making operation to update the new t...

Page 30: ...t be saved Instant T Instant Timer Recording imer Recording Instant Timer Recording allows you to make a recording easily of a preset length without using the program timer 1 Follow steps 1 4 as shown left Basic Recording from a TV 2 Press z REC repeatedly to select the recording time length Recording starts after the first press DVD Each subsequent press increases the record ing time by 10 minute...

Page 31: ... is no space to record on the disc Lack Space The space on the disc is insufficient Duplicate Date Timer Record is overlapped with another 7 Press RETURN O O to exit the Timer Record List menu You must insert a recordable disc or tape The Timer indicator lights on the front panel display The Recorder will record the audio according to the current TV tuner setting Use AUDIO to select the audio chan...

Page 32: ...ccording to previous page 12 Press RETURN O O to exit the Timer Record List menu You must insert a recordable disc The Timer indicator lights on the front panel display The Recorder will automatically power off when the Timer Recording ends There is a short delay when a timer recording finish es to confirm the recorded program If two timer recordings are set to record sequentially one right after ...

Page 33: ... VCR connected to any of the Recorder s external inputs 1 Make sure that the component you want to record from is connected properly to the Recorder See page 15 2 Press INPUT repeatedly to select the external input to record from AV1 Audio Video Input mounted on back panel AV2 Audio Video Input mounted on front panel DV DV Input mounted on front panel 3 Load a recordable disc 4 Set a recording mod...

Page 34: ...ENTER The menu options on the left side of the menu Use v V to select a option then press ENTER to confirm your selection 2 To exit the TITLE LIST menu press RETURN O O repeatedly a Current media b Indicates the record mode free space and elapsed time progress bar c Menu options To display menu option select a title or chapter then press ENTER The options dis played differ depending on the disc ty...

Page 35: ...list to refer to the actual content and the edited version Original content refers to what s actually recorded on the disc Playlist content refers to the edited version of the disc how the Original content is to be played Adding Chapter Markers Adding Chapter Markers You can create chapters within a title by inserting chapter marks at the desired points Chapter markers are inserted at regular inte...

Page 36: ...en press B 3 Select New Playlist then press ENTER The new title appears in the updated Playlist All chapters of the title are added to the Playlist Adding Adding Additional T Additional Title itle Chapters to the Playlist Chapters to the Playlist You can add an Original title or chapter to add to a Playlist title even if it is already registered 1 Choose a title or chapter on the TITLE LIST Origin...

Page 37: ... repeatedly deleted the titles are combined into one When you are deleting a title or chapter only the last one on DVD R RW DVD RW Video mode increases remaining recording time The Chapter delete function is only available on DVD RW VR mode and DVD RAM Deleting a Part Deleting a Part You can delete a part which you do not want in the title 1 Use b B v V to choose a title you want to delete on the ...

Page 38: ...sor position 0 9 Enters the character corresponding to the selected column DISC MENU LIST DISPLAY Switches the key board type 4 Choose OK then press ENTER to fix the name and return to the previous menu screen 5 Press RETURN O O repeatedly to exit the menu Names can be up to 32 characters long For discs formatted on a different recorder you will see only a limited character set When recording on D...

Page 39: ...mple Title List DVD RW 3 Press ENTER to confirm The chapter s or title s thumbnail will dim If you select a hidden chapter or title on the TITLE LIST or Chapter List menu you can show it by choos ing Show option on the menu After doing that you are able to see the chapter or title You can play hidden chapter or title using Full Play option in the menu Protect a T Protect a Title itle Use this func...

Page 40: ...ng Combining T Combining Two Chapters Into wo Chapters Into One One Use this function to combine two adjacent chapters into one 1 On the Chapter List menu select the second chap ter of the two chapters you want to combine then press ENTER The menu options appears on the left side of the screen 2 Use v V to select Combine option The combine indicator appears between the two chapters you want to com...

Page 41: ...e List menu will appear as shown below 3 To play back a title select the title you want then press ENTER or PLAY N You can remove the Title List menu by pressing STOP x Playing Playing Y Your Recordings on our Recordings on Other DVD Players Finalizing Other DVD Players Finalizing a Disc a Disc Most regular DVD players can play finalized discs recorded in Video mode finalized DVD R or DVD RWs A sm...

Page 42: ...ack If a tape without a safety tab is inserted the unit starts playback automatically 4 Press STOP x x to stop playback If the tape reaches the end before you press STOP x x the Recorder automatically stops rewinds and ejects the tape Super video tape Quasi Playback SQPB This Recorder can play back Super video tape recorded however it cannot make recordings using Super video tape format SQPB is an...

Page 43: ...to protect the tape and video heads After 3 minutes in SLOW MOTION mode the Recorder goes back to PLAY mode to protect the tape and video heads BACKWARD m Scan backward In Stop mode rewinds the tape After 3 minutes in SEARCH mode the Recorder returns to PLAY mode to protect the tape and video heads CLEAR Resets the current tape counter position to 0 00 00 To automatically go to tape counter positi...

Page 44: ...f a preset length without using the program timer 1 Follow steps 1 4 as shown left Basic Recording from a TV 2 Press z REC repeatedly to select the recording time length Recording starts after the first press VCR Each subsequent press increases the record ing time by 30 minutes maximum 540 min utes Please confirm the VIDEO tape has enough remaining time to be recorded before recording Checking the...

Page 45: ...inserted tape is not recordable Duplicate Date Timer Record is overlapped with another 7 Press RETURN O O to exit the Timer Record List menu You must insert a recordable tape The Timer indicator lights on the front panel display The Recorder will record the audio according to the current TV tuner setting Use AUDIO to select the audio channel for analog channel to record before switching the Record...

Page 46: ...correctly Check field according to previous page 12 Press RETURN O O to exit the Timer Record List menu You must insert a recordable tape The Timer indicator lights on the front panel display The Recorder will automatically power off when the Timer Recording ends There is a short delay when a timer recording finish es to confirm the recorded program If two timer recordings are set to record sequen...

Page 47: ... recording mode as necessary by pressing REC MODE repeatedly VCR SP or SLP 5 Press z REC once to start recording The REC indicator lights in the display window 6 Press STOP x to stop recording Check that the Audio In settings DV Record Audio are as you want them See page 56 If your source is copy protected using CopyGuard you will not be able to record it using this recorder See Copyright on page ...

Page 48: ...ing press the DUBBING button twice Dubbing from DVD to VCR Dubbing from DVD to VCR You can copy the contents of a DVD to a Video tape using the DUBBING button 1 Insert a blank video tape into the VCR deck 2 Insert the disc you wish to copy in the DVD deck and close the disc tray 3 Select DVD mode by pressing DVD on the remote control or pressing DVD VCR on the front panel 4 Find the place on the D...

Page 49: ...sconnecting the DV cable while recording a con tents of the connected digital camcorder may result in malfunction 1 Make sure your digital camcorder is connected to the front panel DV IN jack See page 15 2 Check that the DV audio input is as you require You can choose between Audio 1 original audio and Audio 2 overdubbed audio DV Input is set from the DV Record Audio in sub menu of the Setup menu ...

Page 50: ...le of receiving the analog and digital channels 1 Select the Auto Channel Set option then press B 2 Use v V to select the tuning band TV or CATV option TV is for over the air antenna reception CATV is for cable subscribers 3 Press B to highlight Start icon 4 Press ENTER to begin the channel search You can skip the analog channel scanning by press ing B while scanning analog channel The tuner will ...

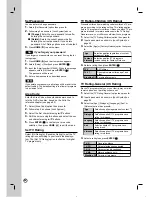
Page 51: ...me b B left right Moves the cursor to the previous or next column v V up down Changes the setting at the cur rent cursor position 3 Press ENTER to confirm your setting TV Aspect 4 3 Letter Box Select when a standard 4 3 TV is connected Displays theatrical images with masking bars above and below the picture 4 3 Pan Scan Select when a standard 4 3 TV is connected Displays pictures cropped to fill y...

Page 52: ...d text is shown when captions appear Use DTV Caption Option to customize the caption type DTV Caption Option You can set DTV Caption Option only when DTV Caption Style is selected in Custom Font Selects the font type for captions Size Selects the font size for captions Color Selects the font color for captions Opacity Selects the font opacity for captions Solid The text is solid without any transp...

Page 53: ...or digital TV program only When you set the TV Rating a program with a TV Rating beyond your rating setting cannot be recorded correctly Normal recording Timer recording etc The default TV Rating setting is to allow all programs to be viewed Lock System You can lock certain unsuitable channels to prevent chil dren from accessing them or set a TV Rating so that any digital TV program classified abo...

Page 54: ...ion is effective for digital TV program only TV Rating Children US Rating Prevents children from watching certain children s TV pro grams according to the rating setting This rating applies only to TV programs for children Unless you block TV pro grams intended for mature audiences in the TV Rating General menu your children could view those programs 1 Select the TV Rating Children option then pre...

Page 55: ...l appear with a language that TV station sends The rating titles For example Humor etc and TV ratings For example MH H VH etc may differ depending on the TV station TV Rating CELR Canadian Rating CELR Canadian English Language Rating system 1 Select the TV Rating CELR option then press B 2 Input a password as shown in Lock System on page 53 3 Select a rating then press ENTER TV Rating CFLR Canadia...

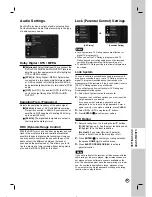
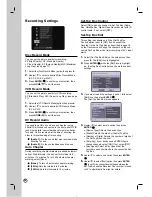
Page 56: ...n off automatic chapter marking 5 Min Sets the intervals to 5 minutes 10 Min Sets the intervals to 10 minutes Set Top Box Control Select ON when you connect a Set Top Box Cable Box Satellite Box Digital Video Recorder etc with IR control cable If not select OFF Set Top Box Edit This setting is available only if the Set Top Box Control option is set to ON If you connect the Recorder to the Set Top ...

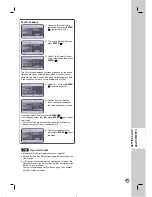
Page 57: ... that your Set Top Box s channel is changed to the selected channel in step 4 If changed select Yes then press ENTER If not changed select No then press ENTER and repeat from step 3 Some Set Top boxes may not be controlled if the device needs sub channel input the same as 19 1 6 The Test procedure is com plete press ENTER to exit the menu If you fail to test Make sure IR Control Cable connection p...

Page 58: ...dy been finalized you can Unfinalize it by choosing Unfinalize from the Finalize menu After doing this you can edit and re record onto the disc You cannot unfinalize a DVD R and DVD R DL disc If Disc Protect option is set to ON the finalize is not available To finalize set Disc Protect option to OFF Disc Label Use the Disc Label feature to enter a name for the disc This name appears when you load ...

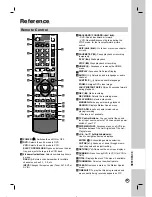
Page 59: ...SKIP Skips 30 seconds forward during playback i REC z Starts recording REC MODE Selects the recording mode j PLAY MODE Selects a play mode MARKER Marks any point during playback SEARCH Displays Marker Search menu k CHP ADD Inserts a chapter marker when playing recording Feature is not available l TV Control Buttons You can control the sound level input source selects TV s channel and power switch ...

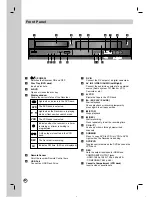
Page 60: ...ct the DV output of a digital camcorder h AV IN 2 VIDEO AUDIO Left Right Connect the audio video output of an external source Audio system TV Monitor VCR Camcorder etc i Z VCR Ejects the tape in the VCR deck j N X PLAY PAUSE Starts playback Pause playback or recording temporarily press again to exit pause mode k x STOP Stops playback l z REC Starts recording Press repeatedly to set the recording t...

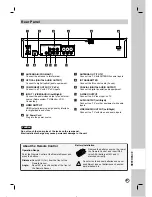
Page 61: ...ts h IR TRANSMITTER Connect the IR control cable if used i COAXIAL DIGITAL AUDIO OUTPUT Connect to digital coaxial audio equipment j S VIDEO OUTPUT Connect to a S Video Input on TV k AUDIO OUTPUT Left Right Connect to a TV or other equipment with audio inputs l VIDEO AUDIO OUTPUT Left Right Connect to a TV with video and audio inputs a b c d e f g h i j k l Rear Panel Rear Panel About the Remote C...

Page 62: ...e 1 USB Flash Drive which require additional program installation when you have connected it to a com puter is not supported 2 USB Flash Drive USB Flash Drive that support USB1 1 The USB Flash Drive option in the HOME menu is not selectable if the unit is in VCR mode The contents on the disc cannot be moved or copied to USB Flash Drive Keep the USB Flash Drive out of reach of children If swallowed...

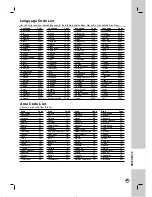
Page 63: ... Byelorussian 6669 Cambodian 7577 Catalan 6765 Chinese 9072 Corsican 6779 Croatian 7282 Czech 6783 Danish 6865 Dutch 7876 English 6978 Esperanto 6979 Estonian 6984 Faroese 7079 Language Code Fiji 7074 Finnish 7073 French 7082 Frisian 7089 Galician 7176 Georgian 7565 German 6869 Greek 6976 Greenlandic 7576 Guarani 7178 Gujarati 7185 Hausa 7265 Hebrew 7387 Hindi 7273 Hungarian 7285 Icelandic 7383 In...

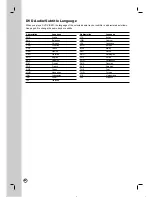
Page 64: ...ic Abbreviation Language ITA Italian IWR Hcbrcw JPA Japanese KOR Korean MAL Malay NLD Dutch NOR Norwegian POL Polish POR Portugucsc RUS Russian SVE Swedish THE Thai TUR Turkish VIE Vietnamese ZAF Afikaans DVD DVD Audio Subtitle Language Audio Subtitle Language When you play a DVD VIDEO the language of the selected audio track or subtitle is abbreviated as follows See page 23 to change the audio tr...

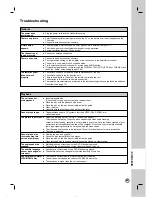
Page 65: ... type color system and regional code b Place the disc with the playback side down b Place the disc on the disc tray correctly inside the guide b Clean the disc b Cancel the Rating function or change the rating level Cannot play a tapes b Tapes recorded under a TV system other than NTSC PAL SECAM etc cannot be played The picture is not clear b Adjust the tracking by the CH TRK button see page 43 Th...

Page 66: ... the TV s built in tuner b If the inserted disc is damaged the recording may not complete successfully b To operate Timer Record using IR control the connected Cable Box or Satellite Box must be turned on Stereo Audio Record b TV is not Stereo compatible and or Playback is b Broadcast program is not in stereo format not present b The A V Output jacks on the unit are not connected to TV A V In jack...

Page 67: ...When this choice is made this unit will automatically convert any 96 kHz signals to 48 kHz so your system can decode them b If your TV is not equipped with Dolby Digital and MPEG decoder set the Dolby Digital and MPEG options to PCM on the setup menu b If your TV is not equipped with DTS decoder set the DTS options to OFF on the setup menu To enjoy DTS multi channel surround you must connect this ...

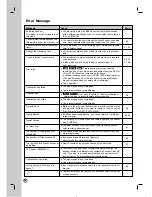
Page 68: ...rd any rated contents The MPEG4 VOD content has zero remaining plays You cannot play it MPEG4 You must set clock of unit before your timer recording unless timer recording cannot be set If you have made 999 recorded chapters unit cannot make any more chapter then If you have made 99 recorded titles unit cannot make any more titles then Region should be longer than 3 seconds to be deleted That mean...

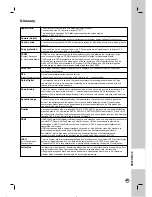
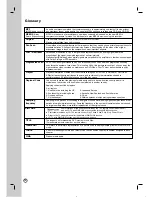
Page 69: ...ibit down0mixing If this is the case this unit can only output the front two channels Dynamic range Dynamic range is the difference between the lowest level of sound that can be heard above the noise of the equipment and the highest level of sound before distortion occurs Dynamic range compression means reducing the gap between the loudest and softest sounds This means you can hear dialog clearly ...

Page 70: ...ed from the actual recordings on a DVD RW VR mode or DVD RAM A Playlist leaves the original titles as they are and contains only the information needed to control playback A Playlist title takes up very little disc space Regional Code Codes used to prevent the playing of media designed for a device from the country where it is marketed on the version of the same device marketed in another country ...

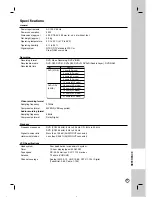
Page 71: ...ncy 48kHz Compression format Dolby Digital Playback Frequency response DVD PCM 48 kHz 8 Hz to 22 kHz CD 8 Hz to 20 kHz DVD PCM 96 kHz 8 Hz to 44 kHz Signal to noise ratio More than 100 dB AUDIO OUT connector Harmonic distortion Less than 0 008 AUDIO OUT connector VCR Specifications Head system Four head helical scan azimuth system Timer 12 hour display type with AM PM Tape speed SP 33 35 mm sec SL...

Page 72: ... Mini DIN 4 pin x 1 C 0 3 V p p 75 Ω COMPONENT VIDEO OUT Y 1 0 V p p 75 Ω sync negative RCA jack x 1 PB PR 0 7 V p p 75 Ω RCA jack x 2 HDMI video audio output 19 pin HDMI standard Type A Audio output digital audio 0 5 V p p 75 Ω RCA jack x 1 Audio output optical audio 3 V p p 75 Ω Optical connector x 1 Audio output analog audio 2 0 Vrms 1 kHz 0 dB 600 Ω RCA jack L R x 1 IR TRANSMITTER OUT 5 V p p ...

Page 73: ...e 29 Copy Never 29 Copy Once 29 Counter 43 CPRM 69 D Delete 34 37 Deleting a Part 37 DIGITAL AUDIO OUTPUT 61 Disc Information 20 Disc Label 58 Disc Menu 52 DISC MENU LIST 23 Disc Protect 58 Disc Settings 58 Disc Type 6 7 DISPLAY 59 Display window 60 Divide 34 40 Dolby Digital 53 69 Down mixing 69 DRC 53 DTS 53 69 DTV Caption 52 Dubbing 34 48 DV dubbing 49 DV Record Audio 56 DVD Rating 53 DVD Editi...

Page 74: ...ar Panel 61 REC 59 REC MODE 59 Record mode DVD 56 VCR 56 Recordable time 71 Recording DVD 29 VCR 44 Recording Settings 56 Regional code 6 70 Remote Control 59 Resetting 67 Resolution 10 60 Resume playback 21 Rotate 26 S Safety tab 42 Sampling Freq 53 SAP 30 44 Satellite Box 16 Search Time Search 38 Marker Search 24 Set Top Box 16 56 Setup 18 50 Show 34 39 Simplink 70 SKIP 22 59 Slide Show 27 Sound...

Page 75: ...enance or failure to maintain or separate system components and Damages or operating problems that result from normal wear and tear misuse abuse operation outside environmental specifications or contrary to the requirements or precautions in the Operating Guide accident lightning strikes or other natural causes unauthorized modification or alteration incorrect electrical current or voltage recepti...

Reviews: