


- 16 -
Caution :
These adjustments have been factory aligned. Do not attempt
to temper with these alignments. However, the effects of
adjacent receiver components, or replacement of picture tube
or deflection yoke may require the need to readjust these
adjustments.
¡
Raster Slant Adjustment
1. Peliminary steps
1) The lens focus and electrical focus must be provisional
alignment.
2) Tune the TV set to receive a digital pattern.
3) Press the buttons of Remote Controller for adjustment (SVC
¡
¡
5
¡
OK
¡
) to reset the convergence.
2. Adjustment
1) Set only green to be appeared on the screen.
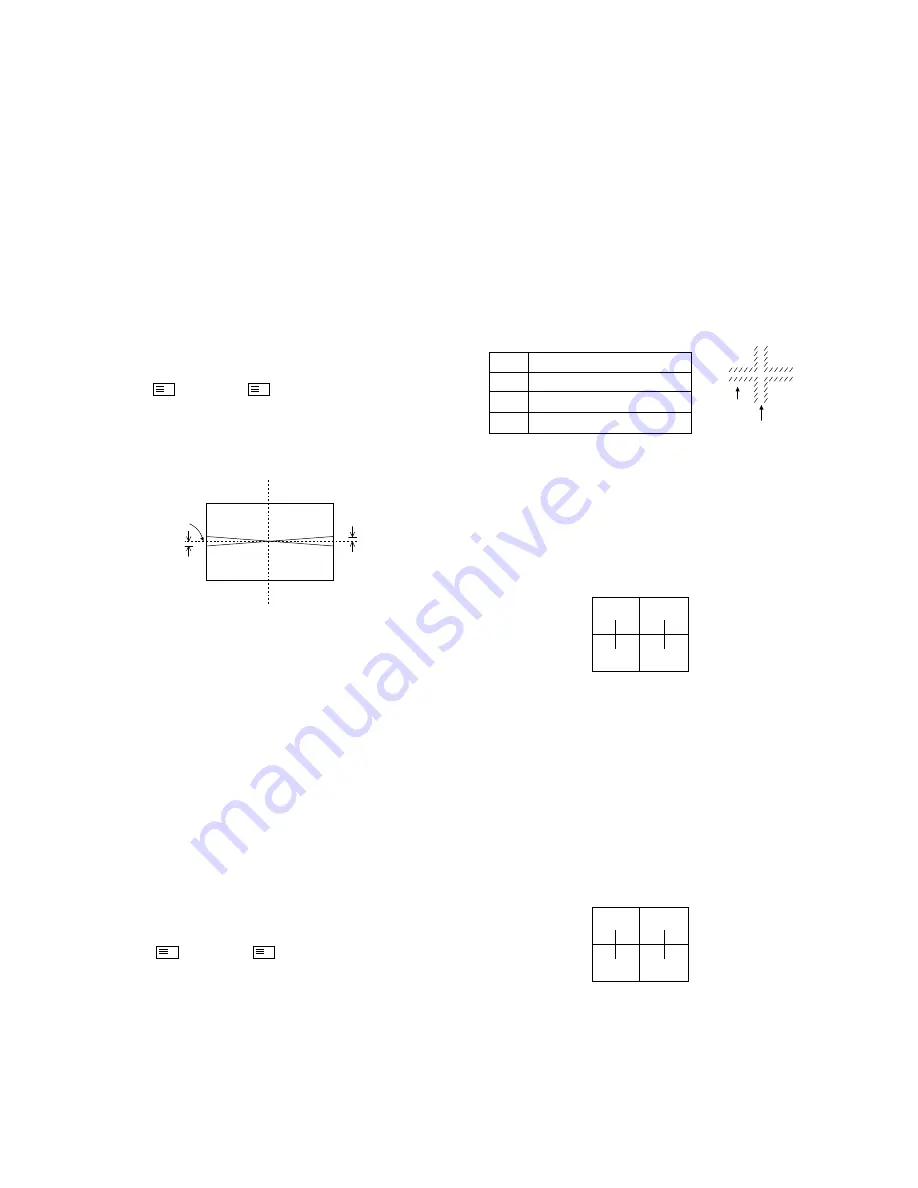
2) Carefully rotate the DY of the green CRT so that the slant
of raster become the following figure.
3) Set two color (R or B and G) to be appeared on the
screen.
4) Set the slant of Red or Blue correspond to the green.
Note :
¡
Raster Position Adjustment
1. Preliminary steps
1) The lens focus and electrical focus must be provisional
alignment.
2) This adjustment should be performed after the raster
slant, the horizontal and the vertical adjustment.
3) Tune the TV set to receive a digital pattern.
4) The convergence must be corrected.
Press the buttons of Remote Controller for adjustment (SVC
¡
¡
5
¡
OK
¡
) to reset the convergence.
2. Adjustment
1) Turn the centering magnet of Green CRT so that the center
of video signal correspond to geometrical center of screen.
2) Tune the TV set to receive cross hatch signal and turn the
centering magnet of Red & Blue so that the center of
cross hatch pattern correspond to Green center.
¡
Lens and Electrical Focus Adjustment
1. Preliminary steps
1) The electrical focus, the raster slant and position must be
provisional alignment.
2) This adjustment should be performed after warming up
for 30 minutes and in the dark room.
3) Tune the TV set cross hatch pattern.
4) Screen the optional two lens with a cover so that the
single color is appeared on the screen.
5) When turn the light the lens at front, chromatic aberration
which appeared in bright line of cross-Hatch signal
changed as below.
¡
After focus adjustment, fix screw about 12
~
17kg.cm.
2. G-lens Adjustment
1) Turn the lens until the chromatic aberration changed 'Blue'
to 'Red point'.
2) Viewing the all screen, in no case of the chromatic aberration
appeared slimly within 3.5 cross-Hatch of the picture center.
At this time, in case that the red chromatic aberration's bright
line isn't equal, adjust G-lens so that the red chromatic
aberration is appeared more than previous time.
3) Switching the signal to digital pattern and operate
adjustment minutely. At this time, adjust it by using the
revolution pattern of circumferencial picture's small circle.
4) Adjust G-focus control volume of focus pack so that the
external big circle's part appeared cleary.
5) Adjust accurately by repeat the upper control.
6) Especially, noting to the G-light because it influenced on
picture's function.
3. R-lens Adjustment
1) Turn the lens until the chromatic aberration changed
orange to scarlet.
2) Adjust the chromatic aberration so that it located center
correctly.
3) Switching the signal to digital pattern and adjust it as
same method of G-lens.
4) Adjust as same method of G-lens with Red focus control
volume of focus pack.
RASTER SLANT/POSITION, FOCUS & CONVERGENCE ADJUSTMENT
L
L
Mechanical
center
1. Tighten the tighten iron after loose completely
tighten iron which fixing DY when adjusting raster
slant and set position.
2. Never control to the tighten iron which fixed, it's
condition is not untied.
Lens
Red
Green
Blue
Change of chromatic aberration
Orange
¤A
Scarlet
Blue
¤A
Red
Purple
¤A
Green
CHROMATIC
ABERRATION
CROSS HATCH
SIGNAL
L
¡´
2mm
M
M
M
M
Summary of Contents for PF-43A20
Page 11: ... 11 ALIGNMENT TEST POINT LOCATION GUIDE SIGNAL Board Component side ...
Page 12: ...DEFLECTION Board Component side 12 ...
Page 13: ...IF Component side 13 PIP Component side CPT Board Component side VR902R VR902G VR902B ...
Page 27: ... 27 ...
Page 28: ... 28 ...
Page 29: ... 29 ...
Page 30: ... 30 ...
Page 32: ... 32 IF MPX PIP ...
Page 33: ... 33 AV DCF A V 2 ...
Page 37: ...MEMO 37 ...
Page 55: ...VIDEO Y C AUDIO ...
Page 56: ......
Page 57: ......
Page 58: ......


