background image

Operation with JPEG Disc

OPERA

TION

23

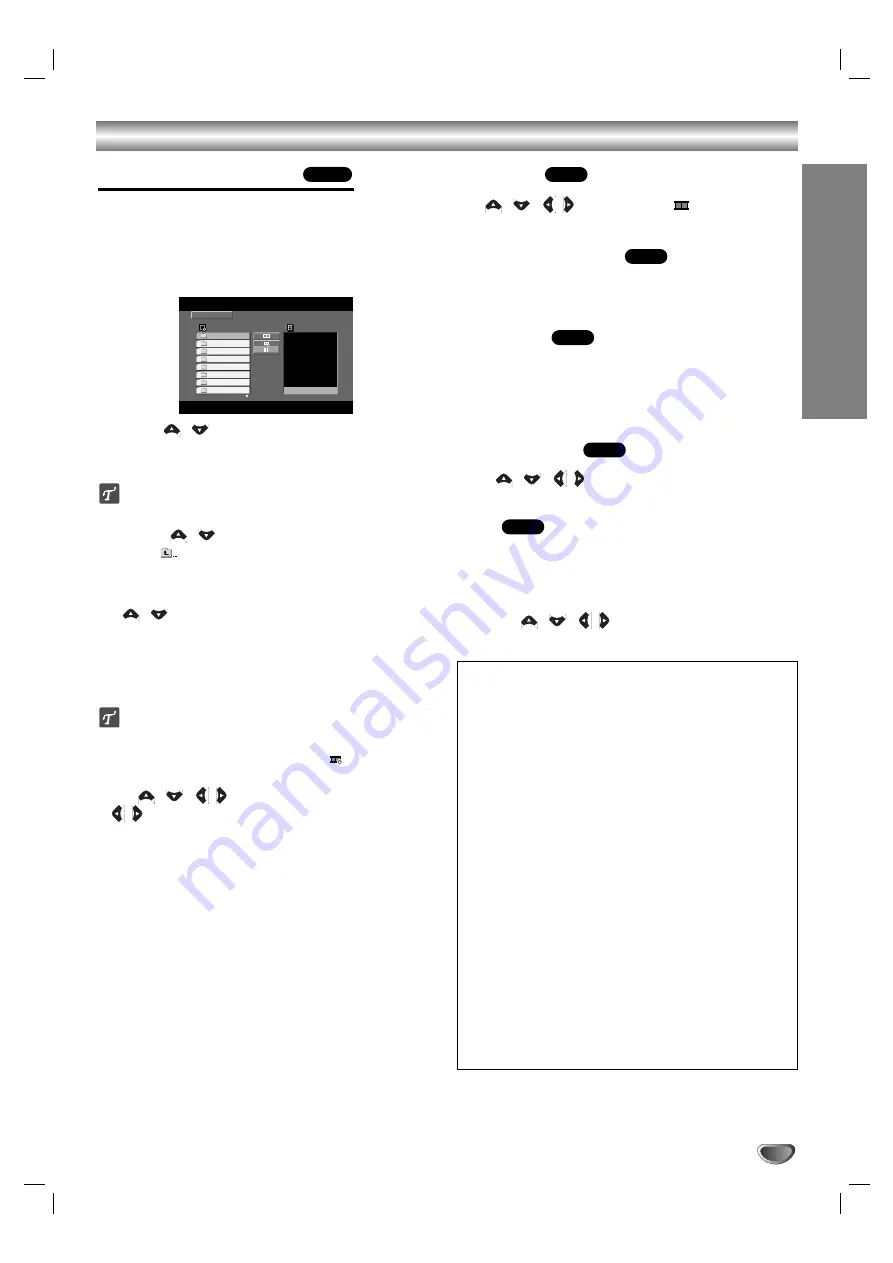
Viewing a JPEG disc

This unit can play discs with JPEG files. 
Before playing JPEG recordings, read the notes on
JPEG Recordings on right.

1

Insert a disc and close the tray.

The PHOTO menu appears on the TV screen.

22

Press 

/

to select a folder, and press

SELECT/ENTER. A list of files in the folder
appears.

Tip

If you are in a file list and want to return to the Folder

list, use the 

/

buttons on the remote control to

highlight “

” and press SELECT/ENTER to return to

the previous menu screen.

33

If you want to view a particular file, press 

/

to highlight a file and press

SELECT/ENTER or PLAY.

Slide Show starts from the selected file if Speed
option is not Off. 
While viewing a file, you can press STOP(

x

) to

move to the previous menu (JPEG menu).

Tip

• Press MENU to move to the next page.

• There are four Slide Speed options:

> (Slow), >> (Normal), >>> (Fast) and II (off). 

Use 

/

/

/

to highlight the Speed. Then, use

/

to select the option you want to use then press

SELECT/ENTER. 

• If you set Speed option to Off, Slide Show is not

active.

Slide Show

Use 

/

/

/

to highlight the 

(Slide Show)

then press SELECT/ENTER.

Moving to another File 

Press 

.

or 

>

once during viewing a picture to

advance to the next file or to the previous file.

Still Picture

1

Press PAUSE/STEP during slide show.
The player will now go into PAUSE mode. 

2

To return to the slide show, press PLAY or press 
PAUSE/STEP again.

To rotate picture

Press 

/

/

/

during showing a picture to rotate

the picture clockwise or counter-clockwise.

Z

oom

The Zoom function allows you to enlarge or reduce the
video image.

1

Press ZOOM repeatedly.
Zoom on 

y

Zoom off 

2

Use the 

/

/

/

buttons on the “Zoom on”

mode.

JPEG

JPEG

JPEG

JPEG

JPEG

JPEG

JPEG disc compatibility with this player is limited
as follows:

• Depending upon the size and number of JPEG files,

it could take a long time for the DVD player to read
the disc’s contents. If you don’t see an on-screen
display after several minutes, some of the files may
be too large — reduce the resolution of the JPEG
files to less than 2760 x 2048 pixels and burn
another disc.

• The total number of files and folders on the disc

should be less than 999.

• Some discs may be incompatible due to a different

recording format or the condition of disc.

• Ensure that all the selected files have the “.jpg”

extensions when copying into the CD layout.

• If the files have “.jpe” or “.jpeg” extensions, please

rename them as “.jpg” file.

• File names without “.jpg” extension will not be able

to be read by this DVD player. Even though the files
are shown as JPEG image files in Windows
Explorer

.

Preview

List

PHOTO

JPEG Folder 1

JPEG Folder 2

JPEG Folder 3

JPEG Folder 4

JPEG Folder 5

JPEG Folder 6

JPEG Folder 7

JPEG Folder 8

Summary of Contents for LM-D6960

Page 1: ...set Retain it for future reference Designs and specifications are subject to change without notice for improvement DIGITECH_LM D6960A_ENG_150H R CD R RW MINI HOME THEATER OWNER S MANUAL MODEL LM D6960 LM D6960A LMS D6960V LMS D6960C LMS D6960S LMS D6960W USB ...

Page 2: ...he apparatus shall not be exposed to water dripping or splashing and that no objects filled with liquids such as vases shall be placed on the apparatus CAUTION VISIBLE AND INVISIBLE LASER RADIATION WHEN OPEN AND INTERLOCKS DEFEATED CAUTION concerning the Power Cord Most appliances recommend they be placed upon a dedi cated circuit That is a single outlet circuit which powers only that appliance an...

Page 3: ... or the CD R RW or DVD R RW disc itself some CD R RW or DVD R RW discs cannot be played on the unit Do not attach any seal or label to either side the labeled side or the recorded side of a disc Do not use irregularly shaped CDs e g heart shaped or octagonal It may result in malfunctions Notes on DVDs and Video CDs Some playback operations of DVDs and Video CDs may be intentionally fixed by softwa...

Page 4: ...AY b b button PLAY B B button STOP xSTOP button CD SKIP SEARCH b bb b B BB B TAPE REWIND FAST FORWARD b bb b B BB B TUNING buttons Pr Pb Y S VIDEO OUT OPTICAL IN REAR R 8 REAR L 8 CENTER 8 WOOFER 3 FRONT R 4 FRONT L 4 AUX IN COMPONENT PROGRESSIVE SCAN VIDEO OUT 2 3 4 5 6 7 8 9 10 11 12 1 16 14 17 18 13 15 10 MIC VOLUME KNOB MIC VOL MIC JACKS MIC1 MIC2 6 3 mm OPTIONAL 11 DISC SKIP D SKIP button CLO...

Page 5: ...UI menu screen TITLE and MENU screen PRESET buttons TUN buttons 7 SELECT ENTER button 8 MENU button Use the MENU button to display the menu screen included on DVD video discs 9 STOP x PAUSE STEP PLAY G buttons 10 PROG MEMO REPEAT REPEAT A B buttons 11 EQ master XTS Pro SOUND AUDIO SUBTITLE S TITLE CLEAR buttons 12 ECHO VOL buttons 13 MIC VOL buttons 14 RDS PTY buttons OPTIONAL 15 XDSS plus VIRTUAL...

Page 6: ... S Component Video Color Stream connection Connect the COMPONENT VIDEO OUT PROGRES SIVE SCAN Y Pb Pr jacks from the unit to the corre sponding in jacks on the TV using an Y Pb Pr cable C Progressive Scan ColorStream pro connection If your television is a high definition or digital ready television you may take advantage of this unit s progressive scan output for higher video resolution If your TV ...

Page 7: ...r connecting the FM wire antenna keep it as horizontal as possible AM MW loop antenna aerial Supplied For AM MW reception connect the loop antenna aerial to the terminal marked AM FM wire antenna supplied Connecting to Auxiliary Equipment You can use VCR or other unit connected to the AUX connector This unit receives the analog signal from auxiliary equipment REAR R 8 REAR L 8 CENTER 8 WOOFER 3 FR...

Page 8: ...cted the unit to a computer are not supported In case of a USB HDD make sure to connect an auxil iary power cord to the USB HDD for porper operation A primary partition of drive is supported up to four If there is an extention partition it is not supported If the drive of USB device is two or more a drive folder is displayed on the screen If you want to move to the previous menu after you select a...

Page 9: ... will be distorted and will lack base If you use front speakers with low maximum input rating adjust the volume carefully to avoid excessive output on the speakers Connect the Front Left Right speaker correctly If it is reversed the sound may be distorted Speaker System Connection Connect the speakers using the supplied speaker cables by matching the colors of the terminals and those of the cords ...

Page 10: ...ndow To cancel press POWER STANDBY ON or DEMO again XDSS Extreme Dynamic Sound System You can improve the sound quality during playback Press XDSS plus repeatedly on the remote contol NORMAL y XDSS ON NORMAL XDSS ON MP3 OPT ON XTS XTS pro Each time you press XTS pro the setting changes in the following order XTS ON NORMAL XTS P ON XTS ON XTS P ON The unique sound quality of the LG Technology cre a...

Page 11: ...iefly The time remaining until the unit turns off is displayed for about 5 seconds ote If you press SLEEP while the sleep time is displayed the SLEEP time is reset To cancel Sleep Timer setting If you wish to stop the function press the SLEEP button repeatedly until SLEEP 10 appears and then press SLEEP once again after SLEEP 10 shows on the display Using Microphone You can sing to a music source ...

Page 12: ... in the display window and then disappears 5 5 Set the hour to switch on by pressing b bb b B BB B on the front panel 6 6 Press SET CD to confirm the turn on hour time 7 7 Set the minute to switch on by pressing b bb b B BB B on the front panel 8 8 Press SET CD to confirm the turn on minutes time OFF TIME indicator appears for about 0 5 seconds in the display window and then disappears 9 9 Set the...

Page 13: ...s the Music mode except that the directional enhancement logic is turned off It may be used to enhance mono signals by making them seem larger The Matrix mode may also find use in auto systems where the fluc tuations from poor FM stereo reception can otherwise cause disturbing surround signals from a logic decoder The ultimate cure for poor FM stereo reception may be simply to force the audio to m...

Page 14: ... title Repeat sequence Resume play from this point Action prohibited or not available Notes Some discs may not provide all of the features on the on screen display example shown below If no button is pressed for 10 seconds the on screen display disappears A B Title Items Title Number Chapter Number Time search Audio language and Digital Audio Output mode Subtitle language Angle Sound Selection Met...

Page 15: ... a 16 9 wide TV is connected Display Mode Display Mode setting works only when the TV Aspect mode is set to 4 3 Letterbox Displays a wide picture with bands on the upper and lower portions of the screen Panscan Automatically displays the wide picture on the entire screen and cuts off the portions that do not fit Progressive Scan Progressive Scan Video provides higher quality pictures with less fli...

Page 16: ...ut level of the selected speaker 5dB 5dB Distance If you connected speakers to your DVD CD Receiver setting the distance lets the speakers know how far the sound has to travel to reach your set listening point This allows the sound from each speaker to reach the listener at the same time Press to adjust the Distance of the selected speaker Test Select All to test the signals of each speaker Adjust...

Page 17: ...d scenes are not played unless an alternate scene is available on the disc The alternative must have the same rating or a lower one If no suitable alternative is found playback stops You must enter the 4 digit password or change the rating level in order to play the disc 4 4 Press SELECT ENTER to confirm your rating selection then press SETUP to exit the menu Password Security Code You can enter o...

Page 18: ... menu Use the buttons to select the title chapter you want to view then press SELECT ENTER to start Press TITLE or MENU to return to the menu screen Use the number buttons to select the track you want to view and press RETURN to return to the menu screen Menu setting and the exact operating procedures for using the menu may differ depending on the disc Follow the instructions on the each menu scre...

Page 19: ... and Frame by frame playback 1 Press PAUSE STEP on the remote control during playback The player will now go into PAUSE mode 2 You can advance the picture frame by frame by pressing PAUSE STEP repeatedly on the remote con trol 3 To exit still motion mode press PLAY Slow Motion 1 Press PAUSE STEP on the remote control during playback The player will now go into PAUSE mode 2 Use the m or M to select...

Page 20: ...o enter up to nine Marker points on a disc To Recall a Marked Scene 1 During disc playback press SEARCH The MARKER SEARCH menu will appear on the screen 2 Within 10 seconds press to select a Marker number that you want to recall 3 Press SELECT ENTER Playback will start from the Marked scene 4 To remove the MARKER SEARCH menu press SEARCH To clear a Marked Scene 1 During disc playback press SEARCH ...

Page 21: ...s on the TV screen Press to select a track then press PLAY or SELECT ENTER and playback starts MP3 WMA 1 Press to select a folder and press SELECT ENTER to see the folder contents 2 Press to select a track then press PLAY or SELECT ENTER Playback starts otes If you are in a file list on the MUSIC menu and want to return to the Folder list use the to highlight on the stop mode and press SELECT ENTE...

Page 22: ...ays be sought from the copyright owner Operation with Audio CD and MP3 WMA Disc Programmed Playback WMA MP3 CD The Program function enables you to store your favorite tracks from any disc in the player memory A program can contain 300 tracks Audio CD MP3 WMA 1 1 Insert a disc Audio CD and MP3 WMA Discs Audio CD or MP3 WMA menu appears as below Audio CD Menu MP3 WMA Menu 2 2 Select a track on the L...

Page 23: ...re 1 Press PAUSE STEP during slide show The player will now go into PAUSE mode 2 To return to the slide show press PLAY or press PAUSE STEP again To rotate picture Press during showing a picture to rotate the picture clockwise or counter clockwise Zoom The Zoom function allows you to enlarge or reduce the video image 1 Press ZOOM repeatedly Zoom on y Zoom off 2 Use the buttons on the Zoom on mode ...

Page 24: ...y during playback press and hold S TITLE about 3 seconds then press S TITLE to select another language code until the subtitle is displayed properly List 0 00 00 MOVIE 1 12 Movie Folder 1 Movie Folder 2 Movie Folder 3 Movie Folder 4 Movie Folder 5 Movie Folder 6 Movie Folder 7 Movie Folder 8 DivX disc compatibility with this player is limited as follows Available resolution size of the DivX file i...

Page 25: ... then a preset number will flash To change the preset number follow the steps 4 5 To recall preset numbers Press and hold on the remote control until the desired preset number appears or press the button repeatedly Listening to the radio 1 Press TUNER BAND on the remote control to show either FM or AM in the display window Or Press TUNER on the front panel The last received station is tuned in 2 2...

Page 26: ...sequence FREQUENCY PTY RT CT PS PTY Programme type recognition The programme type is shown in the display window RT Radio text recognition The radio station s name is displayed in the display window CT Time controlled by the channel Enable the unit to receive the actual time and show it on the display window PS Programme Service name The programme title is displayed in the display window ote Some ...

Page 27: ...ant to record except tape function 2 2 Open the cassette deck TAPE 2 and insert a blank cassette into the cassette compartment Set the recording direction Press PLAY MODE repeatedly to set the recording direction Recording from Radio CD or Auxiliary source 1 1 Press zREC on the front panel or z on the remote control REC flashes and holds the cassette in pause mode 2 2 Press G or F The recording be...

Page 28: ...ote sensor of the unit The remote control is too far from the unit There is an obstacle in the path of the remote control and the unit The batteries in the remote control are exhausted The DVD CD function is not selected Correction Plug the power cord into the wall outlet securely Insert a disc Check that the DVD or audio CD indicator in the DVD display is lit Select the appropriate video input mo...

Page 29: ... 8376 Somali 8379 Spanish 6983 Sudanese 8385 Swahili 8387 Swedish 8386 Tagalog 8476 Tajik 8471 Tamil 8465 Tatar 8484 Telugu 8469 Thai 8472 Tibetan 6679 Tigrinya 8473 Tonga 8479 Turkish 8482 Turkmen 8475 Twi 8487 Ukrainian 8575 Urdu 8582 Uzbek 8590 Vietnamese 8673 Volapük 8679 Welsh 6789 Wolof 8779 Xhosa 8872 Yiddish 7473 Yoruba 8979 Zulu 9085 Use this list to input your desired language for the fo...

Page 30: ... video output Y 1 0 V p p 75 Ω C 0 3 V p p 75 Ω Component Video output Y 1 0 V p p 75 Ω Pb Pr 0 7 V p p 75 Ω Speakers Speaker Name Front Speaker L R Center Speaker Type Bass Reflex 2Way 3Speaker Bass Reflex 2Way 3Speaker Impedance 4 Ω 8 Ω Frequency Response 55 20000 Hz 130 20000 Hz Sound Pressure Level 86 dB W 1m 84 dB W 1m Rated Input Power 130 W 60 W Max Input Power 260 W 120 W Net Dimensions W ...

Reviews: