


46
MAINTENANCE
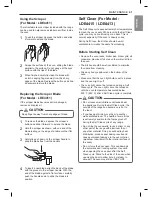
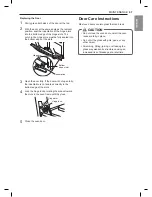
5
Lift the door up until it is clear of the hinges.
about 30°
Replacing the Door
1
Be sure both hinges are in a 30 degree position.
2
Slide the door back onto the hinges until you
hear a solid click and the release buttons have
engaged.
3
Fully open the door.
4
Push the hinge locks down onto the door frame.
5
Close the oven door.
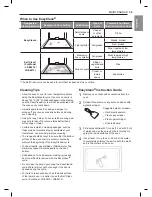
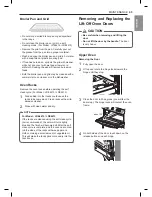
Lower Oven
Removing the Door
1
Fully open the door.
2
Unlock the hinge locks, rotating them as far
toward the open door frame as they will go.
Slot
Lock
Unlock
Hinge
lock
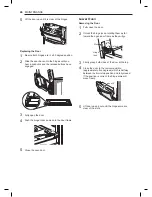
3
Firmly grasp both sides of the door at the top.
4
Close the door to the removal position
(approximately five degrees) which is halfway
between the broil stop position and fully closed.
If the position is correct, the hinge arms will
move freely.
about 5°
5
Lift door up and out until the hinge arms are
clear of the slots.


