11
Mounting the Camera
Note:
Refer the manual of Dome bracket adaptor when you
mount the camera on the wall, pendant and parapet.
Follow the instructions below to surface mount the camera
with supplied camera mounting bracket.
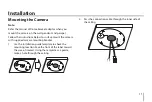
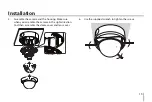
1. Use the installation guide template to check the
mounting location. Face the front of the label toward
the area of interest. Using the template as a guide,
make a hole through the ceiling.
FRONT
PRODUCT CENTER
POSITION
MEZ6268770
3
4 Plac
e
SELFTAPPING SCR
EW
CABLE HOLE (LC
V5300)
CABLE HOLE (LC
D5300)
FRONT
PRODUCT CENT
ER POSITIO
N
MEZ62687
703
4 Plac
e
SELFTAPPING S
CREW
CABLE HOLE (LCV
5300)
CABLE HOLE (LC
D5300)
FRONT
PRODUCT CENTE
R POSITION
MEZ62687
703
4 Plac
e
SELFTAPPING S
CREW
CABLE HOLE (LC
V5300)
CABLE HOLE (LC
D5300)
FRONT
PRODUCT CENTE
R POSITION
MEZ626877
03
4 Place
SELFTAPPING SC
REW
CABLE HOLE (L
CV5300)
CABLE HOLE (L
CD5300)
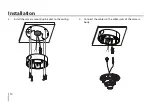
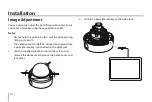
2. Pass the connection cable through the inner side of
the ceiling.
FRONT
PRODUCT CENTER POSITION
MEZ6268770
3
4 Plac
e
SELFTAPPING SCREW
CABLE HOLE (LCV5300)CABLE HOLE (LCD5300)
FRONT
PRODUCT CENTER POSITIO
N
MEZ6268770
3
4 Plac
e
SELFTAPPING SCREW
CABLE HOLE (LCV5300)CABLE HOLE (LCD5300)
FRONT
PRODUCT CENTER POSITION
MEZ6268770
3
4 Plac
e
SELFTAPPING SCREW
CABLE HOLE (LCV5300)CABLE HOLE (LCD5300)
FRONT
PRODUCT CENTER POSITION
MEZ6268770
3
4 Place
SELFTAPPING SCREW
CABLE HOLE (LCV5300)CABLE HOLE (LCD5300)
Installation
Summary of Contents for LCV5500-BN
Page 37: ......

