background image

Getting Started

11

Ge
tting S

tar

ted

1

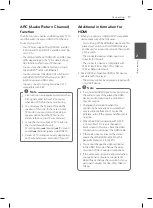
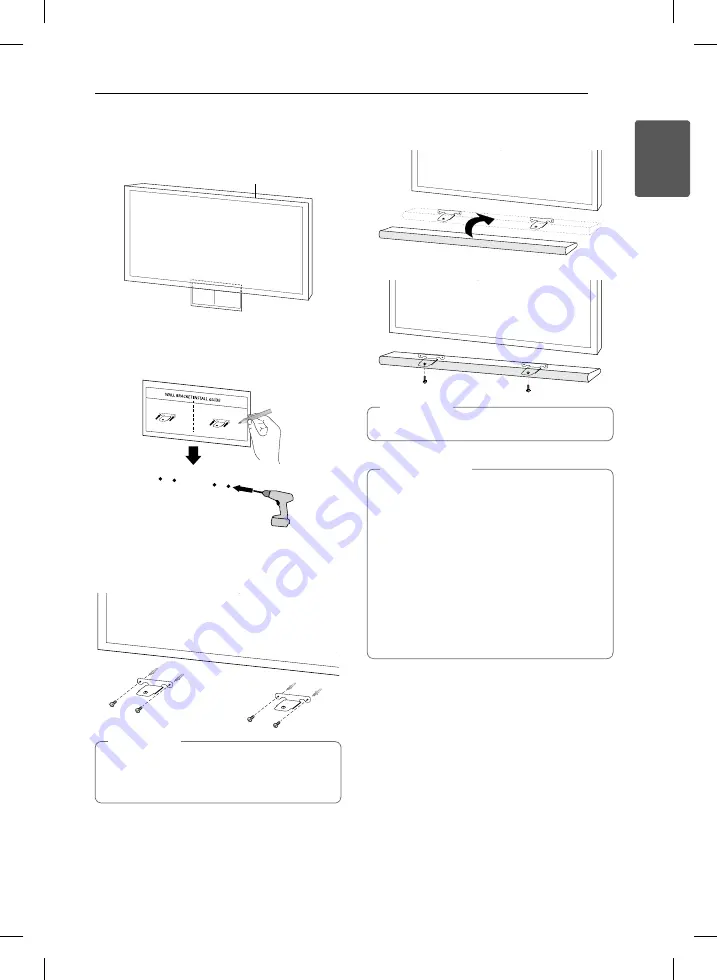
1.  Match the TV’s BOTTOM EDGE of  Wall bracket 

install guide with the bottom of  TV and attach 
to the position.

TV

2.  When you mount it on a wall (concrete), use the 

wall plugs. You should drill some holes. A guide 
sheet (Wall bracket install guide) is supplied to 
drill. Use the sheet to check the point to drill.

3.  Remove the Wall bracket install guide.
4.  Fix the brackets with screws (

A

) as shown in the 

illustration below.

Screws (

A

) and Wall Plugs are not supplied for 

mounting the unit. We recommend the Hilti 
(HUD-1 6 x 30) for the mounting.


,

Note

5.  Put the unit on the brackets to match screw 

holes on the bottom of the unit.

6.  Fix the unit with the screws firmly.

To detach the unit, perform it in reverse order.


,

Note


y

Do not install this unit upside down. It can 
damage the parts of this unit or be the 
cause of personal injury.


y

Do not hang onto the installed unit and 
avoid any impact to the unit.


y

Secure the unit firmly to the wall so that it 
does not fall off. If the unit falls off, it may 
result in an injury or damage to the product.


y

When the unit is installed on a wall, please 
make sure that a child does not pull any of 
connecting cables, as it may cause it to fall.


>

Caution

Summary of Contents for LAS750M

Page 1: ...el LAS750M SMART Hi Fi AUDIO Wireless Multi room Sound Bar Please read this manual carefully before operating your speaker and retain it for future reference ENGLISH OWNER S MANUAL HS7 ENGLISH MFL68864939 ...

Page 2: ......

Page 3: ...gs please refer to the main label on the bottom or rear of the apparatus For models using an adapter Only use the AC adapter supplied with this device Do not use a power supply from another device or another manufacturer Using any other power cable or power supply may cause damage to the device and void your warranty CAUTION concerning the Power Cord Most appliances recommend they be placed upon a...

Page 4: ...ing the speaker to your Network via the Wi Fi Setup Method Android 28 Connecting the speaker to your Network via the Wi Fi Setup Method iOS 32 Connecting the speakers to your Home Network Additional 32 Adding another speaker 3 Operating 35 Enjoying the Music with Music Flow Player app 35 Overview of Home menu 36 Overview of the side menu 36 Playing a song 38 Overview of Playback 39 Different ways ...

Page 5: ...tandby mode 56 Network standby mode 57 Reset the Speaker 57 Resetting the speaker 4 Troubleshooting 58 Troubleshooting 58 General 59 Network 60 Application and PC Software 5 Appendix 61 File requirement 61 Trademarks and licenses 62 Specifications 64 Handling the Speaker 64 Important Information Relating to Network Services 65 TERMS OF USE Some of the content in this manual may differ from Music F...

Page 6: ... iPod touch iPhone iPad or Android device via Music Flow Player app This speaker and your smart device must be connected to the same network Visit iTunes store or Google Play Store or use the QR code shown below to search for Music Flow Player app For detailed information refer to page 21 Apple iOS Android OS y y Depending on the application s version and the settings of smart device Music Flow Pl...

Page 7: ...he supplied accessories Designs and specifications of the accessories are subject to change without prior notice Remote control 1 Batteries 2 AC adapter 1 Power cord 1 Wall bracket 2 Wall bracket install guide 1 Screws 2 Cable ties for arranging cables 2 Foot Optical LAN Cable ...

Page 8: ...ction Selects the function and input source F p o Volume Adjusts volume level G Wi Fi Connects your speaker to your network page 25 H Add Adds the speaker to your network page 32 Front panel A S W download connector For service only B DC IN AC adapter input C HDMI IN OUT TV ARC HDMI input output D ETHERNET LAN port E PORTABLE IN Portable input F OPT IN Optical input Rear panel ...

Page 9: ... and Sub woofer VOL o p Adjusts speaker volume b REPEAT Listen to your music repeatedly C V Skip Skips Fast backward or Forward dM Play Pause Starts playback Pauses playback INFO Displays the input source information You can use these playback buttons after play music by Music Flow Player App or PC software Note c DRC Turns on or off DRC function Set Night mode to On to reduce the sound intensity ...

Page 10: ... wireless connection communicates through a module positioned on the bottom of the unit y y Be careful not to make scratches on the surface of the Unit Sub Woofer when installing or moving them Caution Installing the cover foot You can extend the height of the unit by using cover foot height 17 mm 1 Turn the unit upside down 2 Peel off a sticker attached to the cover foot Then place it on the exis...

Page 11: ... unit We recommend the Hilti HUD 1 6 x 30 for the mounting Note 5 Put the unit on the brackets to match screw holes on the bottom of the unit 6 Fix the unit with the screws firmly To detach the unit perform it in reverse order Note y y Do not install this unit upside down It can damage the parts of this unit or be the cause of personal injury y y Do not hang onto the installed unit and avoid any i...

Page 12: ...ng Green The connection is completed Red The wireless subwoofer is in standby mode or the connection is failed Off No display The power cord of wireless subwoofer is disconnected Setting up the wireless subwoofer for the first time 1 Connect the power cord of the wireless subwoofer to the outlet 2 Turn on the main unit The main unit and wireless subwoofer will be automatically connected Manually p...

Page 13: ...nd the wireless subwoofer will be paired automatically when you turn on the main unit When the connection is completed you can see the green LED on the subwoofer y y It takes a few seconds and may take longer for the main unit and the subwoofer to communicate with each other and make sounds y y The closer the main unit and the subwoofer the better sound quality It is recommended to install the mai...

Page 14: ...V setting menu vary depending on the manufacturers or models of your TV Note LG Sound Sync You can control some functions of this unit by your TV s remote control with LG Sound Sync It is compatible with the LG TV that is supported LG Sound Sync Make sure of the LG Sound Sync logo on your TV Controllable function by LG TV s remote control Volume up down mute Refer to the TV s instruction manual fo...

Page 15: ...ars on the display window for about 3 seconds and then you can see LG TV on the display window if connecting normally between this unit and your TV If you turned off the unit directly by pressing 1 Power LG Sound Sync Wireless will be disconnected To use this function again you should reconnect the TV and the unit Note Using an HDMI cable If you connect this unit to a TV that supports HDMI CEC and...

Page 16: ...ugh an OPTICAL cable 1 HDMI CEC High Definition Multimedia Interface Consumer Electronics Control Consumer Electronics Control CEC is an HDMI feature designed to allow the user to command and control the CEC enabled devices that are connected through HDMI by using only one of their remote controls Trade names for CEC are SimpLink LG Anynet Samsung BRAVIA Sync Sony EasyLink Philips etc What is SIMP...

Page 17: ...y When you connect an HDMI or DVI compatible device make sure of the following Try switching off the HDMI DVI device and this player Next switch on the HDMI DVI device and leave it for around 30 seconds then switch on this player The connected device s video input is set correctly for this unit The connected device is compatible with 720 x 576p 1280 x 720p 1920 x 1080i or 1920 x 1080p video input ...

Page 18: ... to HDMI IN Press repeatedly FUNC on the remote control or F on the unit until the function is selected For enjoying both sound and picture You can enjoy both sound and picture from the external device you connect 1 Connect HDMI IN jack on the back of the unit to HDMI OUT jack on the external device such as Blu ray disc player DVD player etc 2 Connect HDMI OUT TV ARC jack on the back of the unit t...

Page 19: ...on is selected 4 Turn on the portable player or external device and start playing it OPTICAL IN connection Connect an optical output jack of external devices to the OPT IN jack Optical cable 1 Connect the OPT IN jack on the back of the unit to optical out jack of your TV or digital device etc 2 Select the input source to OPTICAL by pressing FUNC on the remote control or F on the unit until the fun...

Page 20: ...ess connection You can use multiple speakers in a multi room configuration A B Router Router Router LAN LAN Speaker Speaker Speaker Add Speaker Main OR Group playback using Music Flow Player app You can use multiple speakers in a multi room configuration page 40 Group setting via Music Flow Player app Download Music Flow Player app ...

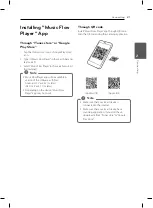
Page 21: ...ll be available in version of the software as follow Android OS Ver 2 3 3 or later iOS O S Ver 5 1 1 or later y y Depending on the device Music Flow Player app may not work Note Through QR code Install Music Flow Player app through QR code Scan the QR code using the scanning application Apple iOS Android OS y y Make sure that your smart device is connected to the internet y y Make sure that your s...

Page 22: ...rms of use appears on the screen Check the contents of terms of use and select Accept 2 Select Start to install the speaker you ve purchased Refer to Connecting the speaker to your Home Network on page 23 If you want to return to the terms of use screen initialize the Music Flow Player app on the smart device s setting menu Note ...

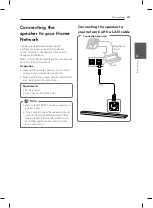
Page 23: ...ent using a router is installed at your home y y Make sure that the speaker and the smart device are connected to the same router Requirements y y Wireless router y y Smart device Android or iOS y y Make sure that DHCP s server is activated on wireless router y y If you cannot connect the speaker with your router go to setting of the router and then make sure that Allow wireless client to see each...

Page 24: ...Player app Select Start to install the speaker 3 Check the LED indicator on the unit and select Next to go to the next step 4 Select Wired connection on the screen 5 Connect one end of the LAN cable to the speaker s ETHERNET port and connect the other end to your wireless router Wait a moment until the LED indicator stops blinking and stays white 6 Then select Next on the screen ...

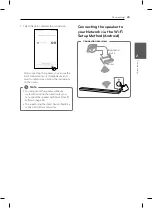
Page 25: ... Follow the instructions on the screen y y You cannot use the speaker without a router When using the wired router you can control the speaker with Music Flow PC Software page 54 y y The speaker and the smart device should be connected to the same router Note Connecting the speaker to your Network via the Wi Fi Setup Method Android Connection overview Broadband service Router ...

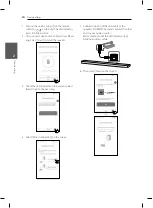
Page 26: ...hite 2 On your smart device launch Music Flow Player app Select Start to install the speaker 3 Check the LED indicator on the unit and select Next to go to the next step 4 Select Wireless connection on the screen 5 Press the button on the unit Then the LED indicator blinks in white and red alternately 6 Then select Next on the screen ...

Page 27: ...t on the screen 9 Select Next to complete the connection After connecting the speaker you can see the list of connected music storage device and music curation screen Follow the instructions on the screen If the speaker fails to connect to your network or its network connection operates abnormally place the speaker closer to your router and try again Note ...

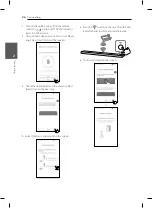
Page 28: ...on overview 1 Turn on the unit by using 1 on the remote control or 1 on the unit The LED indicator starts to blink in white 2 On your smart device launch Music Flow Player app Select Start to install the speaker 3 Check the LED indicator on the unit and select Next to go to the next step 4 Select Wireless connection on the screen ...

Page 29: ...een 7 On your iOS device go to iOS setting Wi Fi setting and select MusicFlow_Setup to connect y y If MusicFlow_Setup is not on the list scan for available Wi Fi networks again y y When your smart device is connected to MusicFlow_Setup you cannot use the internet Note 8 Once the network connection is completed return to the Music Flow Player app ...

Page 30: ...nect 11 Once the network connection is completed return to the Music Flow Player app 12 Select Next to complete the connection After connecting the speaker you can see the list of connected music storage device and music curation screen Follow the instructions on the screen If the speaker fails to connect to your network or its network connection operates abnormally place the speaker closer to you...

Page 31: ...e speaker fails to connect to your network or its network connection operates abnormally place the speaker closer to your router and try again y y Depending on your home network environment and the performance of wireless router it may not work well to connect the speaker to your wireless router y y You cannot connect the speaker to wireless router which has hidden SSID y y The connection you ve m...

Page 32: ... music with multiple speakers and single smart device you have Requirements y y Wireless router y y Smart device Android or iOS y y Another speaker Signal interference may lead to stop playback Note Adding another speaker Broadband service Router Speaker Main Speaker Add LAN cable Connection overview ...

Page 33: ...ome network on page 23 2 On your smart device select the Music Flow Player app Tap the Home menu 3 Select the Add Speakers on the side menu You can also add another speaker as below Note 4 Press the ADD button on the rear of the speaker Add Then Network status LED blinks red 5 Then select the Next on the screen ...

Page 34: ...ing 34 Connecting 2 6 Select Next to complete the connection Speakers may be not connected if the distance between the Sound Bar Main connected by LAN cable and the speaker Add to be connected is too far Note ...

Page 35: ...ith the speaker page 23 2 To use the speaker you must download and install the Music Flow Player app page 21 Overview of Home menu Launch Music Flow Player app on your smart device The Home appears a Recommendation Click the sentence area to see the recommendation b Favorites Displays the favorites songs c Timeline Displays the songs played on this speaker d Most Played Displays the songs most pla...

Page 36: ...e songs on the connected devices Media server d Streaming Services Displays the online services You can enjoy the online radio and music e Connected Speakers Displays the connected speaker f Add Speakers Goes to the speaker installation screen g Settings Displays the settings menu Playing a song 1 Launch Music Flow Player app on your smart device The Home appears 2 Tap the Home menu 3 Side menu ap...

Page 37: ... up appears Select a desired speaker Note Managing a playlist On an album screen tap the of the desired song The pull down menu appears a Play next Selects music to play next b Add to queue Adds to queue list c Add to playlist Adds to a desired playlist Depending on your wireless environment playing a song with the speaker may not work smoothly Note ...

Page 38: ...or forward Adjusts the sound effect d Tap the various option appears Saves the music to the Favorites You can find Favorites on Home tab Adds music to My Playlist Shares on the social network services Searches for more music that is similar to the music being played e Edits the current playlist Selects a speaker to play Displays music menu Selecting Sound effect This speaker has a number of pre se...

Page 39: ...ound mode after switching the input sometimes even after the sound file has been changed Note Different ways of listening to music There are a number of differing ways of listening to music Group Surround and Seamless playbacks If you want to enjoy the group playback and Surround playback it is recommended that at least one speaker be connected by a LAN cable In the wireless connection the smoothn...

Page 40: ...OK 4 The speakers is ready to group playback y y If the speakers are not grouped you can enjoy different music on each speaker y y It is recommended to connect less than 5 devices for the smooth playback y y Because of a long distance between speakers and the wireless router or signal interference the signal may become weak This can cause abnormal playback y y Depending on your wireless environmen...

Page 41: ... 4 The speakers are ready to surround playback y y It is recommended to set the surround speakers to same models y y Because of a long distance between speakers and the wireless router or signal interference the signal may become weak This can cause abnormal playback y y Depending on your wireless environment the grouping may be broken y y For smooth playback it is recommended to select the speake...

Page 42: ...se of the online streaming service Seamless Play may be unavailable y y On seamless play each speaker keeps its existing volume value If there is no sound coming out from the speaker during playback check to see if the switched speaker s volume is set to 0 Note Changing playing speaker from a smart device to a speaker 1 If the smart device playing music is carried from outside to a room where the ...

Page 43: ...ation is installed on your mobile device and if not search and install LINE from your application market Google Play Store Apple App Store etc Additional data charges may occur if installed over 3G 4G according to your device plan Note Step 2 Adding LG HomeChat as a friend on LINE 1 Launch LINE and tap More Official Accounts button 2 Find LG HomeChat from the list or search for LG HomeChat through...

Page 44: ...sking for app install on Android s KitKat version tap yes 3 Product s with Available displayed on the right is available for LG HomeChat service Select product s you wish to connect to LG HomeChat and tap next 4 Connection successfully completed Tap Return to LG HomeChat Conversations and chat with your product s Step 5 Use LG HomeChat 1 Call Audio to give command s Enter Audio What s on now or Au...

Page 45: ... Examples Audio quick button Audio Commands list Mood station Analyzes the songs in Music Libraly using Gracenote and organizes them according to Mood The organization may not be correct depending on the audio file Note Coming home ...

Page 46: ...r page 23 2 To use the speaker you must download and install the Music Flow Player app page 21 Overview of setting menu 1 Launch Music Flow Player app on your smart device 2 Select Settings on the side menu a General Sets for easier use of the speaker b Speakers Sets connected speaker c Alarms Sleep Timer Wakes on and off the speaker at a designated time d Music Library Manages the music Library e...

Page 47: ...ker LED Turns on or off speaker s LED indicator LED Indicator is ON by default c DRC Turns on or off DRC function Page 52 d Night Turns on or off Night Mode function Page 53 e Auto Volume On Off Turns on or off Auto Volume function Page 54 f AV Sync Adjust the audio and video Synchronization Page 52 g Woofer level Adjust Woofer level Page 53 h Auto Display On Off Turns on or off Auto Display funct...

Page 48: ...enu Manages the music library Sync Schedule You can set the time to update the Music index automatically Select the days and time to perform the update Sync Schedule is OFF by default If you do not select the day it performs just once at the time you set Note Sync Manages the music library 1 Select the desired server and click the checkbox 2 Tap the Update to update the desired server Account mana...

Page 49: ...t device or a speaker to another speaker by approaching your smart device to the desired speaker y y Your smart device should support Bluetooth Smart Turn on Bluetooth function in smart device setting y y This function is subject to the smart device capability and the Wi Fi network status y y Auto music play option in the music flow app should be turned on y y This function may cause more battery ...

Page 50: ...st version App version info Displays the current application s version Device version info Updates the latest speaker s firmware version 1 Find the speakers need to update and tap the 2 Starts the software update Open source licenses Menu Shows LGE Open Source Software Notice ...

Page 51: ...airing operation is performed it does not need to be performed again 1 Select the Bluetooth function by using FUNC on the remote control or F on the unit until the function is selected Appears BT READY in display window 2 Operate the Bluetooth device and perform the pairing operation When searching for this speaker on your Bluetooth device a list of the devices found may appear in the Bluetooth de...

Page 52: ...ce you may not be able to use the Bluetooth function y y You can enjoy using Bluetooth when using Phone MP3 Notebook etc y y The more distance between the unit and the bluetooth device the lower the sound quality becomes y y The Bluetooth connection will be disconnected when the unit is turned off or the Bluetooth device gets too far from the unit y y If the Bluetooth connection is disconnected co...

Page 53: ...rol even by other company s product Controllable functions are volume up down and mute Press and hold INFO on the remote control for about 3 seconds ON TV REMOTE appears and you can control this unit by your TV remote control To check the status of this function press and hold INFO To turn off this function press and hold INFO and press it once again while ON TV REMOTE is scrolled y y Supported TV...

Page 54: ...ume level When the output sound is too loud or too low press AUTO VOL on the remote control So you can enjoy the sound with appropriate levels To cancel this function press the button again while ON AUTO VOLUME is displayed Using Media Server for PC Media server Software allows users to access audio files stored in media server and enjoy them on this speaker via home networking Before connecting t...

Page 55: ...tting menu appears 3 On the setting menu click icon on the left to go to the sharing file menu 4 On the sharing file menu Click icon to open the Browse Folder window 5 Select the folder containing the files you want to share The selected folder is added to the list of shared folders Nero MediaHome 4 Essentials for Mac OS About Nero MediaHome Essentials Nero MediaHome 4 Essentials is a software for...

Page 56: ...or sharing files and folders to this speaker y y If the shared folders or files are not displayed on the player click the folder on the Local Folders tab and click Rescan Folder at the More button y y Visit www nero com for more information and software tools Note Standby mode The speaker switches to the standby mode if there is no music playback or no button operation Standby mode Option 1 If net...

Page 57: ...he button until you hear the beep sound once You can see DISABLED on the display window Then all wireless network ports are deactivated and the stored wireless network information is deleted y y Press and hold the button until you hear the beep sound twice You can see RESET on the display window You can reset the speaker to its original factory settings ...

Page 58: ...he volume level to cancel the mute function Is the function selected properly y y Check the input source and select the correct input source No woofer sound Is the subwoofer plugged in y y Plug the power cord of subwoofer into the wall outlet securely Is pairing between the unit and the subwoofer disconnected y y Connect the unit and the subwoofer Refer to the page 12 The remote control does not w...

Page 59: ...er is connected I cannot enjoy multiple playback Group and Surround playbacks Is the speaker connected to the network via Wi Fi y y If you want to enjoy the multiple playback at least one speaker should be connected by LAN cable y y To change network connection using wired connection if the speakers are connected only wirelessly disconnect the wireless connections and reconnect them after connecti...

Page 60: ...to white Music Flow PC Software doesn t work properly Does the firewall on your PC or Mac set to enable y y Disable all your firewalls and try to connect again Refer to your firewall s instruction or website Is the LAN cable connected to the wireless router and your PC or Mac properly y y Ensure that the speaker and your PC or Mac are correctly connected to the local area network and can access th...

Page 61: ...Manufactured under license from DTS Licensing Limited DTS the Symbol DTS and the Symbol together are registered trademarks and DTS Digital Surround is a trademark of DTS Inc DTS Inc All Rights Reserved Bluetooth wireless technology is a system which allows radio contact between electronic devices Connecting individual devices under Bluetooth wireless technology does not incur any charges A mobile ...

Page 62: ... OPT IN 3 V p p Optical jack x 1 PORTABLE IN 0 5 Vrms 3 5 mm stereo jack x 1 HDMI IN 19 Pin Type A HDMI connector x 1 HDMI OUT 19 Pin Type A HDMI connector x 1 Available Digital Input Audio Sampling Frequency 32 kHz 44 1 kHz 48 kHz 96 kHz Amplifier Total 360 W Front 40 W x 2 4 Ω at 1 kHz Surround 40 W x 2 4 Ω at 1 kHz Subwoofer 200 W 3 Ω at 80 Hz THD 10 Wireless subwoofer S75A2 D Power requirement...

Page 63: ...1 10 BASE T 100 BASE TX Wireless LAN Internal antenna Integrated IEEE 802 11n Draft 2 0 wireless networking access compatible with 802 11a b g n Wi Fi networks Bluetooth Version 4 0 Codec SBC y y Designs and specifications are subject to change without prior notice ...

Page 64: ...rams applets widgets applications products and other content Content and all services and offerings Services provided or made available by or through any third party each a Service Provider is the sole responsibility of the Service Provider from whom it originated The availability of and access to Content and Services furnished by the Service Provider through the LGE Device are subject to change a...

Page 65: ...e the LG Software or suspend or restrict your use of all or any part of the Services where we consider it reasonably necessary for technical operational security legal or regulatory reasons We do not accept any responsibility if for any reason the Services or any part of them are unavailable at any time or for any period Although you may use LG Software to download and access content or applicatio...

Page 66: ...ngly to suit if appropriate We use commercially reasonable efforts to ensure that the Services are secure and virus free but those efforts cannot and do not guarantee that the Services will be free from bugs viruses or other vulnerabilities Further we do not accept responsibility for any loss or damage caused by a virus distributed denial of service attack or other technologically harmful material...

Page 67: ...ftware and Gracenote Servers for your own personal non commercial use only You agree not to assign copy transfer or transmit the Gracenote Software or any Gracenote Data to any third party YOU AGREE NOT TO USE OR EXPLOIT GRACENOTE DATA THE GRACENOTE SOFTWARE OR GRACENOTE SERVERS EXCEPT AS EXPRESSLY PERMITTED HEREIN You agree that your non exclusive license to use the Gracenote Data the Gracenote S...

Page 68: ...discontinue its services at any time GRACENOTE DISCLAIMS ALL WARRANTIES EXPRESS OR IMPLIED INCLUDING BUT NOT LIMITED TO IMPLIED WARRANTIES OF MERCHANTABILITY FITNESS FOR A PARTICULAR PURPOSE TITLE AND NON INFRINGEMENT GRACENOTE DOES NOT WARRANT THE RESULTS THAT WILL BE OBTAINED BY YOUR USE OF THE GRACENOTE SOFTWARE OR ANY GRACENOTE SERVER IN NO CASE WILL GRACENOTE BE LIABLE FOR ANY CONSEQUENTIAL O...

Page 69: ......

Page 70: ......

Page 71: ......

Page 72: ......

Reviews: