


17
ENG
ENGLISH
CUSTOMIZING SETTINGS
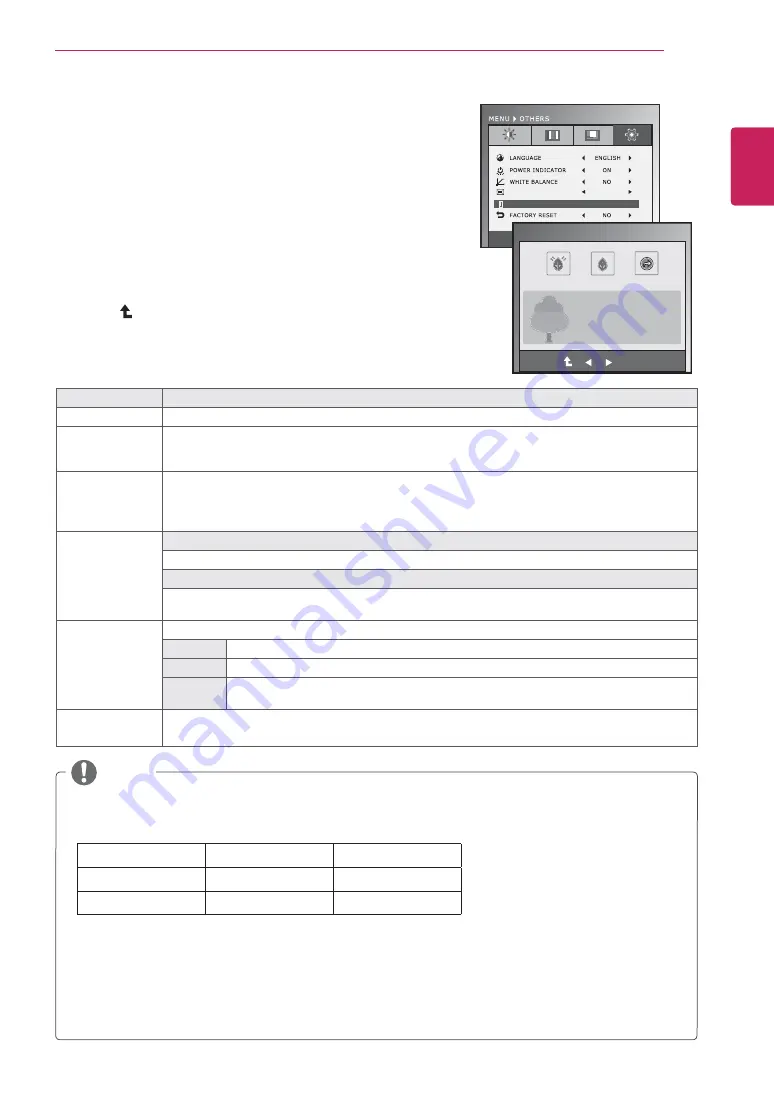
OTHERS
1
Press any button on the front of the Monitor set to display the
MONITOR SETUP
OSD menu.
2
Press
the
MENU
button to display the options in the OSD menu.
3
Select
OTHERS
by pressing the buttons on the front of the
Monitor set and set the options.
4
Select
EXIT
to leave the OSD menu.
To return to the upper menu or set other menu items, use the up
arrow (
) button.
The available picture settings are described below.
ORIGINAL RATIO
SUPER ENEYGY SAVING
WIDE
EXIT
OK
ON
OFF
RESET
TOTAL POWER REDUCTION:
20 W
TOTAL CO2 REDUCTION:
1
6 g
SUPER
SAVING
: 5 W/h
LED
SAVING
: 12 W/h
SUPER ENERGY SAVING
TOTAL POWER REDUCTION
: How much power is saved while using the monitor.
TOTAL CO2 REDUCTION
: Change the TOTAL POWER REDUCTION to CO2.
SAVING DATA(W/h)
545 mm (21.5 inch) 584 mm (23 inch)
SUPER SAVING
4 W/h
5 W/h
LED SAVING
15 W/h
12 W/h
Saving Data depends on the Panel. So,those values should be different from each panel and panel
vendor.
LG calculated these values by using
“broadcast video signal”.
LED Saving refers to how much power can be saved using a WLED Panel instead of CCFL panel.
SUPER SAVING refers to how much power can be saved using the SUPER ENERGY SAVING
function.
NOTE
►
Menu
Description
LANGUAGE
To choose the language in which the control names are displayed.
POWER
INDICATOR
Use this function to set the power indicator on the front side of the monitor to ON or OFF.If you set
OFF, it will go off.
If you set ON at any time, the power indicator will automatically be turned on.
WHITE
BALANCE
If the output of the video card is different the required specifications,the color level may deteriorate
due to video signal distortion. Using this function, the signal level is adjusted to fit into the standard
output level of the video card in order to provide the optimal image.Activate this function when
white and black colors are present in the screen.
ORIGINAL RATIO
WIDE
Switch to full screen mode according to input image signal.
ORIGINAL
Change the input image signal ratio to original.
* This function works only if input resolution is lower than Monitor set ratio (16:9).
SUPER ENEYGY
SAVING
Sets the SUPER ENERGY SAVING function.
ON
Enables SUPER ENERGY SAVING you can save energy with this energy- efficient function
OFF
Disables SUPER ENERGY SAVING.
RESET
Resets the values of total energy consumption reduction and CO2 emission reduction
estimates.
FACTORY
RESET
Restore all factory default settings except"LANGUAGE." Press the
,
►
buttons to reset
immediately.
Summary of Contents for IPS225TX
Page 26: ......


