- 9 -
LGE Internal Use Only
Copyright © 2010 LG Electronics. Inc. All rights reserved.
Only for training and service purposes
- Adjust sequence
A
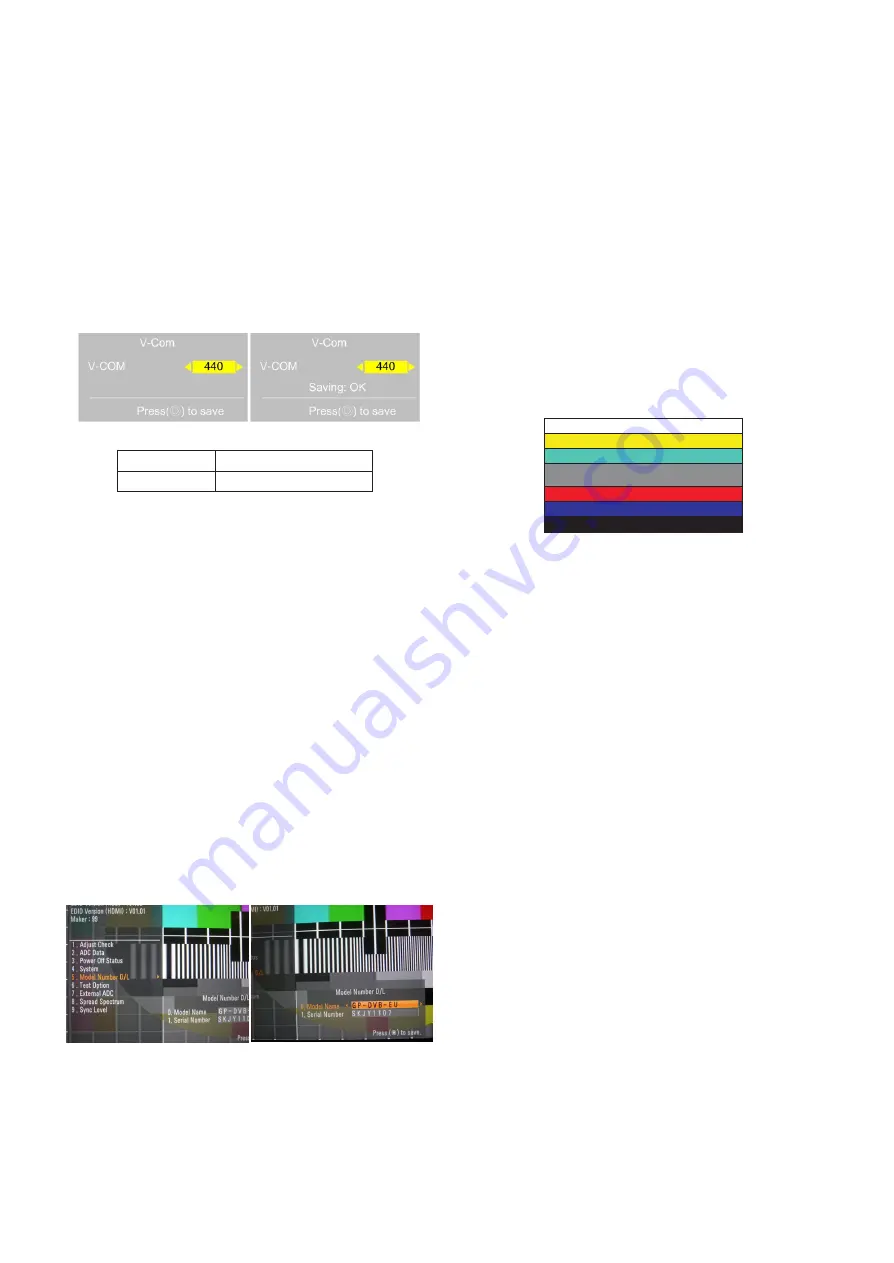
Press the PIP key of the ADJ remote control. (This PIP
key is hot key to enter the VCOM adjusting mode)
(Or After enter Service Mode by pushing “ADJ” key, then
Enter V-Com Adjust mode by pushing “
G
” key at “12. V-
Com”)
A
As pushing the right or the left button on the remote
control, And find the V-COM value Which is no or
minimized the Flicker.
(If there is no flicker at default value, Press the exit key
and finish the VCOM adjustment.)
A
Push the OK key to store value. Then the message
“Saving OK” is pop.
A
Press the exit key to finish VCOM adjustment.
3.6. Model name & serial number download
(1) Model name & Serial number D/L
A
Press “Power on” key of service remote control.(Baud
rate : 115200 bps)
A
Connect RS232 Signal Cable to RS-232 Jack.
A
Write Serial number by use RS-232.
A
Must check the serial number at Instart menu.
(2) Method & notice
A. Serial number download is using of scan equipment.
B. Setting of scan equipment operated by Manufacturing
Technology Group.
C. Serial number download must be conformed when it is
produced in production line, because serial number
download is mandatory by D-book 4.0
* Manual Download (Model Name and Serial Number)
If the TV set is downloaded by OTA or service man,
sometimes model name or serial number is initialized.(Not
always)
There is impossible to download by bar code scan, so It
need Manual download.
a. Press the ‘instart’ key of ADJ remote control.
b. Go to the menu ‘5.Model Number D/L’ like below photo.
c. Input the Factory model name(ex 42LE5500-CA) or Serial
number like photo.
d. Check the model name Instart menu -> Factory name
displayed (ex 42LE7500-CB)
e. Check the Diagnostics (DTV country only) -> Buyer model
displayed (ex 42LE7500-CB)
4. Manual Adjustment
4.1. ADC(GP2) Adjustment
4.1.1. Overview
ADC adjustment is needed to find the optimum black level and
gain in Analog-to-Digital device and to compensate RGB
deviation.
4.1.2. Equipment & Condition
1) Adjust Remocon
2) 801GF(802B, 802F, 802R) or MSPG925FA Pattern Generator
- Resolution :
480i, 720*480 (MSPG-925FA -> Model: 209, Pattern: 65)
- 480i
1080p, 1920*1080 (MSPG-925FA -> Model: 225, Pattern:
65) - 1080p
- Pattern : Horizontal 100% Color Bar Pattern
- Pattern level: 0.7 ± 0.1 Vp-p
- Image
3) Must use standard cable
4.1.3. Adjust method
(1) ADC 480i, 1080p Comp1
1) Check connected condition of Comp1 cable to the equipment
2) Give a 480i, 1080p Mode, Horizontal 100% Color Bar
Pattern to Comp1.
(MSPG-925FA -> Model: 209, Pattern: 65) - 480i
(MSPG-925FA -> Model: 225, Pattern: 65) - 1080p
3) Change input mode as Component1 and picture mode
as “Standard”
4) Press the In-start Key on the ADJ remote after at least 1
min of signal reception. Then, select 7. External ADC ->
1. COMP 1080p on the menu. Press enter key. The
adjustment will start automatically.
5) If ADC calibration is successful, “ADC RGB Success” is
displayed. If ADC calibration is failure, “ADC RGB Fail”
is displayed.
6) If ADC calibration is failure, after recheck ADC pattern or
condition retry calibration Error message refer to 5).
(2) ADC 1920*1080 RGB
1) Check connected condition of Component & RGB cable
to the equipment.
2) Give a 1920*1080 Mode, 100 % Horizontal Color Bar
Pattern to RGB port.
(MSPG-925 Series -> model: 126 , pattern: 65 )
3) Change input mode as RGB and picture mode as
“Standard”.
4) Press the In-start Key on the ADJ remote after at least 1
min of signal reception. Then, select 7. External ADC ->
1. COMP 1080p on the menu. Press enter key. The
adjustment will start automatically.
5) If ADC calibration is successful, “ADC RGB Success” is
displayed. If ADC calibration is failure, “ADC RGB Fail”
is displayed.
6) If ADC calibration is failure, after recheck ADC pattern or
condition retry calibration Error message refer to 5).
[Visual Adjust and control the Voltage level]
Model
V-CAM default value
47LE8500
435
Summary of Contents for INFINIA 47LE8500
Page 44: ......


