background image

10

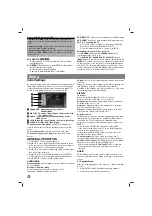
Playing an Audio CD or MP3/WMA file

This unit can play Audio CDs or MP3/WMA files.

MP3/ WMA/ Audio CD

Once you insert a cd with MP3/WMA files or Audio, a menu
appears on the TV screen.
Press 

v

V

to select a track/file and then press PLAY or

ENTER, and playback starts. You can use variable playback
functions. Refer to the page 6,7or 8.

ID3 TAG

When playing a file containing information such as track titles,
you can see the information by pressing DISPLAY.
[ Song,Title, Artist, Album, Year, Comment ]

-ID3 Tag will be operate in the MP3 file.

Tips:

Press MENU to move to the next page.

On a CD with MP3/WMA and JPEG, you can switch
MP3/WMA and JPEG. Press TITLE, and MUSIC or PHOTO
top of the menu is highlighted.

AUTO EQ is set for WMA/ MP3 file in the DVD/CD,USB
function.

Programmed Playback 

The program function enables you to store your favorite tracks
from any disc in the receiver memory. A program can contain 30
tracks.

1.

Insert a disc. Audio CD and MP3/WMA Discs: 

2.

Select a track on the “List”, and then press
PROG./MEMO.“

” icon appears on the display window

and then press ENTER to place the selected track on the
“Program” list. Repeat to place additional tracks on the list.

3.

Select the track you want to start playing on the “Program” list.
Press MENU to move to the next page.

4.

Press PLAY or ENTER to start. Playback begins in the order
in which you programmed the tracks. Playback stops after all
of the tracks on the “Program” list have played once.

5.

To resume normal playback from programmed playback,
select a track of AUDIO CD (or MP3/WMA) list and then
press PLAY.

Repeat Programmed Tracks 

1.

Press REPEAT when playing a disc. The repeat icon
appears.

2.

Press REPEAT to select a desired repeat mode.

• TRACK: repeats the current track

• ALL: repeats all the tracks on programmed list.

• Off(No display): does not play repeatedly.

Erasing a Track from “Program” List 

1.

Use 

v V

to select the track that you wish to erase from the

Program list.

2.

Press CLEAR. Repeat to erase additional tracks on the list.

Erasing the Complete Program List 

Press PROG./MEMO. and then, “

” icon will appear. 

Use

v

/

V

to select  “ Clear All” icon and then press ENTER.

Note:

- The programs are also cleared when the disc is removed.
- During playback,AUTO skip is not supported

Viewing a JPEG file 

This unit can play discs with JPEG files.
Before playing JPEG recordings, read the notes on JPEG
Recordings page 14.

1.

Insert a disc and close the tray.
The PHOTO menu appears on the TV screen.

2.

Press 

v

/

V

to select a folder, and then press ENTER. A list

of files in the folder appears. If you are in a file list and want
to return to the previous Folder list, use the 

v

/

V

buttons on

the Remote to highlight 

and press ENTER.

3.

If you want to view a particular file, press 

v

/

V

to highlight a

file and press ENTER or PLAY. While viewing a file, you can
press STOP to move to the previous menu (JPEG menu).

Tips:

There are three Slide Speed options 

: > (Slow), >>

(Normal), >>> (Fast) .Use 

v

/

V

/

b

/

B

to highlight the Speed.

Then, use 

b

/

B

to select the option you want to use and then

press ENTER. 

Slide Show : 

Use 

v V b B

to highlight the 

(Slide Show)

then press ENTER.

Still Picture :

1.Press PAUSE/STEP during the slide show. The DVD/CD

Receiver will now go into the PAUSE mode.

2.To return to the slide show, press PLAY or press PAUSE/STEP

again.

Playing an Audio CD or MP3/WMA/JPEG/ DivX file

You can preset 50 stations for FM Before tuning, make sure that
you have turned down the volume.
1.

Press 

FUNCTION

on the Remote Control until FM  appears

in the display window.

2.

Press and hold TUN.(-/+) for about two seconds until the
frequency indication starts to change, then release.
Scanning stops when the DVD/CD Receiver tunes in a 
station.

3.

Press PROG./MEMO. on the Remote Control.
A preset number will flash in the display window.

4.

Press /- on the Remote Control to select the
preset number you want.

5.

Press PROG./MEMO. on the Remote Control again.
The station is stored. 

6.

Repeat steps 3 to 6 to store other stations.

To tune in a station with a weak signal 

Press TUN.(-/+) repeatedly in step 3 to tune in the station
manually.

To clear all the stored stations 

Press and hold PROG./MEMO. for about two seconds and “
ERASE ALL” appears in the display window and then press
PROG./MEMO. again, the stations are cleared.

If you have accidentally entered into the "ERASE ALL" mode
and you do not wish to clear the memory, do not press any
key. After a few seconds, the "ERASE ALL" will go off by itself
and change to normal mode.

Note:

If all stations have already been entered, the FULL

message will appear in the display window for a moment and
then a preset number will flash. To change the preset number,
follow steps 5-6 as above.

Presetting the Radio Stations

Summary of Contents for HT313SU

Page 1: ...ÖëàÇÖê Lees deze handleiding aandacht door voordat u dit toestel gebruikt RUSSIAN DVD CD UZTVîRîJS Pirms uzsākt iekārtas izmantošanu rūpīgi iepazīstieties ar šīs rokasgrāmatas saturu LATVIAN DVD CD Grotuvas Prieš naudodami įrenginį atidžiai perskaitykite instrukciją LITHUANIAN DVD CD VASTUVÕTJA Lugege enne seadme kasutamist hoolikalt kasutusjuhendit ESTONIAN ...

Page 2: ...dically examine the cord of your appliance and if its appearance indicates damage or deterioration unplug it discontinue use of the appliance and have the cord replaced with an exact replacement part by an authorized servicer Protect the power cord from physical or mechanical abuse such as being twisted kinked pinched closed in a door or walked upon Pay particular attention to plugs wall outlets a...

Page 3: ...travel to reach your set listening point This allows the sound from each speaker to reach the listener at the same time Press b B to adjust the Distance of the selected speaker Test Press b B to test the signals of each speaker Adjust the volume to match the volume of test signals memorized in the system Front Left L Center Front Right R Rear Right R Rear Left L SubWoofer QUICK SETUP GUIDE Speaker...

Page 4: ...s may not be played on the unit For DVD R RW Discs only ones rewritten in video mode and finalized are supported on this player When there are a lot of data in a disc it may take longer to be read on this player than on other model Do not attach any seal or label to either side the labeled side or the recorded side of a disc Do not use irregularly shaped CDs e g heart shaped or octagonal It may re...

Page 5: ...ure appears on the screen Please read owner s manual for TV then set the resolution that your TV can accept Composit Video connection Connect the MONITOR jack from the DVD CD Receiver to the Video IN jack on the TV using the video cable supplied V Antenna Connection Connect the supplied FM antenna for listening to the radio Connect the FM Wire aerial to the FM aerial connector Notes Be sure to ful...

Page 6: ...10 10 11 11 12 12 1 2 3 4 5 6 7 8 Don t extract the USB device while operating Music files MP3 WMA image files JPEG and Video files can be played This unit cannot use a USB HUB Recommended Memory Cards Compact Flash Card CFC Micro Drive MD Smart Media Card SMC Memory Stick MS Secure Digital Card SD Multimedia Card MMC Memory Stick Pro MS Pro Compatible with FAT16 FAT32 Only use the memory cards re...

Page 7: ...REC z USB Direct Recording This function enable you to record music to a connected USB storage device from AUDIO CD Before USB recordings read the notes on the page 14 1 Insert a USB device suffiicent free space to the USB port on the unit 2 Select DVD CD to record from by pressing FUNCTION button on the remote control AUDIO CD Press v V to select the track file you want 3 Press REC z on the remot...

Page 8: ...for connection to a TV or monitor that is compatible with a progressive scan signal set Progressive Scan to On Press ENTER If you not press ENTER within 10 seconds it will be OFF If you have no progressive scan TV in the state progressive scan on will not appear the screen so then press and hold STOP button on the remote control 5seconds it will be change OFF TV Output Select Select an option acco...

Page 9: ...TER press CLEAR 3 Select a rating from 1 to 8 using the v V buttons Rating 1 8 Rating one 1 has the most restrictions and rating eight 8 is the least restrictive Unlock If you select unlock parental control is not active and the disc plays in full 4 Press ENTER to confirm your rating selection then press SETUP to exit the menu Password You can enter or change password 1 Select Password on the LOCK...

Page 10: ...ed Viewing a JPEG file This unit can play discs with JPEG files Before playing JPEG recordings read the notes on JPEG Recordings page 14 1 Insert a disc and close the tray The PHOTO menu appears on the TV screen 2 Press v V to select a folder and then press ENTER A list of files in the folder appears If you are in a file list and want to return to the previous Folder list use the v V buttons on th...

Page 11: ...er memorizes the last scene from the last disc that is viewed The last scene remains in the memory even if you remove the disc from the receiver or switch off the receiver If you load a disc that has the scene memorized the scene is automatically recalled Note This receiver does not memorize the scene of a disc if you switch off the receiver before commencing to play the disc System Select You mus...

Page 12: ...8376 Somali 8379 Spanish 6983 Sudanese 8385 Swahili 8387 Swedish 8386 Tagalog 8476 Tajik 8471 Tamil 8465 Tatar 8484 Telugu 8469 Thai 8472 Tibetan 6679 Tigrinya 8473 Tonga 8479 Turkish 8482 Turkmen 8475 Twi 8487 Ukrainian 8575 Urdu 8582 Uzbek 8590 Vietnamese 8673 Volapük 8679 Welsh 6789 Wolof 8779 Xhosa 8872 Yiddish 7473 Yoruba 8979 Zulu 9085 Language Codes Use this list to input your desired langu...

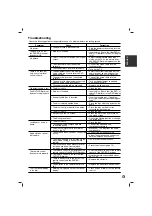
Page 13: ...nted at the remote sensor of the DVD CD Receiver The remote control is too far from the DVD CD Receiver There is an obstacle in the path of the remote control and the DVD CD Receiver The batteries in the remote control are flat Nothing is displayed on the front panel display Correction Plug the power cord securely into the wall outlet Insert a disc Check that the DVD or audio CD indicator in the D...

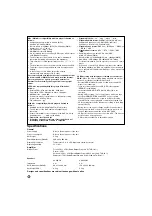
Page 14: ...PCM MP3 WMA Sampling frequency within 32 48 kHz MP3 within 24 48kHz WMA Bit rate within 32 320kbps MP3 40 192kbps WMA Max bitrate USB 4Mbps CD 4Mbps DVD 7Mbps For Discs formatted in Live file system you can not it on this player If the name of movie file is different from that of the subtitle file during playback of a DivX file subtitle may not be display If you play a DivX file differ from DivXsp...

Reviews: