


27
Installation
Ins
talla
tion
3
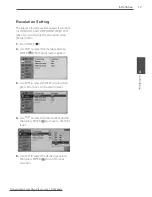
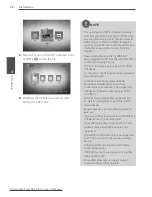
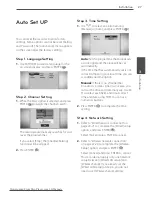
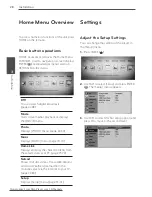
Auto Set UP
You can reset the recorder to all its factory
settings. Some options cannot be reset (Rating
and Password). The [Auto Setup] menu appears
on the screen after the factory settings.
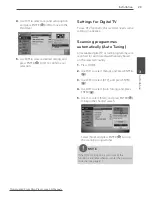
Step 1. Language Setting
1.
Use
U
/
u
/
I
/
i
to select a language for the
on-screen display, and press ENTER ( ).
Step 2. Channel Setting
1.
While the Start option is selected, and press
ENTER ( ) to begin the channel search.
The recorder automatically searches for and
saves the programmes.
If you select [Stop], the [Channel Setting]
function will be skipped.
2.
Press ENTER ( ).
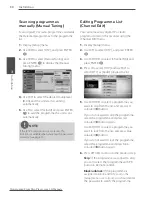
Step 3. Time Setting
1.
Use
I
/
i
to select an option among
[Manual] or [Auto], and press ENTER ( ).
Auto:
Set the programme that broadcasts
a clock signal and the clock will be set
automatically.
If the time that has automatically set is not
correct comparing your local time, you can
set additional time option.
Manual:
If there is no channel that
broadcasts a clock signal in your area, you
can set the time and date manyally. Use
U
/
u
to select each field, and input correct
time and date using
I
/
i
. You can use
numerical buttons.
2.
Press ENTER ( ) to complete the time
setting.
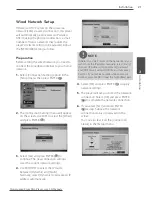
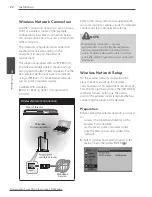
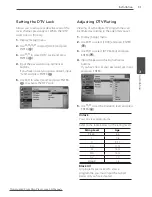
Step 4. Network Setting
1.
Refer to “Wired network connection” on
page 20-21 to complete the [Wired] setup
option, and press ENTER ( ).
Select [No] and press ENTER to cancel.
2.
Refer to “Wireless network connection”
on page 22-24 to complete the [Wireless
Setup] option, and press ENTER ( ).
Select [Cancel] and press ENTER to cancel.
This recorder can apply only one network
setup between [Wired LAN setup] and
[Wireless Setup]. If you already set the
[Wired LAN setup] at step 6, you do not
need to set [Wireless Setup] setting.
Downloaded From Disc-Player.com LG Manuals


