background image

A8

On Screen Display(OSD) Selection and Adjustment 

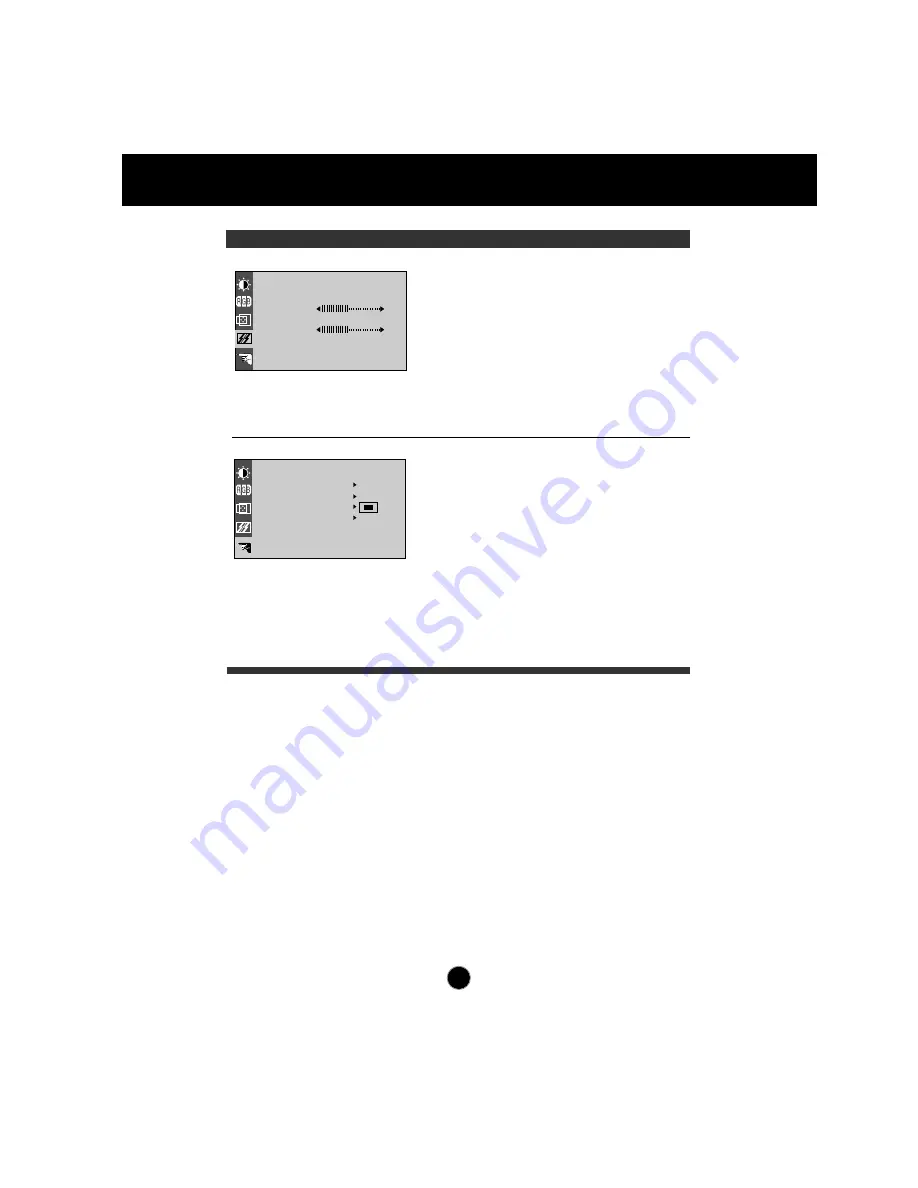
OSD Adjust

Description

TRACKING

CLOCK

PHASE

LANGUAGE

ENGLISH
FULL

OSD POSITION

4 8 . 3 k H z   /   6 0 . 0 H z

P R E S E T   M O D E

BEEP

ON

IMAGE SIZE        

SETUP

To minimize any vertical bars or
stripes visible on the screen
background.The horizontal screen
size will also change.

To adjust the focus of the display.
This item allows you to remove any
horizontal noise and clear or sharpen
the image of characters.

To choose the language in which the
control names are displayed.

This function displays the image in its
original size or enlarged size so as to
fit in the full screen of the LCD panel.

To adjust position of the OSD window
on the screen.

To select beep ON or OFF.

LANGUAGE

IMAGE SIZE

OSD POSITION

BEEP

CLOCK

PHASE

Summary of Contents for FLATRON LCD 575MM

Page 1: ...e speaker you can easily separate speakers from the monitor and place them where you want We accomplished to adapt the advanced design and technology to the monitor Soft touch buttons on the front panel are simple and allow you to conveniently adjust a variety of image controls The absolute flat screen and screen surface treatment eliminate distracting glares It supports resolutions up to 1024x768...

Page 2: ...rough a Macintosh adapter and then tighten screws Connect the plug from the AC adapter into the base of the monitor Connect one end of the AC power cord to the AC adapter and the other end to a properly grounded AC outlet that is easily accessible and close to the monitor Power on the computer then the monitor If you see the NO SIGNAL message check the signal cable and connectors After using the s...

Page 3: ...io cable from the Speaker s AUDIO IN port to the audio output port of your computer s sound card A3 Connecting the Monitor 3 4 2 1 24V AUDIO IN AUDIO L OUT 24 V AUDOI DC OUT 2 4 3 PC 1 4 After connecting both cables fix them with cable fixed holder extra cable fixed holders are shipped with the speaker 24V AUDIO IN AUDIO L OUT 24V AUDOI DC OUT Cable fixed holder 5 Turn on the speaker with power bu...

Page 4: ...of Controls Rear View Front View SOUND SOUND AUDOI DC OUT 2 4 V AUDOI DC OUT A U D O I D C O U T Audio DC Power Cable Stand cover Audio Cable Power Button Power Indicator OSD Button Buttons AUTO SET Button Audio Buttons Speaker ...

Page 5: ...on This indicator lights up green when the monitor operates normally If the monitor is in DPM Energy Saving mode stand by suspend power off this indicator color changes to amber Power Indicator Use this button to turn the monitor on or off Power Button Use this button to enter a selection in the on screen display AUTOadjustmentfunction TouchtheAUTO SETbuttonbeforeusingOSDmenu Thisbuttonisfortheaut...

Page 6: ...Screen Display follow these steps Press the OSD Button then the main menu of the OSD appears To acces a control use the or Buttons When the icon you want becomes highlighted press the AUTO SET Button Use the Buttons to adjust the item to the desired level Accept the changes by pressing the AUTO SET Button Exit the OSD by Pressing the OSD Button A6 On Screen Display OSD Control Adjustment NOTE Allo...

Page 7: ...NTRAST 9300K 6500K COLOR PRESET RED GREEN BLUE 61 39 POSITION Brightness Used to adjust the brightness of the screen Contrast Adjust the display to the contrast desired PRESET RED GREEN BLUE 9300K 6500K To appear the displays color temperature 9300K Slightly bluish white 6500K Slightly reddish white To set your own color levels To set your own color levels To set your own color levels Vertical Pos...

Page 8: ... screen size will also change To adjust the focus of the display This item allows you to remove any horizontal noise and clear or sharpen the image of characters To choose the language in which the control names are displayed This function displays the image in its original size or enlarged size so as to fit in the full screen of the LCD panel To adjust position of the OSD window on the screen To ...

Page 9: ...re new video modes the monitor replaces the information in the user modes starting with mode 17 Display Modes Resolution Horizontal Freq kHz Vertical Freq Hz 1 2 3 4 5 6 7 8 9 10 11 12 13 14 15 16 640 x 350 720 x 400 640 x 480 640 x 480 640 x 480 640 x 480 800 x 600 800 x 600 800 x 600 800 x 600 800 x 600 832 x 624 1024 x 768 1024 x 768 1024 x 768 1024 x 768 31 47 31 47 31 47 35 00 37 50 43 27 35 ...

Page 10: ...y of the signal from the video card is outside the operating range of the monitor Horizontal Frequency 31kHz 69kHz Vertical Frequency 56Hz 85Hz Use the graphics board s utility software to change the frequency setting Refer to the manual for graphics board You can change the setup to the supported resolution using the Safe Mode Press the F8 key during booting the system The power LED is illuminate...

Page 11: ...nce 8Ω Normal Max 36W Stand by Suspend 3W Power Off 3W Width 39 4 cm 15 5 inches without speaker 52 2 cm 20 6 inches Height 37 87 cm 14 9 inches Depth 16 18 cm 6 37 inches DC 24V 1 5A Input AC 100 240V 50 60Hz 1 2A 0 6A Output DC 24V 1 5A Net 5 1 kg 11 24 lbs without speaker 6 1 kg 13 4 lbs Down 5 Up 30 Operating condition Temperature 10 C to 35 C Humidity 10 to 80 non condensing Storage condition...

Reviews: