background image

41

ENGLISH

$MJDLi4JHO*OwJOUIFVQQFSSJHIUDPSOFSPGUIFXFCQBHF

0OUIFMPHJOQBHFCFMPXUIF*%BOEQBTTXPSECPYFTDMJDLUIF

.FNCPJOwCVUUPO

0OUIFOFYUQBHFZPVNVTUBHSFFUPUIFUFSNTPGVTFBOEUIF

QSJWBDZTUBUFNFOU$MJDLi$POGJSNw

/FYUJOUIF*%CPYFOUFSZPVSFNBJMBEESFTT5IJTXJMMCFZPVS

user ID. You will receive a confirmation email for activating the 
account at the email address. This ID will be entered on the ID 
and password screen on your appliance when registering the 
appliance.

&OUFSBQBTTXPSE1BTTXPSETBSFDBTFTFOTJUJWFBOEZPVXJMM

need to enter this password on your appliance when you 

SFHJTUFSUIFBQQMJBODF5IFQBTTXPSETIPVMECFDIBSBDUFST

and you should make note of it for later use.

&OUFSUIFTFDVSJUZDIBSBDUFSTJOUPUIFCPEUPUIFSJHIU

$MJDLUIFi$POGJSNwCVUUPO5IFTZTUFNXJMMTFOEZPVBOFNBJM

containing a link to confirm your identity for the account.

$MJDLUIFMJOLJOUIFDPOGJSNBUJPOFNBJMBOEUIFXFCTJUFXJMM

display a confirmation page. Your account is now setup.  
SMART APPLIANCE CONNECTIVITY Website home screen may 
change. 

Your appliance now does more than just laundry. Once it is 
connected to the internet through your home Wi-Fi network, it 
can check for and download software updates for its operating 
system, or provide you with a list of extra cycles available for 
download. You can even check the progress of a cycle with the LG 
Smart Laundry application for your smart phone. This same smart 
phone application lets you troubleshoot problems by recording 
and analyzing data from the appliance. The appliance is also ready 
for the smart grid when your utility installs smart grid equipment; 
it can adjust its operating times based on when electricity prices 
are lower or delay operation when the demand for electricity is 
high.

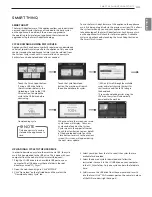
130'*-&4&561 *%BOE1"44803%TFUVQ

In order to use the connectivity features of your appliance, you 
must first create a user ID and password at the LG Smart ThinQ 
website (http://us.smartthinq.com). From your home computer, 
or other computer with internet access, open the Smart ThinQ 
website and follow the instructions below for creating your ID and 
password.

CONNECTIVITY OVERVIEW

Website home screen may change.

SMART APPLIANCE CONNECTIVITY

Summary of Contents for DLEX6001W

Page 1: ...fore beginning installation read these instructions carefully This will simplify installation and ensure that the dryer is installed correctly and safely Leave these instructions near the dryer after installation for future reference P No MFL62512858 www lg com ENGLISH ESPAÑOL ...

Page 2: ...s that are equipped with Smart Grid equipment SMART MESSAGE When the cycle is complete or the appliance has problems you have the option of receiving push notifications on your smart phone Refer to the modem manual for detailed information on Smart ThinQ LARGE CAPACITY STAINLESS STEEL DRUM The ultra large stainless steel drum offers superior durability EASY ACCESS REVERSIBLE DOOR The wide opening ...

Page 3: ...ance of injury and tell you what can happen if the instructions are not followed t P OPU JOTUBMM B DMPUIFT ESZFS XJUI GMFYJCMF QMBTUJD WFOUJOH NBUFSJBMT G GMFYJCMF NFUBM GPJM UZQF EVDU JT JOTUBMMFE JU NVTU CF PG a specific type identified by the appliance manufacturer as suitable for use with clothes dryers Flexible venting materials are known to collapse be easily crushed and trap lint These cond...

Page 4: ... ESZFS PS BUUFNQU BOZ TFSWJDJOH VOMFTT TQFDJGJDBMMZ SFDPNNFOEFE JO UIJT 6TF BOE BSF VJEF PS JO QVCMJTIFE VTFS SFQBJS JOTUSVDUJPOT UIBU ZPV understand and have the skills to carry out t P OPU UBNQFS XJUI DPOUSPMT t Before the dryer is removed from service or discarded remove the door to the drying compartment t P OPU BMMPX DIJMESFO UP QMBZ PO PS JO UIF ESZFS Close supervision of children is necessa...

Page 5: ...ed and sized power circuit to avoid electrical overload Improper power circuit can melt creating electric shock and or fire hazard t 3FNPWF BMM QBDLJOH JUFNT BOE EJTQPTF PG BMM TIJQQJOH materials properly Failure to do so can result in death explosion fire or burns t 1MBDF ESZFS BU MFBTU JODIFT BCPWF UIF GMPPS GPS B HBSBHF installation Failure to do so can result in death explosion fire or burns t...

Page 6: ...Punctured ductwork can cause a fire if it collapses or becomes otherwise restricted in use or during installation t VDUXPSL JT OPU QSPWJEFE XJUI UIF ESZFS BOE ZPV TIPVME obtain the necessary ductwork locally The end cap should have hinged dampers to prevent backdraft when the dryer is not in use Failure to follow these instructions can result in fire or death t 5IF FYIBVTU EVDU NVTU CF JODIFT DN J...

Page 7: ...erly grounded outlet MFDUSJD TIPDL DBO SFTVMU JG UIF ESZFS JT OPU QSPQFSMZ HSPVOEFE BWF UIF XBMM PVUMFU BOE DJSDVJU DIFDLFE CZ B RVBMJGJFE electrician to make sure the outlet is properly grounded Failure to follow these instructions can create an electric shock hazard and or a fire hazard t The dryer should always be plugged into its own individual electrical outlet which has a voltage rating that...

Page 8: ...OMES 26 FINAL INSTALLATION CHECK 27 INSTALLATION TEST EXHAUST CHECK 29 HOW TO USE 29 BASIC OPERATION 30 CYCLE GUIDE 32 SORTING LOAD 32 LOADING THE DRYER 32 CHECK THE LINT FILTER BEFORE EVERY LOAD 33 CYCLE SETTINGS BUTTONS 34 TIME AND STATUS SCREEN 35 MENU OPTIONS BUTTONS AND SCREENS 37 CYCLE OPTIONS AND SPECIAL FEATURES 38 FILLNG THE STEAM FEEDER 40 SMART APPLIANCE CONNECTIVITY 40 SMART THINQ OPER...

Page 9: ...SWJDF BU JO BOBEB JG BOZ BDDFTTPSJFT BSF NJTTJOH t PS ZPVS TBGFUZ BOE GPS FYUFOEFE QSPEVDU MJGF VTF POMZ BVUIPSJ FE DPNQPOFOUT 5IF NBOVGBDUVSFS JT OPU SFTQPOTJCMF GPS QSPEVDU malfunction or accidents caused by the use of separately purchased unauthorized components or parts t 5IF JNBHFT JO UIJT HVJEF NBZ CF EJGGFSFOU GSPN UIF BDUVBM DPNQPOFOUT BOE BDDFTTPSJFT BOE BSF TVCKFDU UP DIBOHF CZ UIF NBOVG...

Page 10: ...6550 Touch to turn the dryer ON or OFF Touching the POWER button during a cycle will cancel that cycle and any dry settings will be lost The lid will unlock after a brief pause A 6 015 0 6550 4 These buttons will take you to special feature and settings screens D 4 The CYCLE screens display cycle names and icons the default cycle is Cotton Normal Touch the left or right arrows to scroll through th...

Page 11: ...evel Temperature and Dry Time of the cycle The bar to the left of each indicator shows the number of adjustments available E 4 7 After modifying a cycle setting you have the option of saving it as a custom cycle and adding it to the cycle screens C 015 0 4 Add available options to the cycle Not all options are available with every cycle The options that are not available will be dimmed F 5 0 03 5 ...

Page 12: ... choosing the proper location Leveling the dryer Connecting Electric Dryers Electric Dryer Type Venting the Dryer Plugging in the power cord and grounding Connecting Gas Dryers Gas Dryer Type Duct check test Refer to page 27 INSTALLATION INSTRUCTIONS 120V 240V Test run ...

Page 13: ...e dryer See MFDUSJDBM 3FRVJSFNFOUT t TUVSEZ GMPPS UP TVQQPSU UIF UPUBM ESZFS XFJHIU PG MCT kg The combined weight of a companion appliance should also be considered t No other fuel burning appliance can be installed in the same closet as a dryer t EEJUJPOBM TQBDJOH TIPVME CF DPOTJEFSFE GPS FBTF PG JOTUBMMBUJPO and servicing t EEJUJPOBM DMFBSBODFT NJHIU CF SFRVJSFE GPS XBMM EPPS BOE GMPPS moldings ...

Page 14: ... drying performance it must be level To minimize vibration noise and unwanted movement the floor must be a perfectly level solid surface 1PTJUJPO UIF ESZFS JO UIF GJOBM MPDBUJPO 1MBDF B MFWFM BDSPTT UIF top of the dryer t MM GPVS MFWFMJOH GFFU NVTU SFTU TPMJEMZ PO UIF GMPPS FOUMZ QVTI on the top corners of the dryer to make sure that the dryer does not rock from corner to corner If you are install...

Page 15: ...surface to prevent damage to the door or the work surface 8JUI UIF EPPS PO B QSPUFDUFE TVSGBDF SFNPWF UIF TDSFXT on each side of the door and lift off the inner door frame using a flat blade screwdriver Remove the latch hook and blank and move them to the opposite side Reversing the door 3FNPWF UIF TDSFXT TFDVSJOH UIF IJOHFT UP UIF EPPS GSBNF Remove the two plastic cover caps Reinstall the hinges ...

Page 16: ... venting is not available on gas models Press the adapter duct onto the blower housing and secure to the base of the dryer as shown 1SFBTTFNCMF B JODIFT DN FMCPX UP UIF OFYU JODIFT DN EVDU TFDUJPO BOE TFDVSF BMM KPJOUT XJUI EVDU UBQF F sure that the male end of the elbow faces AWAY from the dryer Insert the elbow duct assembly through the side opening and press it onto the adapter duct Secure in p...

Page 17: ...t should be kept as short as QPTTJCMF BLF TVSF UP DMFBO BOZ PME EVDUT CFGPSF JOTUBMMJOH your new dryer Failure to follow these instructions can result in fire or death t 3JHJE PS TFNJSJHJE NFUBM EVDUJOH JT SFDPNNFOEFE GPS VTF CFUXFFO UIF ESZFS BOE UIF XBMM O TQFDJBM JOTUBMMBUJPOT when it is impossible to make a connection with the above SFDPNNFOEBUJPOT B 6 MJTUFE GMFYJCMF NFUBM USBOTJUJPO EVDU may...

Page 18: ... to maximize drying performance and reduce lint buildup and condensation in the ductwork Ductwork and fittings are NOT included and must be purchased separately t 6TF JODI DN EJBNFUFS SJHJE PS TFNJSJHJE NFUBM ductwork t 5IF FYIBVTU EVDU SVO TIPVME CF BT TIPSU BT QPTTJCMF t 6TF BT GFX FMCPX KPJOUT BT QPTTJCMF t 5IF NBMF FOE PG FBDI TFDUJPO PG FYIBVTU EVDU NVTU QPJOU away from the dryer t 6TF EVDU U...

Page 19: ... any pressure testing of the gas supply Failure to do so can result in fire explosion or death t 4VQQMZ MJOF SFRVJSFNFOUT Your laundry room must have a rigid gas supply line to your ESZFS O UIF 6OJUFE 4UBUFT BO JOEJWJEVBM NBOVBM TIVUPGG WBMWF 645 CF JOTUBMMFE XJUIJO BU MFBTU GU N PG UIF ESZFS JO BDDPSEBODF XJUI UIF BUJPOBM VFM BT PEF 4 PS BOBEJBO HBT JOTUBMMBUJPO DPEF 4 1 cľ JODI 15 pipe plug must...

Page 20: ...e to do so can result in fire explosion or death t BT ESZFST 645 FYIBVTU UP UIF PVUEPPST Failure to do so can result in fire explosion or death Connecting the Gas Supply BLF TVSF UIBU UIF HBT TVQQMZ UP UIF MBVOESZ SPPN JT UVSOFE OFF Confirm that the type of gas available in your laundry room is appropriate for the dryer The dryer is prepared for Natural Gas with a 8 inch NPT gas connection 3FNPWF ...

Page 21: ... DPEFT MMPX TVGGJDJFOU TMBDL JO wiring so dryer can be moved from its normal location when necessary Failure to do so can result in fire explosion or death t 5IF QPXFS DPSE QJHUBJM DPOOFDUJPO CFUXFFO XBMM SFDFQUBDMF BOE ESZFS UFSNJOBM CMPDL 4 05 TVQQMJFE XJUI ESZFS 5ZQF PG pigtail and gauge of wire must conform to local codes and with instructions on the following pages Failure to follow these ins...

Page 22: ...GUFS BOVBSZ t 6 MJTUFE TUSBJO SFMJFG JT SFRVJSFE 3FNPWF UIF UFSNJOBM CMPDL BDDFTT DPWFS PO UIF VQQFS CBDL PG the dryer Install a UL listed strain relief into the power cord through hole then thread a UL listed 7 XJSF 8 NJOJNVN DPQQFS conductor power cord through the strain relief t 6TF B 7 6 MJTUFE QPXFS DPSE XJUI 8 minimum copper conductor and closed loop or forked terminals with upturned ends 5S...

Page 23: ... GSPN UIF HSPVOE XJSF VU PGG BQQSPYJNBUFMZ cĸ JODIFT DN GSPN UIF PUIFS UISFF XJSFT BOE TUSJQ JODI DN JOTVMBUJPO GSPN FBDI XJSF FOE UIF ends of the three shorter wires into a hook shape 3FNPWF UIF UFSNJOBM CMPDL BDDFTT DPWFS PO UIF VQQFS CBDL PG the dryer Install a UL listed strain relief into the power cord UISPVHI IPMF UIFO UISFBE UIF QPXFS DBCMF QSFQBSFE JO 4UFQ through the strain relief t 6TF 6...

Page 24: ... OFX DPOTUSVDUJPO BGUFS BOVBSZ t 6 MJTUFE TUSBJO SFMJFG JT SFRVJSFE 3FNPWF UIF UFSNJOBM CMPDL BDDFTT DPWFS PO UIF VQQFS CBDL PG the dryer Install a UL listed strain relief into the power cord through hole then thread a UL listed 7 XJSF 8 NJOJNVN DPQQFS conductor power cord through the strain relief t 6TF B 7 6 MJTUFE QPXFS DPSE XJUI 8 minimum copper conductor and closed loop or forked terminals wi...

Page 25: ...RVJSFE 3FNPWF cĸ JODIFT DN PG UIF PVUFS DPWFSJOH GSPN UIF XJSF 4USJQ JODI DN JOTVMBUJPO GSPN FBDI XJSF FOE UIF FOET PG the three wires into a hook shape 3FNPWF UIF UFSNJOBM CMPDL BDDFTT DPWFS PO UIF VQQFS CBDL PG the dryer Install a UL listed strain relief into the power cord UISPVHI IPMF UIFO UISFBE UIF QPXFS DBCMF QSFQBSFE JO 4UFQ through the strain relief t 6TF 6 MJTUFE XJSF 8 NJOJNVN DPQQFS co...

Page 26: ...SUBOU UIBU UIF DMFBSBODF PG UIF EVDU GSPN BOZ DPNCVTUJCMF DPOTUSVDUJPO CF BU MFBTU JODIFT DN BOE XIFO venting the dryer to the outdoors the dryer can be installed with B DMFBSBODF PG JODI DN BU UIF TJEFT BOE CBDL PG UIF ESZFS t 1MFBTF CF BXBSF UIBU WFOUJOH NBUFSJBMT BSF OPU TVQQMJFE XJUI the dryer You should obtain the venting materials necessary for proper installation Final installation check On...

Page 27: ...kages and restrictions in dryer ductwork Keeping ductwork clean of lint buildup and free of restrictions allows clothes to dry faster and reduces energy use 5P BDUJWBUF UIF OTUBMMBUJPO UFTU 5PVDI 4FUUJOH Touch Installation 5PVDI MPX IFDL 5PVDI 45 35 1 64 NOTE The dryer should be cool before starting this test If the dryer was warmed up during installation run the AIR DRY cycle for a few minutes to...

Page 28: ...er has tripped or power outage has occurred t Check the power supply or the connection of power cord to the terminal block Refer to the Connecting Electric Dryers section of this manual for complete instructions t 3FTFU DJSDVJU CSFBLFS PS SFQMBDF GVTF Do not increase the fuse capacity If the problem is a circuit overload have it corrected by a qualified electrician Lint buildup or blockage NOTE Wh...

Page 29: ...e door is opened 0 5 3 3 Load the dryer with the wet laundry from the washer If the load is extra large you may need to divide it into smaller loads for proper performance and fabric care Be sure to remove items that should not be dried in the dryer 5 5 5 3 If the lint filter has not already been cleaned lift out the filter and remove the lint from the last load This will help ensure the fastest a...

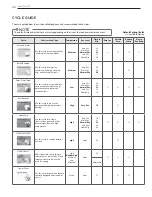
Page 30: ...ery Dry More Dry PSNBM SZ Less Dry Damp Dry Å Å Å Å Anti Bacterial Use this cycle to reduce the bacteria with high temperature heating High 7FSZ SZ Å Heavy Duty Use this cycle for durable items such as jeans and other heavyweight items at a high temperature High Very Dry More Dry PSNBM SZ Less Dry Damp Dry 54 Å Å Å Å STEAM SANITARY Use this cycle to sanitize harmful bacteria High None Å STEAM FRES...

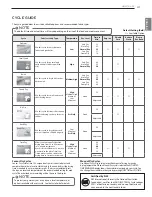
Page 31: ...ed time remaining will be shown in the display NOTE To protect your garments not every dryness level temperature or option is available with every cycle See the Cycle Guide for details Cycle BCSJD PS PBE 5ZQF Temperature SZ FWFM Time in JO BTZ SPO Wrinkle Care 3FEVDF Static BNQ SZ FFQ Delicates Use this cycle for knits delicate fabrics and synthetics PX Very Dry More Dry PSNBM SZ Less Dry Damp Dry...

Page 32: ...e different care requirements and some fabrics will dry more quickly than others Loading the Dryer WWARNING To reduce the risk of fire electric shock or injury to persons when using this appliance follow basic precautions including the following t IFDL BMM QPDLFUT UP NBLF TVSF UIBU UIFZ BSF FNQUZ UFNT such as clips pens coins and keys can damage both your dryer and your clothes Flammable objects s...

Page 33: ...5 1 0 530 Adjusts the temperature setting from AIR ONLY to EXTRA HIGH This allows precise care of your fabrics and garments Temperature setting is not adjustable in AUTO DRY cycles B 5 3 MMPXT ZPV UP NBOVBMMZ TFMFDU PS NJOVUFT of dry time Use this cycle for small loads or to remove wrinkles C 3 7 Sets the level of dryness for the selected AUTO DRY cycle Use this feature to adjust the dryness of th...

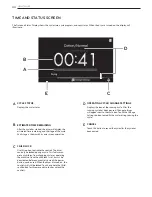
Page 34: ...ocked during a cycle This feature can prevent children from changing cycles or operating the machine Once the child lock is set it must be deactivated before any controls except the power button can be used When the dryer is turned on the controls will still be locked Touch and hold the Child Lock button for three seconds to lock or unlock the controls C 01 3 5 4 55 4 Displays the icon of the runn...

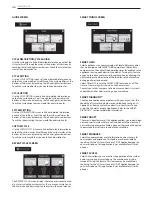
Page 35: ...rt meter you will need to contact the utility company for JOGPSNBUJPO SFHBSEJOH UIF TFU VQ PG UIF JH FF NPEFN BOE UIF smart grid features Your utility company can provide you with information regarding the features and capabilities of the meter and the utility You will need to work with your utility for initial setup These buttons are used for setup connectivity and on screen guides 4 55 4 4 3 4 7...

Page 36: ... dryer using your smart phone The machine can also be turned off using this feature This feature may be available by TFBSDIJOH GPS UIF i 4NBSU BVOESZ 8w QQMJDBUJPO BQQ PO your smart phone This application is not available for all smart phones 6 4 3 4 3 15 0 6 Use the cycle guide to find out detailed information on each of the LG cycles Scroll through the cycles at the bottom of the screen by touch...

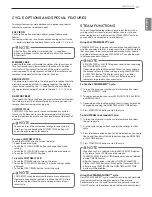
Page 37: ...ent wrinkles if the clothes are not removed immediately after the cycle has finished 3 6 45 5 This option uses steam late in the drying cycle to reduce the static electricity caused by dry fabrics rubbing together Change the steam time by touching the Load Items buttons to display UIF BQQSPYJNBUF OVNCFS PG BSUJDMFT JO UIF MPBE PS 1 3 1 If you touch the Damp Dry Beep the dryer will emit a chime whe...

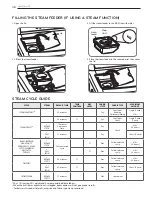
Page 38: ...selected cycle MCT UFNT EASY IRON Å Wet Follow selected cycle MCT UFNT TIME DRY REDUCE STATIC NJOVUFT Å Wet Follow selected temp MCT UFNT EASY IRON NJOVUFT Å Wet Follow selected temp 4IJSUT FBDI SPORTS WEAR REDUCE STATIC NJOVUFT Wet Sports wear STEAM CYCLE GUIDE 4IJSU DPUUPO QPMZ CMFOE WPJE FTQFDJBMMZ EFMJDBUF GBCSJDT t 8IFO UIF MJOU GJMUFS PS FYIBVTU EVDU JT DMPHHFE TUFBN PQUJPOT XJMM OPU HJWF QS...

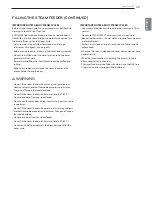
Page 39: ...er Do not fill the steam feeder with foreign substances rinse agents or detergents t Before moving the dryer make sure the steam feeder is empty t Do not use distilled water the water level sensor in the steam generator will not work t Be careful while filling the steam feeder to avoid overflow and spilling t Wipe up any spilled water around the steam feeder and the drawer before starting the drye...

Page 40: ...PO NBZ OPU XPSL QSPQFSMZ EFQFOEJOH PO OUFSOFU TFSWJDF QSPWJEFS t 8JSFMFTT OFUXPSL DBO FYQFSJFODF JOUFSGFSFODF GSPN PUIFS EFWJDFT XJUI GSFRVFODZ XJSFMFTT QIPOF MVFUPPUI PS NJDSPXBWF PWFO OUFSGFSFODF NBZ BMTP CF DBVTFE CZ EFWJDFT XJUI GSFRVFODZ UIF TBNF BT BOZ PUIFS 8J J EFWJDFT t 5IF TVSSPVOEJOH XJSFMFTT FOWJSPONFOU DBO NBLF XJSFMFTT OFUXPSL TFSWJDF SVO TMPXMZ t BJMVSF UP UVSO PGG BMM MPDBM IPNF OF...

Page 41: ...setup SMART APPLIANCE CONNECTIVITY Website home screen may change Your appliance now does more than just laundry Once it is connected to the internet through your home Wi Fi network it can check for and download software updates for its operating system or provide you with a list of extra cycles available for download You can even check the progress of a cycle with the LG Smart Laundry application...

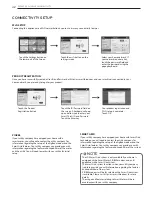
Page 42: ... allow you to enter your Smart ThinQ ID and Password Touch the Enter key Your product registration and Wi Fi setup is complete Touch OK Touch the wi fi button on the settings screen Select your home network If your network requires a key touch the password field and enter the password using the popup keyboard 130 6 5 3 453 5 0 Once you have successfully created a User ID and Password at http us sm...

Page 43: ... It can be selected from the Custom Cycle screen until it is overwritten by a new cycle Each cycle can be downloaded as often as needed 61 0 50 5 64 3 7 In order to download a cycle to the machine via USB the cycle must first be uploaded to the USB drive This is done with your computer from the website http us smartthinq com 1MVH UIF 64 ESJWF JOUP BO BWBJMBCMF 64 QPSU PO ZPVS computer The USB driv...

Page 44: ...or modify and diagnose your smart appliance from anywhere Use the Laundry Guide to find out how to treat a wide variety of stains or check out the laundry care icons on garments 4 35 04 4 Use your phone to record the SMART DIAGNOSIS signal if you have problems with your appliance The application can analyze the signal and help you solve the problem without waiting for a technician NOTE The LG SMAR...

Page 45: ...r abrasive cleansers they can scratch or damage the surface Cleaning Around and Under the Dryer Vacuum lint and dust from around the dryer and underneath it regularly Vent ductwork should be checked for lint buildup and cleaned at least once per year If any noticeable reduction in airflow or drying performance occurs immediately check ductwork for obstructions and blockages Maintaining Ductwork Ve...

Page 46: ...nded by the manufacturer of the fabric softener or product t 0WFSESZJOH B MPBE PG MBVOESZ DBO DBVTF B CVJMEVQ PG TUBUJD FMFDUSJDJUZ EKVTU settings and use a shorter drying time or use SENSOR DRY cycles t 5IFTF NBUFSJBMT DBO DBVTF TUBUJD CVJMEVQ 5SZ VTJOH B GBCSJD TPGUFOFS Display shows error code PS t 1PXFS DPSE DPOOFDUJPO JT JODPSSFDU t IFDL UIF DPOOFDUJPO PG QPXFS DPSE UP UIF UFSNJOBM CMPDL 3FGF...

Page 47: ...ME CF DIFDLFE DMFBOFE TPPO Dryer can be used in this condition but drying times may be longer t G FYIBVTU SFTUSJDUJPOT BSF TFOTFE CZ UIF 08 4 4 TM system the indicator will remain on for two hours after the end of the cycle Opening the door or pressing the POWER button will turn off the display The display shows i MPX IFDL w t 5IF EVDU XPSL JT BCPVU CMPDLFE i MPX IFDL w FSSPS DPEF EJTQMBZFE IPVST ...

Page 48: ...e phone SMART DIAGNOSIS Through the Call Center BMM UIF DBMM DFOUFS BU 6 4 BOBEB 8IFO JOTUSVDUFE UP EP TP CZ UIF DBMM DFOUFS BHFOU IPME UIF mouthpiece of your phone over the SMART DIAGNOSIS logo on the machine Hold the phone no more than one inch but not touching the machine 1SFTT UIF 4 35 04 4 CVUUPO PO UIF EJTQMBZ TDSFFO FFQ UIF QIPOF JO QMBDF VOUJM UIF UPOF USBOTNJTTJPO IBT GJOJTIFE 5IJT UBLFT ...

Page 49: ...N SOURCE SOFTWARE NOTICE To obtain the source code under GPL LGPL MPL and other open source licenses that is contained in this product please visit http opensource lge com In addition to the source code all referred license terms warranty disclaimers and copyright notices are available for download LG Electronics will also provide open source code to you on a CD ROM for a charge covering the cost ...

Page 50: ...OUBM TQFDJöDBUJPOT PS DPOUSBSZ UP UIF requirements of precautions in the Operating Guide accident vermin fire flood improper installation acts of God unauthorized modification or alteration incorrect electrical current or voltage or commercial use or use for other than intended purpose The cost of repair or replacement under these excluded circumstances shall be borne by the consumer 6450 3 03 5 0...

Page 51: ...entamente estas instrucciones Esto simplificara la instalacion y asegurara que la secadora esta instalada en forma correcta y segura Conserve estas instrucciones cerca de la secadora luego de la instalacion para futuras consultas www lg com ESPAÑOL DLEX6001W DLGX6002W DLEX6001V DLGX6002V ...

Page 52: ...ALERTA INTELIGENTE Cuando se ha completado el ciclo o el aparato tiene problemas usted tiene la opción de recibir notificaciones forzadas push en su smart phone Refiérase al manual del módem para información detallada sobre Smart ThinQ TAMBOR DE ACERO INOXIDABLE DE GRAN CAPACIDAD El tambor de acero inoxidable ultra grande ofrece durabilidad superior PUERTA REVERSIBLE DE FÁCIL ACCESO La puerta de g...

Page 53: ...das y qué puede suceder si no se siguen las instrucciones t P JOTUBMF VOB TFDBEPSB KVOUP B NBUFSJBMFT EF WFOUJMBDJØO QMÈTUJDPT GMFYJCMFT 4J TF JOTUBMB VO DPOEVDUP GMFYJCMF NFUÈMJDP EF UJQP lámina de metal éste deberá cumplir las especificaciones determinadas por el fabricante del electrodoméstico para su uso con secadoras Se sabe que los materiales de ventilación flexibles se contraen se agrietan ...

Page 54: ...lavado t P JOUSPEV DB MBT NBOPT FO MB TFDBEPSB DVBOEP FM UBNCPS P MBT otras partes estén en movimiento t P SFQBSF P SFFNQMBDF OJOHVOB QBSUF EF MB TFDBEPSB OJ JOUFOUF reparar la misma a menos que esto se recomiende en forma FTQFDÓGJDB FO FTUB VÓB EF 6TP Z VJEBEP P FO JOTUSVDDJPOFT EF reparación publicadas las cuales comprende y sabe aplicar t P BMUFSF MPT DPOUSPMFT t Antes de poner la secadora fuer...

Page 55: ... y las regulaciones vigentes Siga los detalles en las instrucciones de instalación Si la secadora no se encuentra adecuadamente conectada a tierra se pueden producir descargas eléctricas t Antes de usar la secadora debe estar correctamente instalada como se describe en este manual Si la secadora no se encuentra adecuadamente conectada a tierra se pueden producir descargas eléctricas t OTUBMF Z BMN...

Page 56: ...dios Los sistemas de ventilación agujereados pueden causar incendios si se colapsan o bloquean durante el uso o la instalación t P TF QSPWFF FM TJTUFNB EF WFOUJMBDJØO DPO MB TFDBEPSB FM NJTNP EFCFSÈ PCUFOFSTF MPDBMNFOUF B UBQB UFSNJOBM EFCFSÈ tener reguladores de tiro con bisagras para prevenir el retorno de descarga cuando no se usa la secadora Si no se siguen estas instrucciones se podrá produci...

Page 57: ...nte Si la secadora no se encuentra adecuadamente conectada a tierra se pueden producir descargas eléctricas Contrate a un electricista calificado para que controle el tomacorriente y el circuito FMÏDUSJDP QBSB BTFHVSBSTF RVF FM FODIVGF FTUÈ DPSSFDUBNFOUF conectado a tierra Si estas instrucciones no se cumplen se podrán producir descargas eléctricas y o riesgo de incendio t B TFDBEPSB TJFNQSF EFCF ...

Page 58: ... O PREFABRICADAS 26 REVISIÓN DE INSTALACIÓN FINAL 27 TEST DE INSTALACIÓN COMPROBACIÓN DEL SISTEMA DE EVACUACIÓN 29 MODO DE UTILIZACIÓN 29 FUNCIONAMIENTO BÁSICO 30 GUÍA DE CICLO 32 CLASIFICACIÓN DE CARGAS 32 REVISE EL FILTRO DE PELUSA ANTES DE CADA USO 32 CÓMO CARGAR LA SECADORA 33 BOTONES DE CONFIGURACIÓN DE CICLO 34 PANTALLA TIEMPO Y ESTADO 35 PANTALLAS Y BOTONES DE OPCIONES DE MENU 37 OPCIONES D...

Page 59: ...s o componentes no autorizados t BT JNÈHFOFT EF FTUB HVÓB QVFEFO OP DPJODJEJS DPO MPT DPNQPOFOUFT Z BDDFTPSJPT SFBMFT Z FTUÈO TVKFUBT B DBNCJPT TJO QSFWJP BWJTP QBSB mejoras en el producto PIEZAS Y CARACTERÍSTICAS Componentes ACCESORIOS INCLUIDOS Bloque terminales Panel de acceso Modelos eléctricos Ubicación de la conexión de gas Modelos a gas Salida del conducto de ventilación Ubicación del cable...

Page 60: ...o y se perderán los ajustes de secado La tapa se desbloqueará después de una breve pausa A 050 4 01 0 4 Á Estos botones conducen a pantallas de configuraciones y características especiales D 04 La pantalla CYCLE CICLO muestra los iconos y nombres de los ciclos el ciclo predeterminado es Cotton Normal Algodón Normal Toque las flechas izquierda o derecha para desplazarse por las pantallas de ciclo E...

Page 61: ...el Tiempo de secado predeterminados del ciclo La barra a la izquierda de cada indicador muestra la cantidad de ajustes disponibles E 4 7 ŷ 6 3 3 0Ÿ Después de modificar la configuración de un ciclo tiene la opción de guardarlo como un ciclo personalizado y agregarlo a las pantallas de ciclo C 01 0 4 0 Agrega opciones disponibles al ciclo No todas las opciones están disponibles para todos los ciclo...

Page 62: ...n y elección de la ubicación adecuada Nivelación de la secadora Conexión de secadoras a gas Tipo de secadoras gas ventilación de la secadora Conexión del enchufe y la toma de tierra Cómo conectar las secadoras eléctricas Tipo secadoras eléctricas Prueba de conducto consulte la página 27 120V 240V Prueba de funcionamiento ...

Page 63: ...QFTP UPUBM EF MB TFDBEPSB TJFOEP ÏTUF EF LH MCT HVBMNFOUF TF UFOESÈ FO DVFOUB el peso combinado de un posible electrodoméstico acoplado t No se puede instalar ningún aparato de combustión en el mismo compartimento que la secadora t 4F EFCF EFKBS VO FTQBDJP BEJDJPOBM QBSB GBDJMJUBS MBT UBSFBT EF instalación y mantenimiento t BT TFQBSBDJPOFT BEJDJPOBMFT QVFEFO TFS OFDFTBSJBT QBSB MBT molduras del te...

Page 64: ... estar nivelada Para minimizar la vibración el ruido y movimiento no deseados el piso deberá ser una superficie perfectamente nivelada y sólida 1PTJUJPO UIF ESZFS JO UIF GJOBM MPDBUJPO 1MBDF B MFWFM BDSPTT UIF top of the dryer t BT QBUBT OJWFMBEPSBT EFCFSÈO BQPZBSTF GJSNFNFOUF FO FM QJTP Empuje suavemente las esquinas superiores de la secadora para asegurarse de que su secadora no se mece de esqui...

Page 65: ... protegida para evitar que se dañe PO MB QVFSUB DPMPDBEB TPCSF VOB TVQFSGJDJF QSPUFHJEB SFUJSF MPT UPSOJMMPT EF DBEB MBEP EF MB QVFSUB Z SFUJSF FM QBOFM interior de la puerta con un destornillador de punta plana Retire el enganche y la pieza y llévelas al lado opuesto Inversión de la puerta 3FUJSF MPT UPSOJMMPT GJKBOEP MBT CJTBHSBT B MB FTUSVDUVSB EF MB puerta Retire los dos rellenadores de plásti...

Page 66: ...entilación lateral en los modelos a gas Apriete el conducto adaptador en la carcasa del ventilador y asegure la base de la secadora como se indica POFDUF VO DPEP EF QVMHBEBT DN B MB TJHVJFOUF TFDDJØO EF DPOEVDUP EF QVMHBEBT DN Z BTFHVSF UPEBT MBT conexiones con cinta adhesiva impermeable Asegúrese de que el extremo macho del codo apunte hacia AFUERA de la secadora Inserte el montaje de codo conduc...

Page 67: ...cto de escape deberá NBOUFOFSTF MP NÈT DPSUP QPTJCMF TFHÞSFTF EF MJNQJBS cualquier tipo de conducto antiguo antes de instalar su secadora nueva Si no se siguen estas instrucciones se podrá producir incendio o muerte t 4F SFDPNJFOEBO DPOEVDUPT SÓHJEPT P TFNJSÓHJEPT QBSB VTBS entre la secadora y la pared En instalaciones particulares cuando es imposible realizar una conexión siguiendo las SFDPNFOEBD...

Page 68: ...de secado y reducir la acumulación de pelusa en el sistema de conducto El sistema de conducto y las conexiones NO están incluidas y deben adquirirse por separado t 6TF VO TJTUFNB EF DPOEVDUP NFUÈMJDP SÓHJEP P TFNJSÓHJEP EF DN QVMH t M DPOEVDUP EF FTDBQF EFCFSÈ UFOEFSTF MP NÈT DPSUP QPTJCMF t 6TF MB NFOPS DBOUJEBE EF DPOFYJPOFT EF DPEP RVF TFB posible t M FYUSFNP NBDIP EF DBEB TFDDJØO EFM DPOEVDUP ...

Page 69: ...i no se cumple con esto se podrá producir una explosión incendio o muerte t 3FRVJTJUPT EF MB MÓOFB EF TVNJOJTUSP 4V DVBSUP EF MBWBEP EFCF UFOFS VOB MÓOFB SÓHJEB EF TVNJOJTUSP EF HBT QBSB MB secadora En los EE UU se debe instalar una válvula de corte NBOVBM JOEJWJEVBM B VOB EJTUBODJB EF QPS MP NFOPT QJFT N EF MB TFDBEPSB EF BDVFSEP DPO FM ØEJHP BDJPOBM EF BT PNCVTUJCMF 4 4F EFCF JOTUBMBS VO UBQØO E...

Page 70: ...podrá producir una explosión incendio o muerte t BT TFDBEPSBT EF HBT WFOUJMBS IBDJB FM FYUFSJPS Si no se cumple con esto se podrá producir una explosión incendio o muerte Conexión del suministro de gas TFHÞSFTF EF RVF FM TVNJOJTUSP EF HBT BM DVBSUP EF MBWBEP TF encuentre APAGADO Confirme que el tipo de gas disponible en su cuarto de lavado sea el adecuado para la secadora La secadora está lista pa...

Page 71: ...HB EF TVGJDJFOUF dotación de cableado de manera de poder mover la secadora de su ubicación normal cuando sea necesario Si no se cumple con esto se podrá producir una explosión incendio o muerte t 0 TF QSPWFF MB DPOFYJØO FO FTQJSBM EFM DBCMF FMÏDUSJDP FOUSF MB DBKB EF QBSFE Z FM CMPRVF UFSNJOBM EF MB TFDBEPSB con la misma El tipo de conexión en espiral y el calibre del alambre deben seguir los códi...

Page 72: ...era de la secadora Instale un protector de tensión listado por UL en el orificio de pase del cable eléctrico MVFHP QBTF VO DBCMF FMÏDUSJDP DPOEVDUPS EF DPCSF ÞN 8 EF QPS MP NFOPT IJMPT MJTUBEP QPS 6 QPS FM QSPUFDUPS EF tensión t OTUBMF VO DBCMF FMÏDUSJDP EF 7 MJTUBEP QPS 6 DPO VO DPOEVDUPS EF DPCSF ÞN 8 DPNP NÓOJNP y terminales de bucle cerrado o de horquilla con extremos doblados hacia arriba 5SB...

Page 73: ...DVCJFSUB EF BDDFTP BM CMPRVF UFSNJOBM MPDBMJ BEP FO MB parte superior trasera de la secadora Instale un protector de tensión listado por UL en el orificio de pase del cable eléctrico MVFHP QBTF FM DBCMF FMÏDUSJDP GBCSJDBEP FO FM 1BTP QPS FM protector de tensión t OTUBMF VO DBCMF FMÏDUSJDP MJTUBEP QPS 6 DPO 4 conductores de DPCSF ÞN 8 DPNP NÓOJNP t 1SFQBSF VO NÓOJNP EF QJFT N EF MPOHJUVE QBSB QPEFS...

Page 74: ... VO GMVKP EF DPSSJFOUF DPSUP P excesivo t POUBDUP QPS DPOEVDUPS OFVUSP FTUÈ QSPIJCJEP QBSB OVFWBT JOTUBMBDJPOFT EF DJSDVJUP EFSJWBEP MBT DBTBT NØWJMFT WFIÓDVMPT SFDSFBDJPOBMFT Z ÈSFBT EPOEF MPT DØEJHPT QSPIÓCFO VOB DPOFYJØO B UJFSSB QPS FM DPOEVDUPS neutro Conexión de tres hilos para secadoras eléctricas Cable eléctrico con enchufe t 0 TF QFSNJUF VOB DPOFYJØO EF IJMPT FO DPOTUSVDDJPOFT OVFWBT EFTQ...

Page 75: ...BDUP QPS DPOEVDUPS OFVUSP FTUÈ QSPIJCJEP QBSB OVFWBT JOTUBMBDJPOFT EF DJSDVJUP EFSJWBEP MBT DBTBT NØWJMFT WFIÓDVMPT SFDSFBDJPOBMFT Z ÈSFBT EPOEF MPT DØEJHPT QSPIÓCFO VOB DPOFYJØO B UJFSSB QPS FM DPOEVDUPS neutro Conexión de tres hilos para secadoras eléctricas Conexión directa t 0 TF QFSNJUF VOB DPOFYJØO EF IJMPT FO DPOTUSVDDJPOFT OVFWBT EFTQVÏT EFM EF FOFSP EF t 4F SFRVJFSF VO QSPUFDUPS EF UFOTJØ...

Page 76: ...UP a cualquier material combustible de construcción sea de por lo NFOPT QVMHBEBT DN Z RVF DVBOEP TF WFOUJMF MB TFDBEPSB al exterior se pueda instalar la secadora dejando un espacio MJCSF EF QVMHBEBT DN B MPT MBEPT Z MB QBSUF USBTFSB EF MB secadora t 5FOHB FO DVFOUB RVF MPT NBUFSJBMFT EF WFOUJMBDJØO OP TF QSPWFFO con la secadora Debe obtener los materiales de ventilación necesarios para una instala...

Page 77: ...pelusa y libre de restricciones le permitirá secar la ropa más rápido y reducir el gasto de energía DUJWBS FM UFTU EF JOTUBMBDJØO 5PRVF FM DPOGJHVSBDJØO Toque el Instalación 3FWJTJØO EF GMVKP 5PRVF FM CPUØO 45 35 1 64 Test de Instalación Comprobación del sistema de evacuación NOTA La secadora deberá estar fría antes de iniciar el test Si la unidad se ha calentado durante la instala ción active el ...

Page 78: ...to t Se han fundido los fusibles ha saltado el disyuntor o ha habido un apagón t Compruebe el suministro eléctrico o la conexión del cable de alimentación al enchufe Consulte la sección Cómo conectar las se cadoras eléctricas de este manual para las instrucciones completas t Reactive el disyuntor o reemplace el fusible No incremente la capacidad del fusible Si el problema es una sobrecarga del cir...

Page 79: ...PSB HJSBSÈ brevemente cada algunos minutos para evitar que las arrugas se asienten en la ropa durante IPSBT P IBTUB RVF TF BCSB MB QVFSUB 3 4 03 Cargue la secadora con la ropa húmeda de la secadora Si la carga es muy grande puede dividirla en pequeñas cargas para lograr un rendimiento adecuado y cuidado de las telas Asegúrese de quitar los elementos que no se deben secar en la secadora 1 530 1 64 ...

Page 80: ...s BKB Muy seco Más seco PSNBM Menos seco Sec húm Å Å Å Å Antibacterial Utilice este programa cuando quiera reducir las bacterias utilizando altas temperaturas Alta VZ TFDP 70 Å Ruerte Utilice este ciclo para prendas duraderas como pantalones de mezclilla y otras prendas de peso completo a alta temperatura Alta Muy seco Más seco PSNBM Menos seco Sec húm 54 Å Å Å Å STEAM SANITARY Utilice este ciclo ...

Page 81: ... Media Baja Ultra baja Ninguno 40 Å Å Å Adjustable Configuración por defecto FO OFHSJUB Å Opción disponible GUÍA DE CICLO La siguiente guía de ciclo muestra las opciones disponibles y los tipos de telas recomendados NOTA El tiempo predeterminado y el tiempo real variarán dependiendo del tamaño de la carga y del contenido de humedad MODO DE UTILIZACIÓN Ciclos de SECADO MANUAL MANUAL DRY Use los cic...

Page 82: ...secado Los diferentes tipos de telas tienen diferentes requisitos de cuidado y algunas telas se secarán más rápido que otras Cómo cargar la secadora W ADVERTENCIA Para reducir el riesgo de incendio descargas eléctricas o heridas al usar su electrodoméstico siga las precauciones básicas incluyendo lo siguiente t Revise todos los bolsillos para asegurarse de que estén WBDÓPT PT BSUÓDVMPT DPNP DMJQT ...

Page 83: ... la configuración de temperatura de SOLO AIRE a EXTRA ALTA Esto permite brindar un cuidado preciso a sus telas y prendas No es posible ajustar la configuración de temperatura en los ciclos de SECADO AUTOMÁTICO B 4 0 5 10 5 3 F QFSNJUF TFMFDDJPOBS NBOVBMNFOUF P NJOVUPT EF UJFNQP EF TFDBEP 6TF FTUF DJDMP QBSB pequeñas cargas o para eliminar arrugas C 7 4 0 ŷ 3 7 Ÿ Determina el nivel de secado para e...

Page 84: ...r que los niños cambien los ciclos u operen la máquina Una vez que se activa el bloqueo para niños debe desactivarse antes de poder usar cualquier control excepto el botón POWER encendido apagado Cuando se enciende la secadora los controles seguirán bloqueados Toque y mantenga presionado el botón de bloqueo para niños durante tres segundos para bloquear o desbloquear los controles C 0 01 3 5 70 3 ...

Page 85: ...ios para obtener información acerca de la configuración EFM NØEFN JH FF Z EF MBT DBSBDUFSÓTUJDBT EF SFE JOUFMJHFOUF Su compañía de servicios eléctricos le puede proporcionar información acerca de las características y capacidades del medidor y de las utilidades Deberá trabajar en conjunto con su empresa de servicios eléctricos para realizar la configuración inicial Estos botones se utilizan para l...

Page 86: ...ando esta función Puede acceder a esta función buscando la aplicación app LG Smart Laundry DW en su teléfono inteligente Esta aplicación no se encuentra disponible en todos los teléfonos inteligentes 1 5 6 6 4 3 15 0 4 3 1 04 6 04 Utilice la guía de ciclos para obtener información detallada acerca de cada uno de los ciclos de LG Desplácese a través de los ciclos de la parte inferior de la pantalla...

Page 87: ...nes ya que no son las del ciclo guardado OPCIONES DE CICLO Y CARACTERÍSTICAS ESPECIALES FUNCIONES DE VAPOR La nueva tecnologia de vapor de LG le permite inyectar las telas con un chorro giratorio de vapor caliente para refrescar las prendas reducir la estatica y facilitar el planchado Simplemente seleccione el ciclo STEAMFRESH o agregue la opcion Vapor Steam a los ciclos seleccionados Cómo usar el...

Page 88: ...O Å Mojada Siga la temperatura seleccionada CT 35Ó 6 04 PLANCHADO FáCIL JO Å Mojada Siga la temperatura seleccionada BNJTBT DBEB ROPA DEPORTIVA REDUCCIóN ESTáTICA JO Mojada Ropa deportiva GUÍA DE CICLO DE VAPOR PARA LLENAR EL ALIMENTADOR DE VAPOR SI SE UTILIZA UNA FUNCIÓN DE VAPOR BNJTB NF DMB EF BMHPEØO QPMJÏTUFS WJUF MBT QSFOEBT FTQFDJBMNFOUF EFMJDBEBT t VBOEP TF UBQBO FM GJMUSP EF QFMVTBT P FM ...

Page 89: ...ilice sólo agua No llene el alimentador de vapor con otros líquidos extraños ni con productos o detergentes t Antes de mover la secadora asegúrese de que el alimentador de vapor está vacío t No utilice agua destilada el sensor de nivel de agua del generador de vapor no funcionará t Tenga cuidado al colocar el alimentador de vapor para evitar que el agua se derrame t Seque cualquier resto de agua d...

Page 90: ...VF OP GVODJPOF DPSSFDUBNFOUF t B DPOFYJØO JOBMÈNCSJDB QVFEF TVGSJS JOUFSGFSFODJBT EF PUSPT BQBSBUPT RVF UFOHBO VOB GSFDVFODJB EF UFMÏGPOP JOBMÈNCSJDP MVFUPPUI P NJDSPPOEBT B JOUFSGFSFODJB UBNCJÏO QVFEF TFS DBVTBEB QPS BQBSUBEPT DPO VOB GSFDVFODJB EF MB NJTNB RVF MB EF cualquier otro aparato Wi Fi t M FOUPSOP JOBMÈNCSJDP QVFEF IBDFS RVF FM TFSWJDJP EF SFE JOBMÈNCSJDB GVODJPOF NÈT EFTQBDJP t 4J OP T...

Page 91: ...tareas que sólo lavar ropa Una vez que se conecta a Internet a través de su red Wi Fi se puede buscar y descargar actualizaciones de software para su sistema operativo o proporcionarle una lista de los ciclos adicionales disponibles para su descarga Puede comprobar también el progreso de un ciclo con la aplicación LG Smart Laundry para su teléfono inteligente Esta misma aplicación para teléfono in...

Page 92: ...traseña Smart ThinQ Toque la tecla Enter Su registro de producto y la configuración de Wi Fi están completos Toque OK Toque el botón Wi Fi de la pantalla de configuración Settings Seleccione su red hogareña Si su red requiere una contraseña toque el campo de la contraseña e ingrese la contraseña con el teclado emergente CONFIGURACIÓN DE CONECTIVIDAD CONECTIVIDAD SMART APPLIANCE 0 63 8J J Conectar ...

Page 93: ...a pantalla Custom Cycle Ciclo personalizado hasta que se lo sobrescriba con un ciclo nuevo Cada ciclo se podrá descargar todas las veces que resulte necesario 3 6 0 6 64 Para cargar un ciclo en la máquina mediante una unidad USB primero se debe cargar el ciclo en la unidad de memoria USB Esto se realiza con la computadora desde el sitio web http us smartthinq com ODIVGF MB VOJEBE 64 EF FO VO QVFSU...

Page 94: ...e lavado para informarse sobre cómo tratar una amplia variedad de manchas o revise los íconos de cuidados de lavado de las prendas 4 35 04 4 Use su teléfono para registrar la señal SMART DIAGNOSIS si tiene problemas con su electrodoméstico La aplicación puede analizar la señal y ayudarle a resolver el problema sin tener que esperar a un técnico Toque el botón Smart Adapt de la pantalla Smart ThinQ...

Page 95: ...den raspar o dañar la superficie Limpieza alrededor y debajo de la secadora Aspire la pelusa y polvo alrededor de la secadora y debajo de ella con regularidad Se debe revisar que el sistema de conductos de ventilación no tenga acumulación de pelusa y se debe limpiar una vez por año Si se percibe una reducción del flujo de aire o desempeño del secado notorios revise que el sistema de conductos no e...

Page 96: ... que las ropas queden completamente limpias de acuerdo con las instrucciones de su lavadora y detergente La pantalla muestra los errores tE t P FTUÈ GVODJPOBOEP FM DBMFGBDUPS t QBHVF MB TFDBEPSB Z MMBNF B NBOUFOJNJFOUP Pelusa en las prendas t P TF IB MJNQJBEP DPSSFDUBNFOUF FM GJMUSP EF pelusa t 1SFOEBT EF MBWBEP OP DMBTJGJDBEBT adecuadamente t YDFTP EF FTUÈUJDB FO MBT QSFOEBT t B TFDBEPSB FTUÈ TPC...

Page 97: ...F IPSBT Las prendas encogen t P TF TJHVFO MBT JOTUSVDDJPOFT EF MB FUJRVFUB de la prenda t 1BSB FWJUBS RVF MBT QSFOEBT FODPKBO TJHB DVJEBEPTBNFOUF MBT JOTUSVDDJPOFT EF cuidado de telas correspondiente a su prenda ya que algunas telas encogen naturalmente cuando se lavan Otras telas se pueden lavar pero encogen cuando se secan en una secadora Use un ajuste de calor bajo o sin calor La pantalla muest...

Page 98: ... la placa de clasificación para información en detalles Requisitos de gas B QVMHBEBT 8 1 B QVMHBEBT 8 4PMP NPEFMPT B HBT Dimensiones JO O 9 JO 1SPG 9 JO MU in Prof con puerta abierta DN O 9 DN 1SPG 9 DN MU 1SPG DPO QVFSUB BCJFSUB Peso neto MÏDUSJDB LH MJCSBT BT LH MJCSBT Capacidad de secado Ciclo de normal QJFT DVCJDPT MC LH ...

Page 99: ... través del Centro de atención telefónica MBNF BM FOUSP EF BUFODJØO UFMFGØOJDB EF MFDUSPOJDT BM UFMÏGPOP 66 BOBEÈ VBOEP TF MP JOEJRVF FM BHFOUF EFM FOUSP EF BUFODJØO UFMFGØOJDB mantenga el micrófono de su teléfono sobre el logotipo SMART DIAGNOSIS del equipo Sostenga el teléfono a no más de una QVMHBEB P DN QFSP TJO UPDBS FM FRVJQP 1SFTJPOF FM CPUØO 4 35 04 4 EF MB QBOUBMMB BOUFOHB FM UFMÏGPOP FO ...

Page 100: ...QPESÈ BZVEBSMF B QSPTFHVJS DPO FM EJBHOØTUJDP NOTIFICACIÓN DE SOFTWARE DE FUENTE ABIERTA Para obtener el código fuente contenido en este producto bajo GPL LGPL MPL y otras licencias de código abierto visite http opensource lge com Además del código fuente están disponibles para su descarga todos los términos de la licencia los descargos de la garantía y los avisos de propiedad intelectual LG Elect...

Page 101: ...ales o inconsistentes con los requisitos de precauciones establecidos en la Guía de funcionamiento accidente insectos incendio inundación instalación inadecuada casos de fuerza mayor modificación o alteración no autorizada corriente o voltaje incorrectos o uso comercial o uso diferente al indicado El costo de reparación o reemplazo bajo estas circunstancias excluidas será responsabilidad del clien...

Page 102: ...52 ...

Page 103: ...53 ESPAÑOL ...

Page 104: ...54 ...

Page 105: ...55 ESPAÑOL ...

Page 106: ...56 ...

Page 107: ...57 ESPAÑOL ...

Page 108: ...1 800 243 0000 USA 1 888 542 2623 CANADA LG Customer Information Center Register your product Online www lg com ...

Reviews: