background image

T

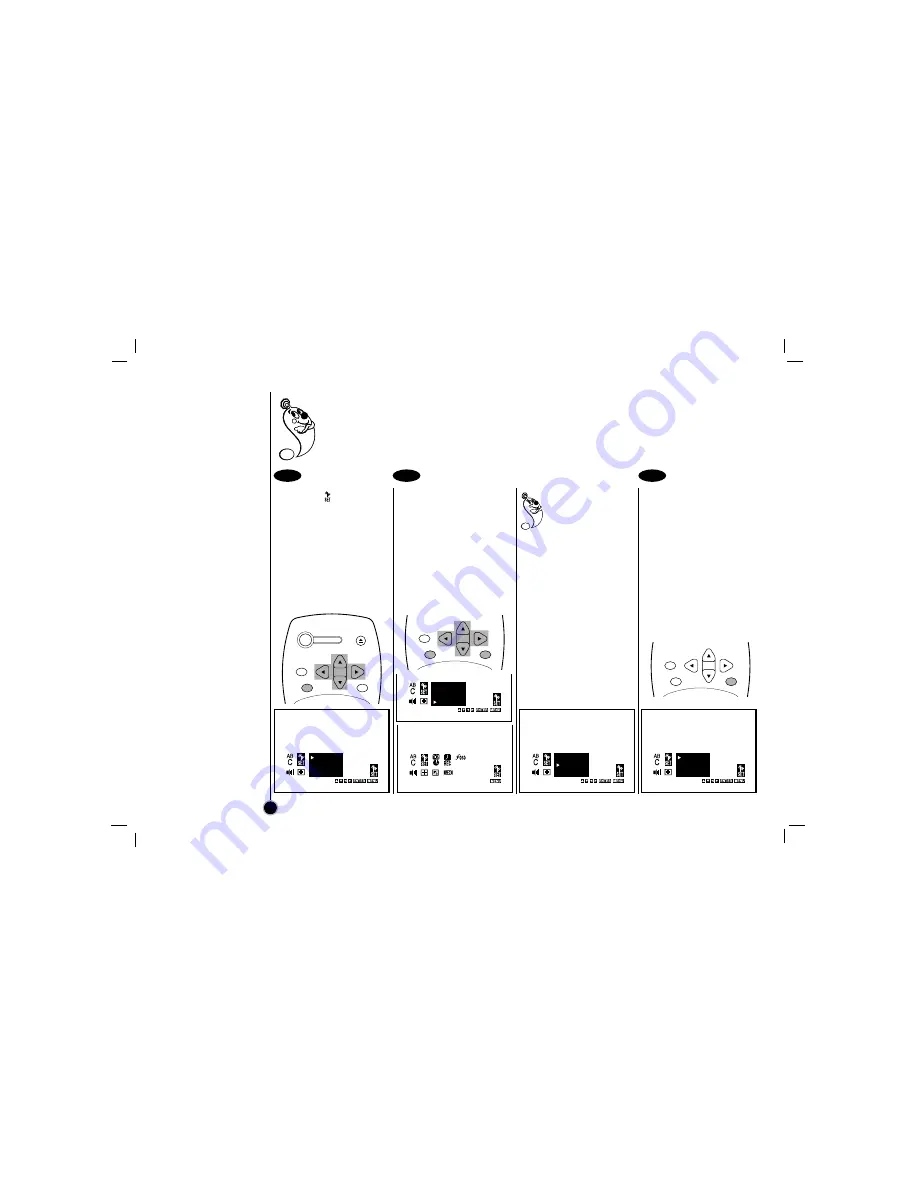
uning in TV Stations

Automatically and Manually

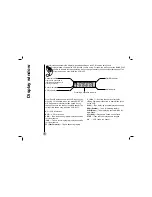
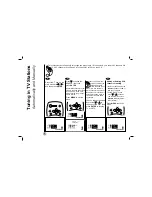
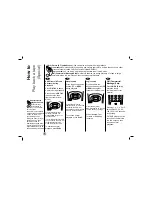
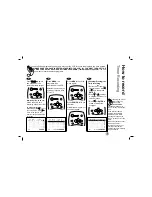
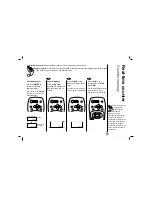
Select the 

item on the

main menu with 

F

F

or 

G

G

,

and then press ENTER.

Press 

E

E

to choose the

SEARCH item, then
press ENTER.

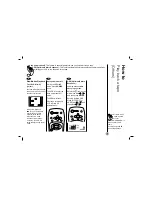
All available channels in your
area are scanned and stored
in the memory of the VCR.
After scanning, the previous
screen returns.

Press MENU to exit the
menu.

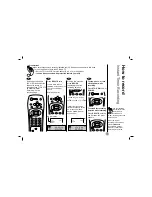
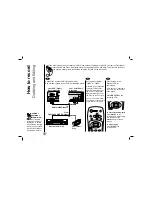
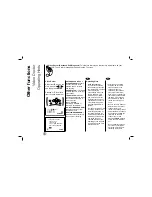
When you perform the

Auto Channel Set, the
VCR automatically

selects the band (TV or

CATV) in which there are
more channels to be preset.
Remember, TV is for the air
antenna reception, CATV is
for cable or wireless cable
connection.

You can change the band
by pressing 

E

E

or 

D

D

to

choose second item, then
press ENTER to display
TV or CATV.

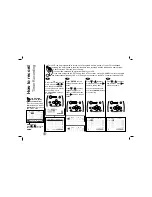
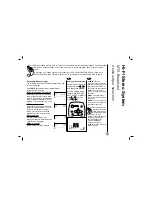
Adding or Deleting VCR
channels manually

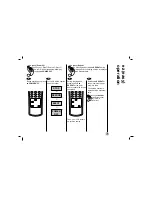
Select a channel using the
Number buttons to add or
CH (+/–) to delete.

Follow Step 

, then

press 

E

E

or 

D

D

to choose

the first item, then press
ENTER to display ADD or
DEL (Delete).

Press MENU to exit the
menu.

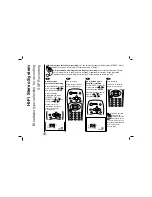
This convenient Auto Channel Set function can preset up to 181 channels in your area (VHF channels 2 to

13, UHF channels 14 to 69 and CATV channels 1 to 125) on the VCR.

14

1

2

3

ADD
TV
SEARCH

ADD
TV
SEARCH

ADD
TV
SEARCH

ADD
TV
SEARCH

SEARCH  :  13

PLEASE WAIT !

POWER

EJECT

CH+/TRK+

CH—/TRK—

CLEAR

ENTER

MENU

CH+/TRK+

CH—/TRK—

CLEAR

ENTER

MENU

CH+/TRK+

CH—/TRK—

CLEAR

ENTER

MENU

Summary of Contents for CC990M

Page 1: ...Before connecting operating or adjusting this product please read this instruction booklet carefully and completely VCR OWNER S MANUAL MODEL CC990M ...

Page 2: ...tion If this equipment does cause harmful interference to radio or television reception which can be determined by turning the equipment off and on the user is encouraged to try to correct the interference by one or more of the following measures Reorient or relocate the receiving antenna Increase the separation between the equipment and receiver Connect the equipment into an outlet on a circuit d...

Page 3: ...y Window 10 On screen Display OSD 11 Setting the On screen Display 12 Setting the menu 13 Language Select 13 Function OSD On Off 13 Setting the Clock 13 Tuning in TV Stations 14 How to Play Back a Tape 15 17 Normal Playback 15 Special Playback 16 The Others Playback 17 How to Record 18 22 Normal Recording 18 Instant Timer Recording 19 Timer Recording 20 21 Dubbing and Editing 22 Hi Fi Stereo Syste...

Page 4: ...e product on a bed sofa rug or other similar surface This product should not be placed in a built in installation such as a bookcase or rack unless proper ventilation is provided or the manufacturer s instructions have been adhered to 11 Power Sources This product should be operated only from the type of power source indicated on the marking label If you are not sure of the type of power supply to...

Page 5: ... expose you to dangerous voltage or other hazards Refer all servicing to qualified service personnel 20 Damage Requiring Service Unplug this product from the wall outlet and refer servicing to qualified service personnel under the following conditions a If the power supply cord or plug is damaged b If liquid has been spilled or objects have fallen into the product c If the product has been exposed...

Page 6: ...ontrol is powered by two AA type batteries 1 To insert them push the tab backwards and lift off the cover of the remote control 2 Put the two batteries into the compartment making sure the and are correctly positioned 3 Replace the cover POWER To turn the VCR on and off D D E E F F G G ARROWS For OSD menu setting page 12 CLEAR See the page 25 ENTER See the page 11 12 P STILL To still playback page...

Page 7: ...1 from AUDIO VIDEO IN jacks at the rear or LINE 2 from AUDIO VIDEO IN jacks at the front pressing CH continuously to display LINE1 or LINE2 on the TV screen You can also select LINE1 or LINE2 by pressing 0 button twice or four times VHF UHF CATV ANT IN OUT TO TV CH3 CH4 VIDEO OUT MONO LINE1 AUX1 IN OUT IN R AUDIO L Power cord RF OUT CHANNEL Selector Set this switch to channel 3 or 4 AUDIO OUT Left...

Page 8: ...lector at the rear to CH 3 or CH 4 not employed for broadcasts and select the same channel on the TV When a TV is connected with an audio video cable When the TV is connected using an audio video cable turn the TV and VCR on and select the video input mode on the TV VCR reception setting 8 VHF UHF CATV ANT IN OUT TO TV CH3 CH4 VIDEO OUT MONO LINE1 AUX1 IN OUT IN R AUDIO L To OUT TO TV VCR s Back P...

Page 9: ...o output channel as located on the back of the VCR CH3 or CH4 2 Set the VCR channel selector to the output channel of the cable converter box by pressing CH or number buttons 0 9 of your VCR Example CH3 3 Select the channel to view at the Cable Converter Box Connections CATV to VCR 9 With this connection you CANNOT record one program while viewing another 1 Connect the cable from the CATV system t...

Page 10: ... HI VCR is turned on BYE VCR is turned off CUE Tape is advancing rapidly in playback mode for visual search CUE Tape is reversing rapidly in playback mode for visual search FF Fast Forward Tape is advancing rapidly L_ Line_ Auxiliary channel is selected for viewing equipment connected to Audio Video jacks on the VCR PLAY Tape is playing at normal playback speed REW Rewind Tape is rewinding rapidly...

Page 11: ...tape counter display does not appear when the tape is not inserted STOP CH 4 SP MONO 0H30M JUL 05 WED 2 15 PM Identifying the on screen display item Changing the on screen function display One press Two presses Three presses STOP CH 4 SP MONO JUL 05 WED 2 15 PM STOP CH 4 SP MONO JUL 05 WED 2 15 PM STOP CH 4 SP MONO M 0 35 40 2 15 PM M 0 35 40 After 3 seconds 2 15 PM After 3 seconds After 3 seconds...

Page 12: ...ge 24 Press MENU to exit the menu Blue Background on screen Function On Off Select the item on the main menu with F F or G G and then press ENTER Select a desired mode ON or OFF with D D or E E and then press F F or G G The SETUP clock setting and timer recordings are accessed conveniently with On screen Menu Displays that lead you through each step The following pages describe the On screen selec...

Page 13: ... then press ENTER Select a desired mode ON or OFF with D D or E E and then press F F or G G Setting the Clock Select the item on the main menu with F F or G G and then press ENTER Press the E E or D D to set MONTH first then press G G to move to next option And then set DAY YEAR and TIME by using E E D D and G G Press MENU to exit the menu 1 2 3 Setting the Menu Language Select Function OSD On Off...

Page 14: ...ireless cable connection You can change the band by pressing E E or D D to choose second item then press ENTER to display TV or CATV Adding or Deleting VCR channels manually Select a channel using the Number buttons to add or CH to delete Follow Step then press E E or D D to choose the first item then press ENTER to display ADD or DEL Delete Press MENU to exit the menu This convenient Auto Channel...

Page 15: ...djusting the picture Although the VCR adjusts the tracking automatically you may need to adjust the tracking manually if the tape quality is too poor Auto tracking While the VCR is adjusting the tracking automatically AUTO TRACKING appears It turns off after the adjustment is complete Manual tracking If noise appears on the screen during playback press either TRK on the remote control until the no...

Page 16: ...ls or other material Pressing 1 2 3 4 5 or 6 times skips 30 60 90 120 150 or 180 seconds respectively CM SKIP skips a full 180 seconds of commercials in a few seconds then resumes normal playback Still Picture Frame Advance You can watch a still picture during playback Visual search This function lets you quickly and visually search for a desired tape section in either direction forward called CUE...

Page 17: ...uto power shut off During the REWIND mode press POWER once The VCR will enter the Auto power shut off mode The REW will flash After tape is rewound VCR will turn off automatically OPR Optimum Picture Response You may only set OPR when playing a tape Select the item on the main menu with F F or G G and then press ENTER Select a desired OPR mode OFF SOFT or HARD with D D or E E and then press F F or...

Page 18: ...ding Press STOP To pause recording Press P STILL The PAUSE appear on the TV screen Also REC indicator will flash during pause mode on the display window To resume recording press P STILL again Preparations Make sure that you have correctly installed your VCR as described earlier in this book Turn on the power of both the VCR and TV Set the TV to the VCR Output Channel CH 3 or 4 or video input Inse...

Page 19: ...on the TV screen and window display TIMER indicator appears also To stop pause or turn off the power while recording Press STOP P STILL or POWER To extend the recording duration while recording Press REC ITR until the new duration you want appears 1 2 3 4 How to record Instant Timer Recording 19 When the recording time indicator in the display window counts down to 0 00 recording stops and VCR tur...

Page 20: ... Check that the VCR clock is set correctly Insert a video cassette with protection tab into your VCR If you have connected the CATV using the CATV converter set the CHANNEL to match the cable box output channel usually CH3 or 4 Change the channel on the CATV converter instead of VCR 20 1 2 3 4 Press ENTER to select date option on the DATE item 1 31 One time recording DLY Daily Same Mon Fri Weekly ...

Page 21: ...appears on the display window Checking Erasing the Timer recording Select the item on the main menu with F F or G G and then press ENTER Press E E or D D to select a program you want to check or erase Press F F or ENTER to erase or modify the program 5 6 7 8 If the program preset time is past the PAST TIME PROGRAMMED message will appear on the TV screen Correct the time If the incorrect data is en...

Page 22: ...other VCR or camcorder recordings to this VCR the rear or Front panel mounted Audio and Video input jacks make the connections quick and easy The direct A V jacks will also provide better picture results than using the RF jack on the rear panel VHF UHF CATV ANT IN OUT TO TV CH3 CH4 VIDEO OUT MONO LINE1 AUX1 IN OUT IN R AUDIO L Camcorder Play Another VCR Play Your VCR Front Recording Your VCR Rear ...

Page 23: ...ode only If audio output selection is selected at STEREO position while playing a prerecorded SAP audio program the main language Left and the sub language Right will be heard simultaneously For SAP BILINGUAL playback do not use STEREO position Select the RIGHT position 1 2 Receivable Broadcast types The following are possible audio broadcast type and on screen displays Press ENTER to display the ...

Page 24: ...e Do the SAP Second Audio Program recording if only the SAP appears on the TV screen Please refer to the Receivable Broadcast types section on the previous page Broadcast type selection for recording You can select the broadcast audio format STEREO SAP or MONO to use when recording We recommend using STEREO SAP Secondary Audio Program sub language recording Some stations transmit a Second Audio Pr...

Page 25: ...creen resets to M 0 00 00 After playback or recording press STOP then REW The tape automatically stops when the tape counter returns to about M 0 00 00 1 2 3 Real time counter Counter memory 25 M 0 35 40 M 0 00 00 2 15 PM M 0 05 25 Clock Real time counter TV Screen Counter memory does not work during fast forward and Auto rewind When you insert a cassette the tape counter is reset to M 0 00 00 The...

Page 26: ...anual recording Timer recording Instant Timer Recording playback or fast forward modes the VCR automatically starts rewinding the tape at the end of the tape The cassette will stop at the beginning of the tape and be ejected and the VCR will turn itself off After you have finished using the VCR rewind eject and remove the cassette Place the cassette in its protective sleeve to protect it from dust...

Page 27: ...d Then your VCR is start ed reverse search Release ez REPEAT at the point where repeat play is to start The holding section is replayed twice automati cally Pressing ez REPEAT again during repeat play return to normal play 1 2 1 2 ez easy Repeat By pressing and holding ez REPEAT during playing back the holding section is replayed twice automatically 4 5 6 7 8 9 TV VCR SP EP SLOW ez POWER OFF ez RE...

Page 28: ...ch CH3 or CH4 The playback picture is noisy Make sure the TV is set to the video channel or video input Adjust the tracking manually when the tape quality is poor Although the unit cleans the video heads automatically dirt may be accumulated after a long period of use Clean the video heads with a commercially available video heads cleaning tape Make sure all the connections with the VCR are made c...

Page 29: ... 6 HOURS T 120 EP mode 8 HOURS T 160 EP mode Rewind Time About 60 seconds T 120 TUNER Antenna 75 ohms UHF 75 ohms VHF VHF Output Signal Channel 3 or 4 Switchable Channel Coverage VHF 2 13 UHF 14 69 CATV 4A A W W 1 W 84 A 5 A 1 VIDEO Video Signal System EIA Standard 525 lines 60 fields NTSC type color signal Input 1 0 Vp p 75 ohms unbalanced Output 1 0 Vp p 75 ohms unbalanced Signal to Noise Ratio ...

Page 30: ...P NO ...
Reviews: