- 13 -
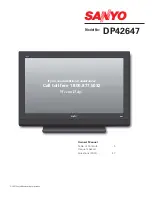
(4) Select program options.
(5) Check the [Erase before programming] and [Verify] menu
as shown <Fig. 10> and press the OK button.
(6) At this time, the download starts. The download will finish
in about 10 seconds.
7-3. MEMORY Board CPLD Download Work
(1) Required Test Equipments & Preparation for
Adjustment
1) Connect the PC and memory JIG as shown in <Fig. 11>.
2) Turn on JIG MAIN POWER SW.
3) Turn on the PC and moniter, operate the Quartus
¥–
software.
(2) Adjustment Sequence
1) Once the program is running, select the [TOOL/
PROGRAMMER] in the MENU item.
2) Select the “Active Serial Programming” in the Mode.
At this time, “ByteBlasterII [LPT1]” must be selected in the
Hardware Setup item.
3) Select the Add file.... and select the Download file.
(ex. EPF.pof)
4) Check the Program/Configure and Verify item.
5) When select the Start, CPLD Download is running.
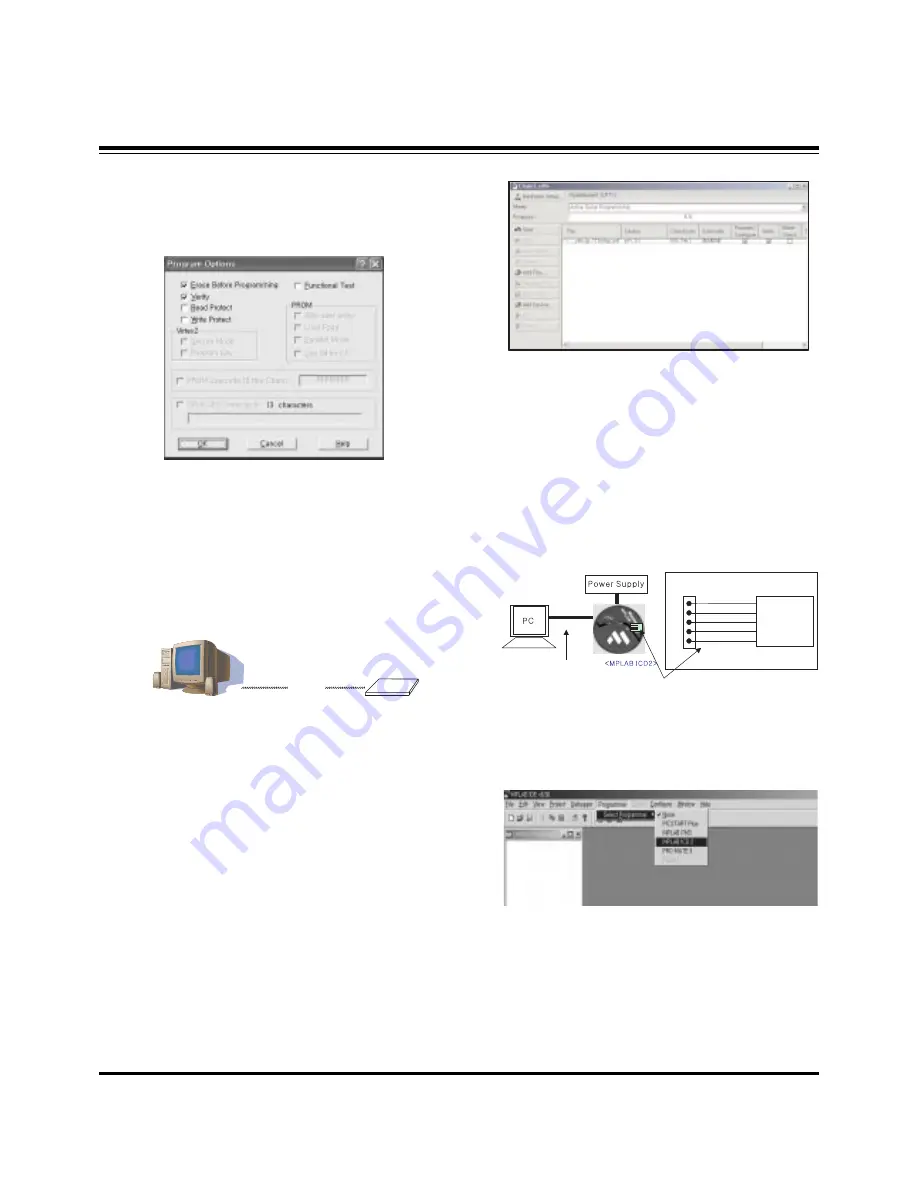
8. Gemstar VBI Micom Download
8-1. Preparation for Adjustment
(1) As shown below, connect the MPLAB ICD2 equipment, PC
and Digital Connector.
(2) Turn on the MPLAB ICD2 POWER Supply.
(3) After turning on the PC and MONITOR, select the ‘MPLAB
IDE’ from the screen
8-2. Adjustment Sequence
(1) Once the program is executed, select the MPLAB ICD2
from "Programmer -> Select Programmer".
ADJUSTMENT INSTRUCTIONS
<Fig . 10> PROGRAM OPTION WINDOW
PC
EPF(Memory)
JIG
<Fig . 11> How to connect the MEMORY JIG and PC
<Fig . 12> CPLD DOWNLOAD PROGRAM
+13V
CN1201
IC1204
VIB Micom
+5V
GND
Data
Clock
<Digital Board>
Connect the MPLAB ICD2 and connector of Digital Board
Connect the RS-232 or USB Cable