


ENG
ENGLISH
7
Connections (notifications)
Connect various external devices to the TV and switch input modes
to select an external device. For more information about an external
device’s connection, refer to the manual supplied with each device.
Available external devices are: HD receivers, DVD players, VCRs, audio
systems, USB storage devices, PC, camcorders or cameras, gaming
devices, and other external devices.
NOTE
y
The external device connection may differ from the model.
y
Connect external devices to the TV regardless of the order of
the TV port.
y
If you record a TV programme on a DVD recorder or VCR, make
sure to connect the TV signal input cable to the TV through a
DVD recorder or VCR. For more information of recording, refer
to the manual provided with the connected device.
y
Refer to the external equipment’s manual for operating
instructions.
y
If you connect a gaming device to the TV, use the cable
supplied with the gaming device.
y
In PC mode, there may be noise associated with the resolution,
vertical pattern, contrast or brightness. If noise is present,
change the PC output to another resolution, change the refresh
rate to another rate or adjust the brightness and contrast on
the PICTURE menu until the picture is clear.
y
In PC mode, some resolution settings may not work properly
depending on the graphics card.
Antenna connection
Connect the TV to a wall antenna socket with an RF cable (75 Ω).
y
Use a signal splitter to use more than 2 TVs.
y
If the image quality is poor, install a signal amplifier properly
to improve the image quality.
y
If the image quality is poor with an antenna connected, try to
realign the antenna in the correct direction.
y
An antenna cable and converter are not supplied.
y
Supported DTV Audio: MPEG, Dolby Digital, Dolby Digital Plus,
HE-AAC
Satellite dish connection
(Only satellite models)
Connect the TV to a satellite dish to a satellite socket with a satellite
RF cable (75 Ω).
CI module connection
View the encrypted (pay) services in digital TV mode.
y
Check if the CI module is inserted into the PCMCIA card slot in
the right direction. If the module is not inserted properly, this
can cause damage to the TV and the PCMCIA card slot.
y
If the TV does not display any video and audio when CI+ CAM
is connected, please contact to the Terrestrial/Cable/Satellite
Service Operator.
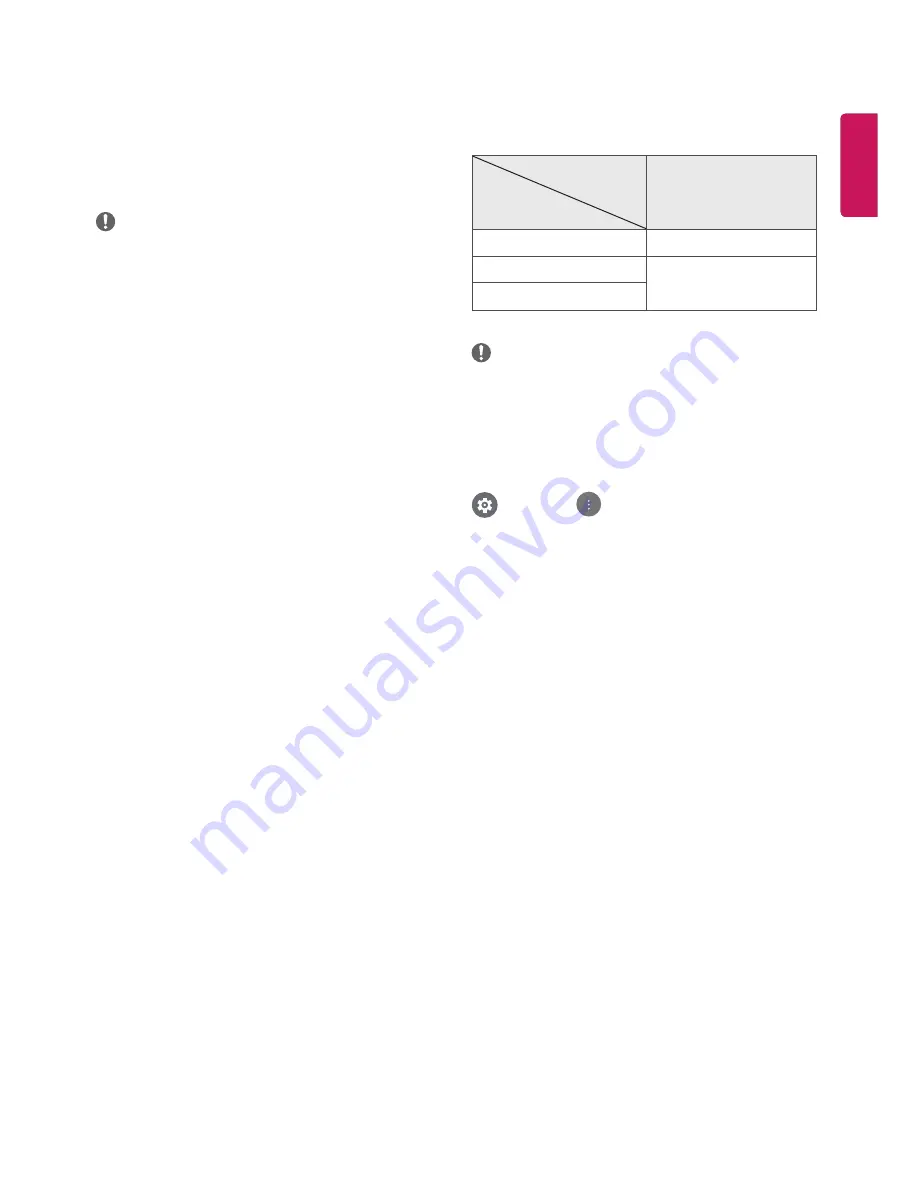
Euro scart connection
(Depending on model)
Transmits the video and audio signals from an external device to the
TV set. Connect the external device and the TV set with the euro scart
cable.
Output
Type
Current
input mode
AV1
(TV Out
1
)
Digital TV
Digital TV
Analogue TV
Analogue TV
Component, AV, HDMI
1
TV Out : Outputs Analogue TV or Digital TV signals.
NOTE
y
Any Euro scart cable used must be signal shielded.
PC connection
When connecting your PC to the HDMI input port, set the HDMI-PC
mode to On.
(Q.MENU)
→
(Advanced)
→
Picture
→
HDMI-PC
Other connections
Connect your TV to external devices. For the best picture and audio
quality, connect the external device and the TV with the HDMI cable.
Some separate cable is not provided.


