


15
ENG
ENGLISH
ASSEMBLING AND PREPARING
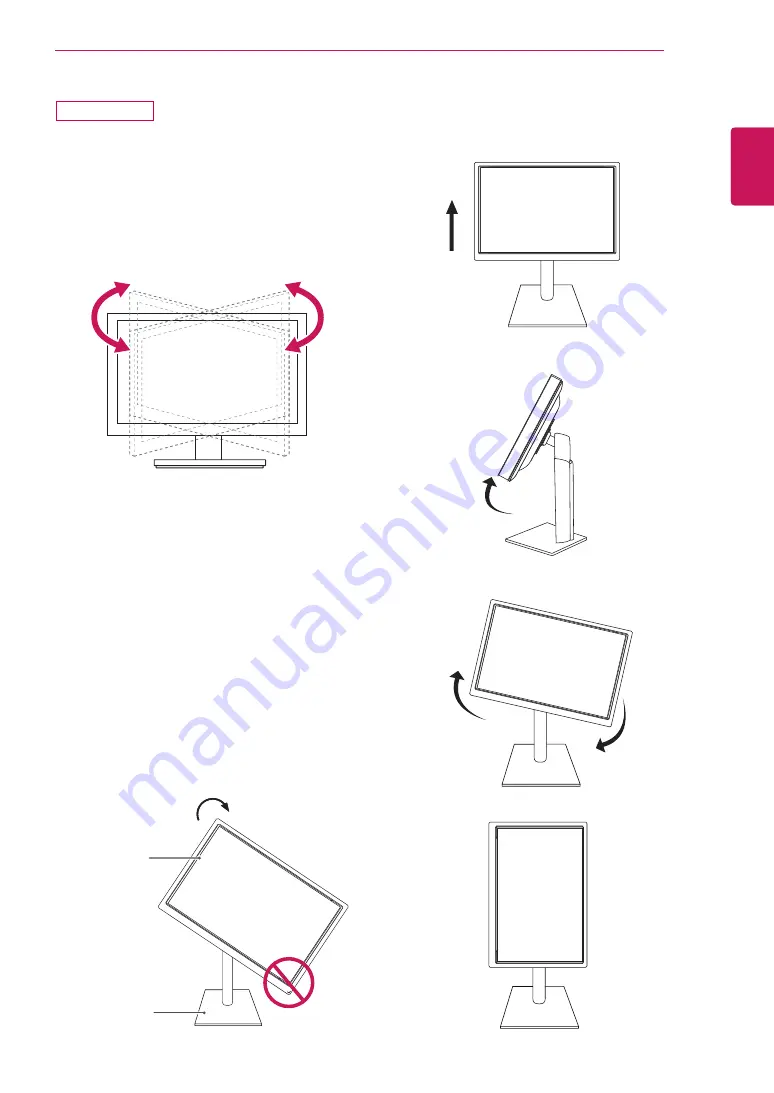
Swivel stand
y
Image shown may differ from your Monitor
set.
1
Swivel 355 degrees and adjust the angle of the
Monitor set to suit your view.
1
Lift the monitor to its highest height to utilize
the Pivot function.
Using the Pivot function
The pivot function allows you to rotate the screen
90 degrees clockwise.
2
Landscape & Portrait : You can rotate the panel
90° clockwise. Please be cautious and avoid
contact between the monitor head and the
Stand Base when rotating the screen to access
the Pivot function. If the monitor head touches
the Stand Base, then the Stand Base could
crack.
Head
section
Stand
section
3
Be careful with the cables when rotating the
screen.
27MB35PH


