background image

34

ENG

ENGLISH

CUSTOMIZING TV SETTING

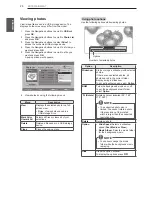
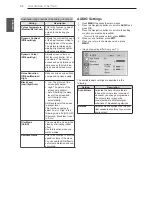
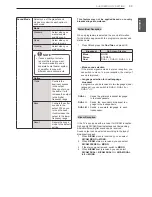
Speaker Sound Output Selection

In AV mode, you can select output sound for the left and 

right loudspeakers.

Select the sound output.

L+R:

 Audio signal from audio L input is sent to the 

left loudspeaker and audio signal from audio R 

input is sent to the right loudspeaker.

L+L:

Audio signal from audio L input is sent to left 

and right loudspeakers.

R+R:

Audio signal from audio R input is sent to left 

and right loudspeakers.

TIME Settings

1  Press 

MENU

 to access the main menus.

2  Press the Navigation buttons to scroll to 

TIME

 and 

press 

OK

.

3  Press the Navigation buttons to scroll to the setting 

or option you want and press 

OK

.

 - To return to the previous level, press 

MENU

.

4  When you are finished, press 

EXIT

5  When you return to the previous menu, press 

MENU

.

y

y

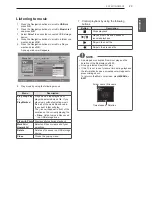
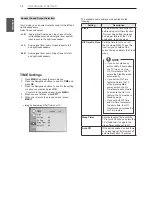
Image shown may differ from your TV.

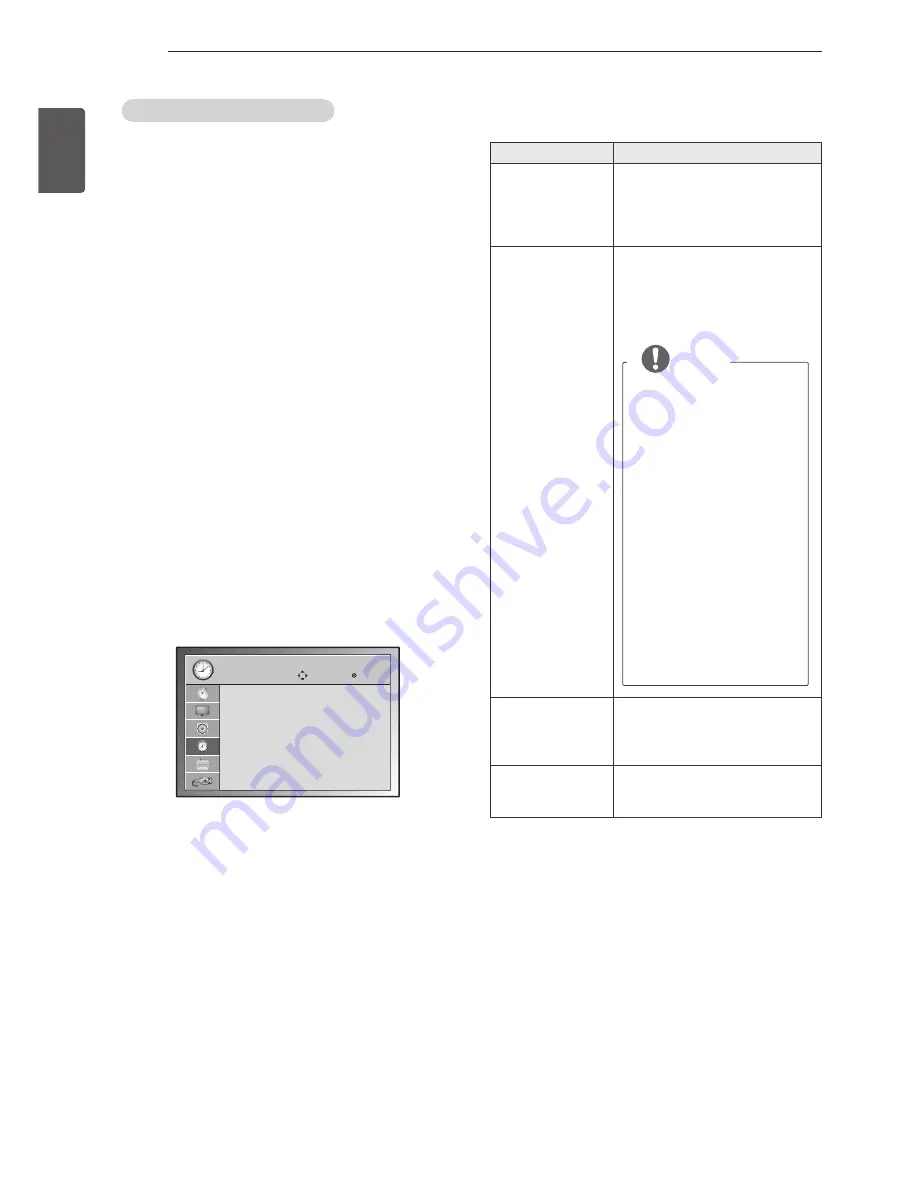
TIME

Clock
Off Time  

: Off

On Time  

: Off

Sleep Timer  : Off
Auto Off  

: Off

Move

OK

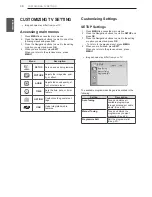
The available audio settings are described in the 

following.

Setting

Description

Clock

You must set the time correctly 

before using on/off time function.

If current time setting is erased 

by a power failure or the TV is 

unplugged, reset the clock. 

Off Time

/

On Time

Sets the time to turn on or off 

the tv automatically. To use this 

function, you should set the 

current time and date in the Clock 

menu.

 NOTE


y

 If you do not press any 

button within 2 hours after 

the TV turns on by the 

On  Time feature, the TV 

enters the Standby mode 

automatically.


y

 If you set the On Time 

feature and turn the TV 

off by pressing Main 

power  switch, the On 

Time feature will not work. 

To activate the On Time 

feature, the TV must be in 

Standby mode.


y

 If you set both Off Time 

and On Time features to 

the same time, the Off 

Time function overrides the 

On Time feature. 

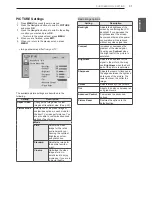
Sleep Timer

Sets the length of time until the 

TV to turns off. When you turn the 

TV off and turn it on again, the 

Sleep Timer will be set to off.

Auto Off  

If the set is switched on and there 

is no input signal, it will switch off 

automatically after 15 minutes. 

Summary of Contents for 22LN4000-TA

Page 1: ...ED TV Please read this manual carefully before operating your set and retain it for future reference 22LN4000 TA P NO MFL67861307 1303 REV00 Printed in Korea LG LED TV applies LCD screen with LED backlights www lg com ...

Page 2: ...NTROL 21 WATCHING TV 21 Turning the TV on for the first time 21 Watching TV 22 Managing programmes 22 Automatically setting up programme 22 Manually setting up programme 23 Editing your programme list 23 Selecting a programme on the programme list 23 Favourite programme setup 24 Using additional options 24 Adjusting aspect ratio 25 Using the input list 26 ENTERTAINMENT 26 Connecting USB storage de...

Page 3: ...et with Grounded earth pin Except for devices which are not grounded on earth Otherwise possibility you may be electrocuted or injured y y Insert power cable plug completely into wall socket otherwise if not secured completely into socket fire ignition may break out y y Ensure the power cord does not come into contact with hot objects such as a heater This may cause a fire or an electric shock haz...

Page 4: ... Do not drop metallic objects such as coins hair pins chopsticks or wire into the product or inflammable objects such as paper and matches Children must pay particular attention Electrical shock fire or injury can occur If a foreign object is dropped into the product unplug the power cord and contact the service centre y y Do not spray water on the product or scrub with an inflammable substance th...

Page 5: ...ly so as not to drop y y Only use the attachments accessories specified by the manufacturer y y When installing the antenna consult with a qualified service technician If not installed by a qualified technician this may create a fire hazard or an electric shock hazard y y We recommend that you maintain a distance of at least 2 to 7 times the diagonal screen size when watching TV If you watch TV fo...

Page 6: ...y upon the panel with a hand or sharp object such as nail pencil or pen or make a scratch on it as it may cause damage to screen y y Avoid touching the screen or holding your finger s against it for long periods of time Doing so may produce some temporary or permanent distortion damage to screen y y When cleaning the product and its components unplug the power first and wipe it with a soft cloth A...

Page 7: ...ur viewing position left right top down This phenomenon occurs due to the characteristic of the panel It is not related with the product performance and it is not malfunction y y Displaying a still image e g broadcasting channel logo on screen menu scene from a video game for a prolonged time may cause damage to the screen resulting in retention of the image which is known as image sticking The wa...

Page 8: ...3 Connect an external device to the TV set ASSEMBLING AND PREPARING Unpacking Check your product box for the following items If there are any missing accessories contact the local dealer where you purchased your product The illustrations in this manual may differ from the actual product and item CAUTION y y Do not use any unapproved items to ensure the safety and product life span y y Any damages ...

Page 9: ...atteries AAA See p 20 Owner s manual Cable Tie Depending on model See p 16 Stand Base See p 13 or Power Cord Depending on model See p 18 AC DC Adapter Depending on model See p 18 AC DC Adapter Depending on model See p 18 Isolator Depending on model See p 10 or ...

Page 10: ...r after installation Before starting be sure that the TV antenna is connected ANTENNA CABLE IN Cable Antenna Wall Isolator 1 Connect to TV 2 Connect to Set Top box or Connect one end of the isolator to cable antenna jack and the other to TV set or set top box Equipment connected to the protective earthing of the building installation through the mains connection or through other equipment with a c...

Page 11: ...elects the highlighted menu option or confirms an input SETTINGS Accesses the main menu or saves your input and exits the menus INPUT Changes the input source I Turns the power on or off 1 All of the buttons are touch sensitive and can be operated through simple touch with your finger INPUT OK SETTINGS Touch buttons1 Screen Remote control Sensor Speakers ...

Page 12: ...nd all cables y y When holding the TV the screen should face away from you to avoid damage y y Hold the top and bottom of the TV frame firmly Make sure not to hold the transparent part speaker or speaker grill area y y When transporting a large TV there should be at least 2 people y y When transporting the TV by hand hold the TV as shown in the following illustration y y When transporting the TV d...

Page 13: ...ing the stand to the TV set place the screen facing down on a cushioned table or flat surface to protect the screen from scratches CAUTION y y Lay a foam mat or soft protective cloth on the surface to protect the screen from damage y y When Detaching the stand to the TV set place the screen facing down on a cushioned table or flat surface to protect the screen from scratches NOTE y y When Detachin...

Page 14: ...N y y Make sure that children do not climb on or hang on the TV NOTE y y Use a platform or cabinet that is strong and large enough to support the TV securely y y Brackets bolts and ropes are not provided You can obtain additional accessories from your local dealer WARNING y y If a television is not positioned in a sufficiently stable location it can be potentially hazardous due to falling Many inj...

Page 15: ...nt bracket that meet the VESA standard Standard dimensions for the wall mount kits are described in the following table Separate purchase Wall Mounting Bracket Model 22LN4000 TA VESA A x B 100 x 100 Standard screw M4 Number of screws 4 Wall mount bracket LSW130B A B Using the Kensington security system This feature is not available for all models The Kensington security system connector is located...

Page 16: ...sing an improper accessory are not covered by the manufacturer s warranty NOTE y y Use the screws that are listed on the VESA standard screw specifications y y The wall mount kit includes an installation manual and necessary parts y y The wall mount bracket is not provided You can obtain additional accessories from your local dealer y y The length of screws may differ depending on the wall mount M...

Page 17: ...input modes to select an external device For more information of external device s connection refer to the manual provided with each device Available external devices are HD receivers DVD players VCRs audio systems USB storage devices gaming devices and other external devices NOTE y y The external device connection may differ from the model y y Connect external devices to the TV regardless of the ...

Page 18: ... to the AC DC power adapter before connecting the TV s power plug to a wall power outlet or Composite connection Transmits analog video and audio signals from an external device to the TV Connect the external device and the TV with the composite cable as shown VIDEO AUDIO R L MONO AV IN DVD Blu Ray HD Cable Box VCR YELLOW RED WHITE Not Provided ...

Page 19: ...G CONNECTIONS USB connection Connect a USB storage device such as a USB flash memory external hard drive or a USB memory card reader to the TV and access the USB menu to use various multimedia files USB IN USB Not Provided ...

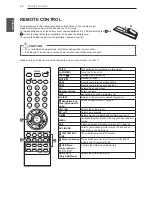
Page 20: ...E 1 2 3 TV PC This button does not function in this model POWER Turns the TV on or off INPUT Changes the input source MUTE Mutes all sounds PSM Recalls your preferred picture setting SSM Recalls your preferred sound setting I II Selects the sound output Number buttons Enters numbers LIST Accesses the saved programme list Q VIEW Returns to the previously viewed programme 1 Navigation but tons up do...

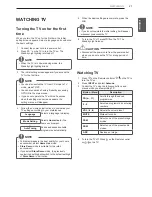
Page 21: ... saves available programmes automatically NOTE y y To display images in the best quality for your home environment select Home Use mode y y Store Demo mode is suitable for the retail environment y y If you select Store Demo mode the previously customized settings will switch to the default settings of Store Demo in 5 minutes 5 When the basic settings are complete press the OK NOTE y y If you do no...

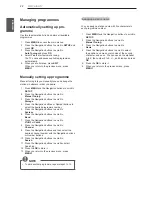
Page 22: ...on buttons to scroll to System 6 Press the Navigation buttons to scroll to Band 7 Press the Navigation buttons to scroll to V UHF or Cable 8 Press the Navigation buttons to scroll to Channel 9 Press the Navigation buttons and then select the desired channel number with the Navigation buttons or Number buttons 10 Press the Navigation buttons to scroll to Search 11 Press the Navigation buttons to sc...

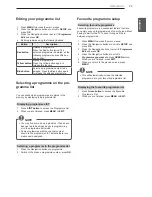
Page 23: ...been set up to be skipped by auto programming or in the programme edit mode y y Some programmes with the channel number shown in the programme LIST indicate there is no station name assigned Selecting a programme in the programme list 1 Press the Navigation buttons to programme 2 Switch to the chosen programme number press OK Favourite programme setup Selecting favourite programme Favourite progra...

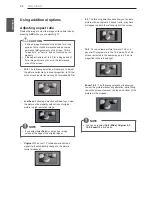
Page 24: ...t its optimal size by pressing ARC while you are watching TV CAUTION y y If a fixed image displays on the screen for a long period of time it will be imprinted and become a permanent disfigurement on the screen This is image burn or burn in and not covered by the warranty y y If the aspect ratio is set to 4 3 for a long period of time image burn may occur on the letterboxed area of the screen 16 9...

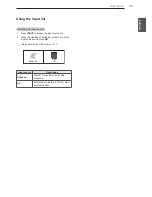
Page 25: ...access the input source list 2 Press the Navigation buttons to scroll to one of the input sources and press OK y y Image shown may differ from your TV Antenna AV Input source Description Antenna Watch TV over the air and cable broadcast AV Watch the contents in a VCR or other external devices ...

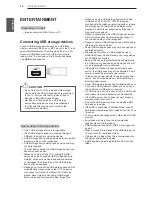
Page 26: ...d with the windows operating system In case of a storage device formatted as a different utility programme which is not supported by Windows it may not be recognized y y Please connect power to a USB storage device over 0 5 A which requires an external power supply If not the device may not be recognized y y Please connect a USB storage device with the cable offered by the device maker y y Some US...

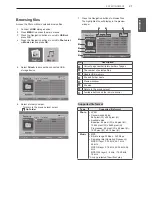
Page 27: ... window Free Space 728MB Photo List Up Folder Up Folder SG kim 002 10 01 2010 SG kim 003 10 01 2010 SG kim 001 10 01 2010 SG kim 004 10 01 2010 SG kim 005 10 01 2010 SG kim 006 10 01 2010 SG kim 007 10 01 2010 Page 1 1 No Marked 1366x768 125KB 1 4 5 6 7 8 2 USB Device 3 Navigation Option Mark Exit Drive 1 Root No Description 1 Current page number total number of pages 2 The number of selected file...

Page 28: ...he options press OK Viewing photos View image files saved in a USB storage device The displays on the screen may differ from the model 1 Press the Navigation buttons to scroll to USB and press OK 2 Press the Navigation buttons to scroll to Photo List and press OK 3 Press the Navigation buttons to select Drive1 to access the connected USB storage device 4 Press the Navigation buttons to scroll to a...

Page 29: ...e If you play music without selecting music files all of the music files saved in the current folder will play The icon will appear in front of the duration on the currently playing file y y Drive Listen to music files saved in a USB storage drive Play with Photo Displays photos during playback Mark All or Unmark All Selects all files or clears all of your selections Delete Deletes a file saved in...

Page 30: ...ON Customizes the general set tings USB Using integrated media features Customizing Settings SETUP Settings 1 Press MENU to access the main menus 2 Press the Navigation buttons to scroll to SETUP and press OK 3 Press the Navigation buttons to scroll to the setting or option you want and press OK To return to the previous level press MENU 4 When you are finished press EXIT When you return to the pr...

Page 31: ...justs the video image for the retail environment by en hancing the contrast brightness colour and sharpness Standard Adjusts the image for the normal environ ment Cinema Optimizes the video images for a cin ematic look to enjoy movies as if you are in a movie theatre Basic image options Setting Description Backlight Adjusts the brightness of the screen by controlling the LCD backlight If you decre...

Page 32: ... Low or High in the following mode AV NTSC M Otherwise Black level is set to Auto Film Mode On Off You can watch a cinema like video by eliminating judder effect Use this function when you watch movies Red Green Blue This is the function to filter the specific colours of the video You can use the RGB filter to set colour saturation and hue accurately AUDIO Settings 1 Press MENU to access the main ...

Page 33: ... quality NICAM Near Instantaneous Companding Audio Multiplex digital sound can be received Sound output can be selected according to the type of broadcast received 1 When NICAM mono is received you can select NICAM MONO or MONO 2 When NICAM stereo is received you can select NICAM STEREO or MONO 3 If the stereo signal is weak switch to MONO 4 When NICAM dual is received you can select NICAM DUAL I ...

Page 34: ...K The available audio settings are described in the following Setting Description Clock You must set the time correctly before using on off time function If current time setting is erased by a power failure or the TV is unplugged reset the clock Off Time On Time Sets the time to turn on or off the tv automatically To use this function you should set the current time and date in the Clock menu NOTE...

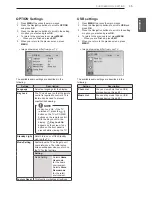
Page 35: ...n you are finished press EXIT 5 When you return to the previous menu press MENU y y Image shown may differ from your TV OPTION Language English Key Lock Off Standby Light On Mode Setting Home Use Factory Reset Move OK The available audio settings are described in the following Setting Description Language Selects a language for the display Key Lock The TV can be set so that the remote control is r...

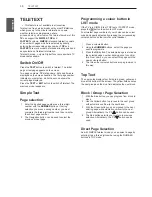
Page 36: ...Navigation button can be used to select the previous or next page Programming a colour button in LIST mode If the TV is in SIMPLE text TOP text or FASTEXT mode press the button to switch to LIST mode Four teletext page numbers of your choice can be colour coded and easily selected by pressing the corresponding coloured button on the remote control handset 1 Press a coloured button 2 Using the NUMB...

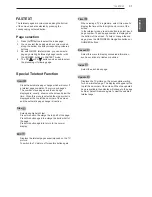
Page 37: ...ge change is inactive Size Selects double height text Press this button to enlarge the top half of the page Press this button again to enlarge the bottom half of the page Press this button again to return to the normal display MIX Displays the teletext pages superimposed on the TV picture To switch the TV picture off press this button again Time When viewing a TV programme select this menu to disp...

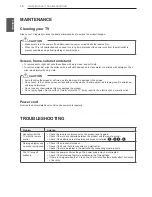
Page 38: ...esult in scratches and image distortions y y Do not use any chemicals as this may damage the product y y Do not spray liquid onto the surface If water enters the TV it may result in fire electric shock or malfunction Power cord Remove the accumulated dust or dirt on the power cord regularly TROUBLESHOOTING Problem Solution Cannot control the TV with the remote control y y Check the remote control ...

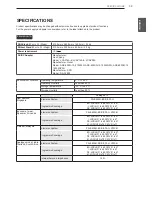
Page 39: ... VHF UHF 1 to 69 CATV 01 to 47 DK VHF UHF 1 to 69 CATV 01 to 47 M VHF UHF 2 to 78 CATV 01 to 71 Analogue model India Thailand South Africa Television System PAL SECAM B G D K PAL I NTSC M Programme Coverage BG VHF UHF 1 to 69 CATV 01 to 47 I VHF UHF 1 to 69 CATV 01 to 47 DK VHF UHF 1 to 69 CATV 01 to 47 M VHF UHF 2 to 78 CATV 01 to 71 External Antenna Impedance 75 Ω SPECIFICATIONS Product specific...

Page 40: ...Record the model number and serial number of the TV Refer to the label on the back cover and quote this information to your dealer when requiring any service MODEL SERIAL ...

Reviews: