LG 22LD310 Owner'S Manual Download Page 7

5

C

Clleeaan

niin

ng

g

When cleaning, unplug the power cord and rub
gently with a soft cloth to prevent scratching.
Do not spray water or other liquids directly on
the  TV  as  electric  shock  may  occur.  Do  not
clean with chemicals such as alcohol, thinners
or benzene.  

M

Mo

ovviin

ng

g

Make  sure  the  product  is  turned  off,
unplugged and all cables have been removed. It
may take 2 or more people to carry larger TVs.
Do not press against or put stress on the front
panel of the TV. 

V

Veen

nttiillaattiio

on

n

Install  your  TV  where  there  is  proper  ventila-
tion. Do not install in a confined space such as
a  bookcase.  Do  not  cover  the  product  with
cloth  or  other  materials  (e.g.)  plastic  while
plugged in. Do not install in excessively dusty
places.   

Take  care  not  to  touch  the  ventilation  open-
ings. When watching the TV for a long period,
the ventilation openings may become hot.  

If you smell smoke or other odors coming from
the TV or hear strange sounds, unplug the power
cord contact an authorized service center.

No  presione  en  exceso  el  panel  con  sus  manos  u
objetos  afilados,  como  tornillos,  lápices  o  bolí-
grafos, y evite rayarlo.

Keep the product away from direct sunlight.

FFo

orr   LLC

CD

D   T

TV

V

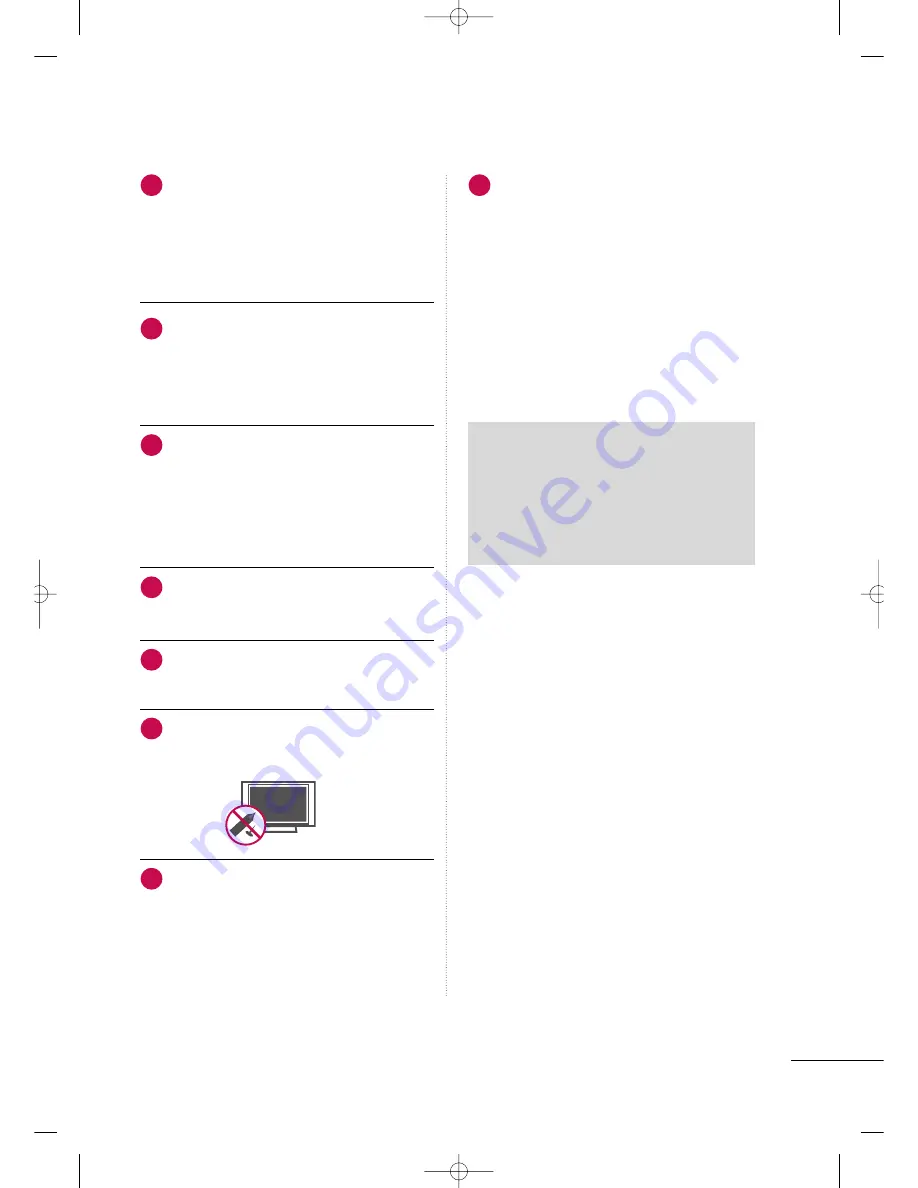
If the TV feels cold to the touch, there may be
a  small  “flicker”  when  it  is  turned  on.  This  is
normal, there is nothing wrong with TV.

Some minute dot defects may be visible on the
screen,  appearing  as  tiny  red,  green,  or  blue
spots. However, they have no adverse effect on
the monitor's performance.
Avoid touching the LCD screen or holding your
finger(s)  against  it  for  long  periods  of  time.
Doing  so  may  produce  some  temporary  dis-
tortion effects on the screen.

19

26

20

21

22

23

24

25

ON DISPOSAL 

(Only Hg lamp used LCD TV)

The fluorescent lamp used in this product contains
a  small  amount  of  mercury.    Do  not  dispose  of
this  product  with  general  household  waste.
Disposal  of  this  product  must  be  carried  out  in
accordance to the regulations of your local authority.

MFL41469218-en  4/29/10 2:15 PM  Page 5

Summary of Contents for 22LD310

Page 1: ...B PBDE etc within LG standard level Details should be followed Eco SCM management standard LG 56 A 2524 Especially Part should be followed and controlled the following specification 1 Eco hazardous substances test report should be submitted when Part certification test and First Mass Production 2 Especially Don t use or contain lead Pb and cadmium Cd in ink N O T E S Owner s Manual Specification O...

Page 2: ...Pagination sheet Pagination sheet P NO MFL41469222 Total pages 60 pages 2 Front cover LG EN P NO Rear cover LG EN 59 58 ...

Page 3: ...P NO MFL41469222 1006 REV01 www lg com OWNER S MANUAL LCD TV Please read this manual carefully before operating your set and retain it for future reference 22LD310 26LD310 32LD310 ...

Page 4: ...The exclamation point within an equilateral triangle is intended to alert the user to the presence of important operating and maintenance servicing instructions in the litera ture accompanying the appliance TO REDUCE THE RISK OF ELECTRIC SHOCK DO NOT REMOVE COVER OR BACK NO USER SERVICEABLE PARTS INSIDE REFER TO QUALIFIED SERVICE PERSONNEL WARNING CAUTION TO REDUCE THE RISK OF FIRE AND ELECTRIC SH...

Page 5: ...t from the apparatus Only use attachments accessories specified by the manufacturer Use only with the cart stand tripod bracket or table specified by the manufacturer or sold with the apparatus When a cart is used use caution when moving the cart apparatus com bination to avoid injury from tip over Unplug this apparatus during lighting storms or when unused for long periods of time Refer all servi...

Page 6: ...r attention to plugs wall outlets and the point where the cord exits the appliance Do not make the TV with the power cord plugged in Do not use a damaged or loose power cord Be sure do grasp the plug when unplugging the power cord Do not pull on the power cord to unplug the TV WARNING To reduce the risk of fire or electrical shock do not expose this product to rain moisture or other liquids Do not...

Page 7: ...or other odors coming from the TV or hear strange sounds unplug the power cord contact an authorized service center No presione en exceso el panel con sus manos u objetos afilados como tornillos lápices o bolí grafos y evite rayarlo Keep the product away from direct sunlight F Fo or r L LC CD D T TV V If the TV feels cold to the touch there may be a small flicker when it is turned on This is norma...

Page 8: ...etup 25 WATCHING TV CHANNEL CONTROL Remote Control Functions 26 Turning On the TV 28 Channel Selection 28 Volume Adjustment 28 On Screen Menus Selection 29 Channel Search Auto Tuning 30 Manual Tuning 31 Fine Tuning Adjustment 32 Favorite Channels Setup 33 Key Lock 34 Factory Reset 34 PICTURE CONTROL Picture Size Aspect Ratio Control 35 Preset Picture Settings Picture Mode Preset 36 Manual Picture ...

Page 9: ...7 TIME SETTING Clock Setup 52 Auto On Off Time Setting 53 Sleep Timer Setting 54 APPENDIX Troubleshooting 55 Maintenance 57 Product Specifications 58 IR Codes 59 MFL41469218 en 4 29 10 2 15 PM Page 7 ...

Page 10: ...nd richer sound field When a fixed image e g logos screen menus video game and computer display is displayed on the TV for an extended period it can become permanently imprinted on the screen This phenomenon is known as image burn or burn in Image burn is not covered under the manufacturer s warranty In order to prevent image burn avoid displaying a fixed image on your TV screen for a prolonged pe...

Page 11: ...EE P RA TI O M TS FA V MUT E A PR OG CA PT IO N TV IN PU T ME MO RY ER ASE SO UN D PI CT UR E Wipe spots on the exterior only with the polishing cloth Do not wipe roughly when removing stains Excessive pressure may cause scratches or discoloration Polishing Cloth Not included with all models F Fo or r 2 22 2L LD D3 31 10 0 Cable Management Clip Protection Cover O On nl ly y 2 26 6 3 32 2L LD D3 31...

Page 12: ...ER Button INPUT Button INPUT MENU ENTER CH VOL CHANNEL D D E E Buttons VOLUME Buttons ENTER Button MENU Button INPUT Button POWER Button SPEAKER Remote Control Sensor Power Standby Indicator Illuminates red in standby mode Illuminates blue when the TV is switched on Can be adjusted P Po ow we er r I In nd di ic ca at to or r in the OPTION menu G G p p 5 50 0 MFL41469218 en 4 29 10 2 15 PM Page 10 ...

Page 13: ...I signal to HDMI IN This TV does not support DVI VIDEO signal using DVI to HDMI cable Audio Output Connect an external amplifier or add a subwoofer to your surround sound system Audio Video Input AV IN Connect audio video output from an external device to these jacks SERVICE ONLY PORT Component Input Connect a component video audio device to these jacks Antenna Input Connect RF antenna to this jac...

Page 14: ...r it click 1 2 INSTALLATION PROTECTION COVER Insert the P PR RO OT TE EC CT TI IO ON N C CO OV VE ER R into the TV 4 P PR RO OT TE EC CT TI IO ON N C CO OV VE ER R Fix the 4 bolts securely using the holes in the back of the TV 5 DETACHMENT Carefully place the TV screen side down on a cushioned surface to protect the screen from damage 1 Loose the bolts from TV 2 Detach the stand from TV 3 MFL41469...

Page 15: ...ightened If not tightened fully the TV can tilt forward after the product installa tion Do not over tighten NOTE Carefully place the TV screen side down on a cushioned surface to protect the screen from damage 1 Loose the bolts from TV 2 Detach the stand from TV 3 After removing the stand install the included p pr ro ot te ec ct ti io on n c co ov ve er r over the hole for the stand Press the P PR...

Page 16: ...ing our wall mount kit a detailed installation manual and all parts necessary for assembly are provided G G Do not use screws longer then the standard dimen sion as they may cause damage to the inside to the TV G G For wall mounts that do not comply with the VESA standard screw specifications the length of the screws may differ depending on their specifica tions G G Do not use screws that do not c...

Page 17: ...ld the CABLE MAN AGEMENT CLIP with both hands and pull it backward G G Do not hold the CABLE MANAGEMENT CLIP when moving the TV If the TV is dropped you may be injured or the product may be broken NOTE CABLE MANAGEMENT CLIP For 26 32LD310 Connect the cables as necessary To connect additional equipment see the EXTERNAL EQUIPMENT SETUP section Install the CABLE MANAGEMENT CLIP as shown 1 2 Put the c...

Page 18: ... G Do not mount near or above any type of heat source CAUTION 4 inches 4 inches 4 inches SWIVEL STAND Except 22LD310 After installing the TV you can adjust the TV set manually to the left or right direction by 20 degrees to suit your viewing position POSITIONING YOUR DISPLAY For 22LD310 Here shown may be somewhat different from your TV Adjust the position of the panel in various ways for maximum c...

Page 19: ...e is not available for all models The TV is equipped with a Kensington Security System connector on the back panel Connect the Kensington Security System cable as shown below For the detailed installation and use of the Kensington Security System refer to the user s guide provided with the Kensington Security System For further information contact h ht tt tp p w ww ww w k ke en ns si in ng gt to o...

Page 20: ...s Insert the eye bolts or TV brackets bolts and tighten them securely in the upper holes Secure the wall brackets with the bolts sold separately to the wall Match the height of the bracket that is mounted on the wall to the holes in the product Ensure the eye bolts or brackets are tightened securely Use a sturdy rope sold separately to tie the product It is safer to tie the rope so it becomes hori...

Page 21: ...oaxial Wire 75 ohm RF Coaxial Wire 75 ohm Single family Dwellings Houses Connect to wall jack for outdoor antenna Be careful not to bend the copper wire when connecting the antenna Copper Wire To improve the picture quality in a poor signal area please purchase a signal amplifier and install properly If the antenna needs to be split for two TV s install a 2 Way Signal Splitter If the antenna is no...

Page 22: ...set top box operation Select the C Co om mp po on ne en nt t input source on the TV using the I IN NP PU UT T button on the remote control To prevent the equipment damage never plug in any power cords until you have finished connecting all equipment Supported Resolutions Signal 480i 480p 720p 1080i 1080p Component Yes Yes Yes No No HDMI No Yes Yes No No IN SERVICE ONLY ANTENNA IN AUDIO OUT VIDEO A...

Page 23: ... If the DVD player does not support Auto HDMI you must TV the output resolution appropriately To get the best picture quality adjust the output resolution of the source device to 1280 720p G GWe recommend less than 10m for HDMI cable G G HDMI Audio Supported Format PCM G GIf the Auto setting is set to Dolby DTS Bitstream in some DVDP STB make sure to change the setting to PCM G GIf the resolution ...

Page 24: ... T I IN N V VI ID DE EO O jacks on the TV Match the jack colors Y green PB blue and PR red Connect the audio outputs of the DVD to the C CO OM MP PO ON NE EN NT T I IN N A AU UD DI IO O jacks on the TV 1 How to connect 2 How to use Turn on the DVD player insert a DVD Select the C Co om mp po on ne en nt t input source on the TV using the I IN NP PU UT T button on the remote control Refer to the DV...

Page 25: ...EO COMPONENT IN 1 G G If the DVD player supports Auto HDMI function the output resolution of the source device will be auto matically TV to 1280 720p G G If the DVD player does not support Auto HDMI you must TV the output resolution appropriately To get the best picture quality adjust the output resolution of the source device to 1280 720p G GWe recommend less than 10m for HDMI cable G G HDMI Audi...

Page 26: ... O L L M MO ON NO O jack of the TV NOTE 1 Connect the A AU UD DI IO O V VI ID DE EO O jacks between TV and VCR Match the jack colors Video yellow Audio Left white and Audio Right red 1 How to connect 2 How to use Insert a video tape into the VCR and press PLAY on the VCR Refer to the VCR owner s manual Select the A AV V input source on the TV using the I IN NP PU UT T button on the remote control ...

Page 27: ...OUT AUDIO VIDEO COMPONENT IN AV IN L R VIDEO VIDEO AUDIO L MONO R Camcorder Video Game Set 1 EXTERNAL STEREO SETUP Use to connected either an external amplifier or add a sub woofer to your surround sound system Connect the input jack of the stereo amplifier to the A AU UD DI IO O O OU UT T jacks on the TV Set up your speakers through your analog stereo amplifier according to the instructions provi...

Page 28: ...o Stereo or SAP G G p p 4 48 8 Searches for available channels G G p p 3 30 0 Memorizes or erases selected channel G G p p 3 31 1 Selects CAPTION mode G G p p 5 51 1 Select available channels Increase decrease the sound level Navigate the on screen menus and adjust the system set tings to your preference Displays the main menu Tune to the last channel viewed Select the amount of time before your T...

Page 29: ...ries Don t mix old or used batteries with new ones Close cover Installing Batteries NUMBER button Turns your TV In AV Component and HDMI input sources screen returns to the last TV channel Select the desired input source Switch the sound on or off Scroll through the programmed Favorite channels G G p p 3 33 3 POWER TV INPUT MUTE FAV MFL41469218 en 4 29 10 2 15 PM Page 27 ...

Page 30: ...ate it was last set to even if the power cord is out When finished using the TV press the P PO OW WE ER R button on the remote control The TV reverts to standby mode 1 2 3 Press the C CH H D D or E E or N NU UM MB BE ER R buttons to select a channel number 1 VOLUME ADJUSTMENT CHANNEL SELECTION Press the V VO OL L F F or G G button to adjust the volume If you want to switch the sound off press the ...

Page 31: ...U Picture MENU Audio MENU Time MENU Option MENU Clock Off Time On Time Sleep Timer Time Auto Tuning Manual Tuning Favorite Channel Setup Sound Mode Treble 50 Bass 50 Reset Auto Volume Balance 0 Audio Language Key Lock Caption Text Power Indicator Factory Reset Option Aspect Ratio Picture Mode Backlight 100 Contrast 100 Brightness 50 Sharpness 70 Color 70 Tint 0 Picture DEF G MENU DEF G MENU DEF G ...

Page 32: ...ls with Manual Tuning Redo Auto Tuning if the TV is ever moved to another location Auto Tuning will search for channels only through the Antenna jack If channels numbers for broadcast over the air TV and cable TV are duplicated where different channels have the same number press the same number buttons again to toggle between For example press 17 to go to the channel press 17 again to go to the du...

Page 33: ...scan manually Manual Tuning Adding Deleting Channels Use the C CH H D D E E or NUMBER buttons to select the channel number you want to add or delete Press the M ME EM MO OR RY Y E ER RA AS SE E button to select M Me em mo or ry y or E Er ra as se e Press the E EN NT TE ER R button to return to TV viewing 1 2 3 You can also use the S Se et tu up p menu to adjust M Ma an nu ua al l T Tu un ni in ng ...

Page 34: ...T Tu un ni in ng g Press the G G button and then D D or E E button to select F Fi in ne e Press the F F or G G button to adjust the picture to your preference Press the E EN NT TE ER R button to save 2 1 4 5 3 1 2 Setup Auto Tuning Manual Tuning Favorite Channel TV 39 Memory Fine 0 Manual Tuning G DE F G MENU Auto Tuning Manual Tuning Favorite Channel Setup DE F G MENU Setup Auto Tuning Manual Tun...

Page 35: ...it te e C Ch ha an nn ne el l Press the G G button and then D D or E E button to select the first favorite channel position Use the F F or G G button to set the desired channel number for first favorite channel Repeat steps 3 to 5 to memorize other favorite chan nels You can store up to 8 channels Press the M ME EN NU U button to move to the previous menu 2 3 4 5 6 1 2 3 4 1 Setup Auto Tuning Manu...

Page 36: ...actory Reset Option DE F G MENU NOTE G G In K Ke ey y L Lo oc ck k O On n if the TV is turned off press the I button on the TV or P PO OW WE ER R buttons on the remote control G G With the K Ke ey y L Lo oc ck k O On n the display K Ke ey y L Lo oc ck k O On n appears on the screen if any button on the front panel is pressed while viewing the TV Use to quickly reset all the menu options to their o...

Page 37: ...lead you to view the pic ture without any alternation while filling the entire screen However the top and bottom por tions of the picture will be cropped You can adjust the enlarge proportion of Zoom1 using D D or E E button Zoom 2 Choose Zoom2 when you want the picture to be altered both horizontally extended and vertical ly cropped The picture taking a halfway trade off between alteration and sc...

Page 38: ... repeatedly to select the picture appearance setup option as below V Vi iv vi id d S St ta an nd da ar rd d or C Ci in ne em ma a Press the E EN NT TE ER R button to return to TV viewing You can also use the P Pi ic ct tu ur re e menu to adjust P Pi ic ct tu ur re e M Mo od de e 2 1 Aspect Ratio Picture Mode Backlight 100 Contrast 100 Brightness 50 Sharpness 70 Color 70 Tint 0 Picture DEF G MENU E...

Page 39: ...of the screen adjust the bright ness of LCD panel C Co on nt tr ra as st t Adjusts the difference between light and dark B Br ri ig gh ht tn ne es ss s Increases or decreases the amount of white in the picture S Sh ha ar rp pn ne es ss s Adjusts the level of crispness in the edges between the light and dark areas of the picture The lower the level the softer the image C Co ol lo or r Adjusts inten...

Page 40: ...he previous menu You can calibrate the screen for each Picture Mode or set the video value according to the special video screen You can set the video value differently for each input To reset to the factory default screen after making adjustments to each video mode execute the Picture Reset function for each Picture Mode 1 2 3 4 1 3 2 Picture Mode Backlight 100 Contrast 100 Brightness 50 Sharpnes...

Page 41: ...educes screen noise without compromising video quality Low The reflection of the screen gets darker High The reflection of the screen gets brighter Set black level of the screen to proper level Makes video clips recorded in film look more natural by eliminating judder effect Set to warm to enhance hotter colors such as red or set to cool to make picture bluish Dynamic Color Off Low High Noise Redu...

Page 42: ...tton to initialize the adjusted value Press the M ME EN NU U button to move to the previous menu Returns to the default factory setting for Picture Mode Advanced 1 2 3 4 3 2 Picture Backlight 100 Contrast 100 Brightness 50 Sharpness 70 Color 70 Tint 0 Advanced Picture Reset Picture Reset G OK 1 DEF G MENU Backlight 100 Contrast 100 Brightness 50 Sharpness 70 Color 70 Tint 0 Advanced Picture Reset ...

Page 43: ... H H P Po os si it ti io on n or V V P Po os si it ti io on n Press the F F or G G button to make appropriate adjust ments Press the M ME EN NU U button to move to the previous menu 2 1 4 5 3 6 This function works in the following mode when the signal exist HDMI Component 3 4 5 1 Aspect Ratio Picture Mode Backlight 100 Contrast 100 Brightness 50 Sharpness 70 Color 70 Tint 0 Picture 2 Picture Contr...

Page 44: ...ss the M ME EN NU U button to move to the previous menu 2 1 4 5 3 This function operates in current mode To initialize the adjusted value This function works in the following mode when the signal exist HDMI Component 3 4 1 Aspect Ratio Picture Mode Backlight 100 Contrast 100 Brightness 50 Sharpness 70 Color 70 Tint 0 Picture 2 Screen Manual Config Reset To Set Reset G DEF G MENU DEF G MENU Picture...

Page 45: ...y and are not adjustable Press the S SO OU UN ND D button repeatedly to select the appropri ate sound setup as below S St ta an nd da ar rd d M Mu us si ic c or C Ci in ne em ma a Press the E EN NT TE ER R button to return to TV viewing You can also adjust S SO OU UN ND D M MO OD DE E in the A Au ud di io o menu 2 1 1 Sound Mode Treble 50 Bass 50 Reset Auto Volume Balance 0 Audio DEF G MENU 3 2 Au...

Page 46: ...S St ta an nd da ar rd d M Mu us si ic c or C Ci in ne em ma a Press the E EN NT TE ER R button and then D D or E E button to select T Tr re eb bl le e or B Ba as ss s Press the F F or G G button to make appropriate adjustments Press the M ME EN NU U button to move to the previous menu 1 2 3 4 5 6 1 3 2 Audio Sound Mode Treble 50 Bass 50 Reset Auto Volume Balance 0 Treble 50 G Standard To Set Soun...

Page 47: ... Re es se et t Press the G G button Press the M ME EN NU U button to move to the previous menu Settings of selected Sound Mode return to the default factory settings 1 2 3 4 1 3 2 Audio Sound Mode Treble 50 Bass 50 Reset Auto Volume Balance 0 Reset G Sound Mode Treble 50 Bass 50 Reset Auto Volume Balance 0 Audio DEF G MENU DEF G MENU Standard To Set MFL41469218 en 4 29 10 2 15 PM Page 45 ...

Page 48: ...lu um me e Press the G G button and then D D or E E button to select O On n or O Of ff f Press the M ME EN NU U button to move to the previous menu Auto Volume automatically remains on the same level of volume if you change programs 1 2 3 4 1 3 2 Audio Sound Mode Treble 50 Bass 50 Reset Auto Volume Balance 0 Auto Volume G Off On Sound Mode Treble 50 Bass 50 Reset Auto Volume Balance 0 Audio DEF G ...

Page 49: ... button and then D D or E E button to select B Ba al la an nc ce e Press the G G button and then F F or G G button to make desired adjustment Press the M ME EN NU U button to move to the previous menu 1 2 3 4 1 3 2 Audio Sound Mode Treble 50 Bass 50 Reset Auto Volume Balance 0 Balance 0 G Sound Mode Treble 50 Bass 50 Reset Auto Volume Balance 0 Audio DEF G MENU DEF G MENU MFL41469218 en 4 29 10 2 ...

Page 50: ...ard from left and right speakers Signal mode is stereo SAP The secondary language is heard from left and right speakers in mono sound Use the M MT TS S button to select your desired MTS mode in analog signal Each time you press the M MT TS S button M Mo on no o S St te er re eo o or S SA AP P appear in turn Press the E EN NT TE ER R button to return to TV viewing NOTE G G Select mono sound mode if...

Page 51: ...E EN NU U button and then use D D or E E button to select the O Op pt ti io on n menu Press the G G button and then use D D or E E button to select L La an ng gu ua ag ge e Press the G G button and then use F F or G G button to select your desired language Press the E En nt te er r button to move to the previous menu 1 2 3 4 MFL41469218 en 4 29 10 2 15 PM Page 49 ...

Page 52: ... an nd db by y L Li ig gh ht t or P Po ow we er r L Li ig gh ht t Press the G G button and then D D or E E button to select O On n or O Of ff f Press the M ME EN NU U button to move to the previous menu 1 2 3 4 5 1 3 2 Option Language Key Lock Caption Text Power Indicator Factory Reset Power Indicator G To set Language Key Lock Caption Text Power Indicator Factory Reset Option DEF G MENU DEF G MEN...

Page 53: ...ot all TV broadcasts include closed caption signals Sometimes TV stations broadcast four different caption signals on the same channel By selecting Mode1 to Mode2 you can choose which signal you view Mode1 is usually the signal with the captions while another mode might show demonstration or programming information Your TV might not receive caption signals normally in the following situations I IG...

Page 54: ... the hour Press the G G button and then D D or E E button to set the minute Press the M ME EN NU U button to move to the previous menu You must set the time correctly before using on off timer function If current time setting is erased by a power failure or the TV is unplugged reset the clock 1 2 3 4 5 1 3 4 2 Time Clock Off Time On Time Sleep Timer Clock G Clock Off Time On Time Sleep Timer Time ...

Page 55: ...M ME EN NU U button to move to the previous menu The Off time function automatically switches the TV to standby at a preset time Two hours after the TV is switched on by the on time function it will auto matically switch back to standby mode unless a button has been pressed Once the on time off time is set these functions operate daily at the preset time The Off time function overrides the On time...

Page 56: ...utes you want is displayed on the screen press the E EN NT TE ER R button The timer begins to count down from the number of minutes selected To check the remaining minutes before the TV turns off press the S SL LE EE EP P button once To cancel the Sleep Timer press the S SL LE EE EP P button repeat edly to select off The Sleep Timer turns the TV off at the preset time Note that this setting is cle...

Page 57: ...m may be with the broadcast Is the power cord inserted into wall power outlet Check your antenna direction and or location Test the wall power outlet plug another product s power cord into the outlet where the product s power cord was plugged in This is normal the image is muted during the product startup process Please contact your service center if the picture has not appeared after five minutes...

Page 58: ...E button Try another channel The problem may be with the broadcast Are the audio cables installed properly Adjust Balance in menu option A change in ambient humidity or temperature may result in an unusual noise when the product is turned on or off and does not indicate a fault with the product Check HDMI cable over version 1 3 Check USB cable over version 2 0 Use normal MP3 file This feature is n...

Page 59: ...c softener or dish washing detergent Wring the cloth until it s almost dry and then use it to wipe the screen Make sure the excess water is off the screen and then let it air dry before you turn on your TV Cleaning the Cabinet To remove dirt or dust wipe the cabinet with a soft dry lint free cloth Please be sure not to use a wet cloth Extended Absence G G If you expect to leave your TV dormant for...

Page 60: ...orage Temperature Storage Humidity 22LD310 22LD310 MA 533 4 mm x 397 0 mm x 171 0 mm 21 0 inch x 15 6 inch x 6 7 inch 533 4 mm x 351 7 mm x 65 0 mm 21 0 inch x 13 8 inch x 2 6 inch 4 8 kg 10 6 lbs 4 6 kg 10 1 lbs Dimensions Width x Height x Depth Weight With stand Without stand With stand Without stand 667 0 mm x 504 0 mm x 224 0 mm 26 3 inch x 19 8 inch x 8 8 inch 667 0 mm x 446 2 mm x 80 0 mm 26...

Page 61: ...ote control 0F TV 0B INPUT 08 POWER 79 RATIO 10 19 Number Key 0 9 09 MUTE 02 VOL G G 03 VOL F F 00 CH D D 01 CH E E 43 MENU 44 ENTER 1A Q VIEW 52 SOUND 4D PICTURE 39 CAPTION 0E SLEEP 54 A PROG 55 MEMORY ERASE 1E FAV 0A MTS MFL41469218 en 4 29 10 2 15 PM Page 59 ...

Page 62: ...The model and serial number of the TV is located on the back and one side of the TV Record it below should you ever need service MODEL SERIAL ...

Reviews: