background image

ENGLISH

1

INTRODUCTION

CONTROLS

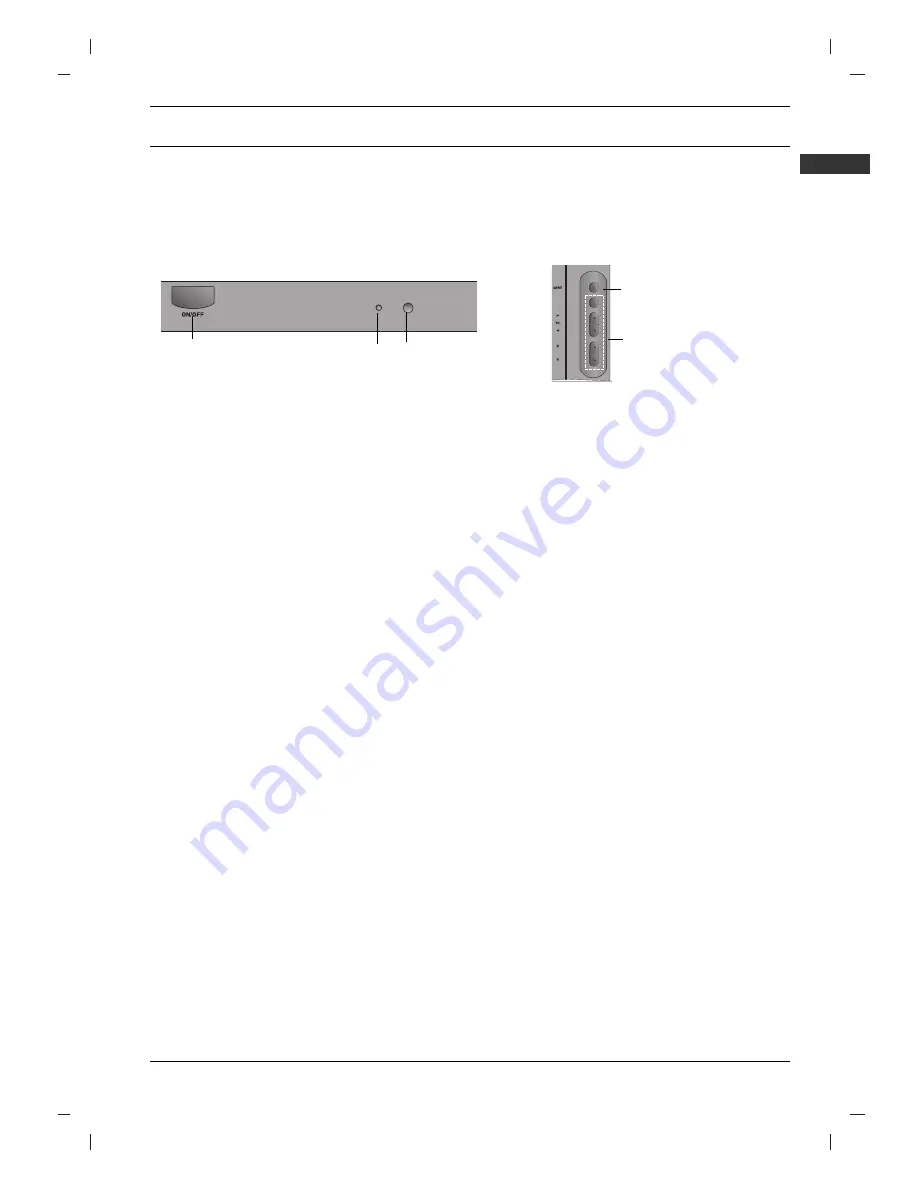
Front panel

21FU1 series

PR

OK

1

4

5

2

3

1. MAIN POWER (ON/OFF)

switches the set on or off.

2. POWER/STANDBY INDICATOR

illuminates brightly when the set is in standby mode.
dims when the set is switched on.

3. REMOTE CONTROL SENSOR

Note :

Only use the supplied remote control handset. (When you use others, they won’t be able

to function.)

4. MENU 

(option)

selects a menu.

5. OK 

(option)

accepts your selection or displays the current mode.

F  

G  

(Volume Up/Down) 

(option)

adjusts the volume.
adjusts menu settings.

D  

E

(Programme Up/Down)

(option)

selects a programme or a menu item.
switches the set on from standby.

Note :

Shown is a simplified representation of front or side panel. What is shown here may be some-

what different from your set or can not be supplied on your area. 

Summary of Contents for 21FU1 Series

Page 1: ... read this manual carefully before operating your set Retain it for future reference Record model number and serial number of the set See the label attached on the back cover and quote this information to your dealer when you require service Model number Serial number ...

Page 2: ......

Page 3: ...ote control handset When you use others they won t be able to function 4 MENU option selects a menu 5 OK option accepts your selection or displays the current mode F G Volume Up Down option adjusts the volume adjusts menu settings D E Programme Up Down option selects a programme or a menu item switches the set on from standby Note Shown is a simplified representation of front or side panel What is...

Page 4: ...ndby scans programmes automatically F G Volume Up Down adjusts the volume adjusts menu settings OK accepts your selection or displays the current mode 5 TELETEXT BUTTONS option These buttons are used for teletext For further details see the Teletext section 6 SLEEP sets the sleep timer 7 PIP BUTTONS option PIP switches the sub picture on or off PR selects a programme for the sub picture SWAP alter...

Page 5: ...hese buttons are used for teletext only TELETEXT models or programme edit Battery installation The remote control handset is powered by two AAA type batteries To load the batteries turn the remote control handset over and open the battery compartment Install two batteries as indicated by the polarity symbols and marked inside the compartment Note To avoid damage from possible battery leakage remov...

Page 6: ... set to any unnecessary vibration moisture dust or heat Also ensure that the set is placed in a position to allow a free flow of air Do not cover the ventilation openings on the back cover Note To remove dirt or fingerprint on the surface of your TV please rub with a line free cloth supplied in the accessory Do not pose too much pressure in cleaning so as to prevent any risk of damage to the prod ...

Page 7: ...o tape via audio video out sockets Note If you have a mono VCR connect the audio cable from the VCR to the AUDIO L MONO socket of the set Euro scart socket 1 Connect the Euro scart socket of the VCR to the Euro scart socket of the set 2 Press the PLAY button on the VCR If your VCR outputs a switching voltage when connected to Euro scart socket the set will switch to A V or A V1 mode auto matically...

Page 8: ...e adjustment Press the F G button to adjust the volume Q VIEW or SWAP Press the Q View or SWAP button to view the last programme you were watching Mute function Press the MUTE button The sound is switched off and the display W appears You can cancel it by pressing the MUTE F G I II option button On screen language selection option The menu can be displayed on the screen in desired language First s...

Page 9: ... on the sound will be more emphasized and amplified than normal sound 1 Press the MENU button and then D E button to select the Sound menu 2 Press the G button and then D E button to select Turbo Sound 3 Press the G button and then D E button to select On or off 4 Press the OK or F button 5 Repeatedly press the MENU button to return to normal TV viewing X WAVE Wireless Sound option You can also li...

Page 10: ... and then re enter the correct page number 2 The D E button can be used to select the preceding or following page TOP text option The user guide displays four fields red green yellow and blue at the bottom of the screen The yellow field denotes the next group and the blue field indicates the next block Block group page selection 1 With the blue button you can progress from block to block 2 Use the...

Page 11: ...utton and to move to the lower level menu press the G G button Note a In the teletext mode menus are not displayed b In some models the Normal search will not display only the Start will display in the Auto pro gramme menu c In some models Game Booster or Degauss will not display d In some models the Language X WAVE Country will not display TV MENU AutoOprogramme ManualOprogramme ProgrammeOedit Fa...

Page 12: ...tton or NUMBER buttons on the Storage from pull down menu Any number under 10 is entered with a numeric 0 in front of it i e 05 for 5 7 Press the OK button 8 Press the D E button to select Normal search Option In some models you can only select Start 9 Press the G button to begin auto programming All receivable stations are stored The station name is stored for stations which broadcast VPS Video P...

Page 13: ...lour Remote control does not work The mains plug plugged in and switched on Is the TV switched on Try another channel weak signal Check aerial plugged into TV Check aerial broken lead Check aerial Check for local interference Adjust contrast Adjust brightness Adjust colour Adjust volume Check the batteries in remote control Check Audio Video sockets VCR only Check these items and try to adjust the...

Page 14: ......

Reviews: