background image

 Set the grill on a flat, horizontal, hard, non-flammable

and stable substrate, in a wind-shielded location.

Always place the grill at a safe distance from

flammable objects such as branches, wooden fences

or floors, fuel, etc.

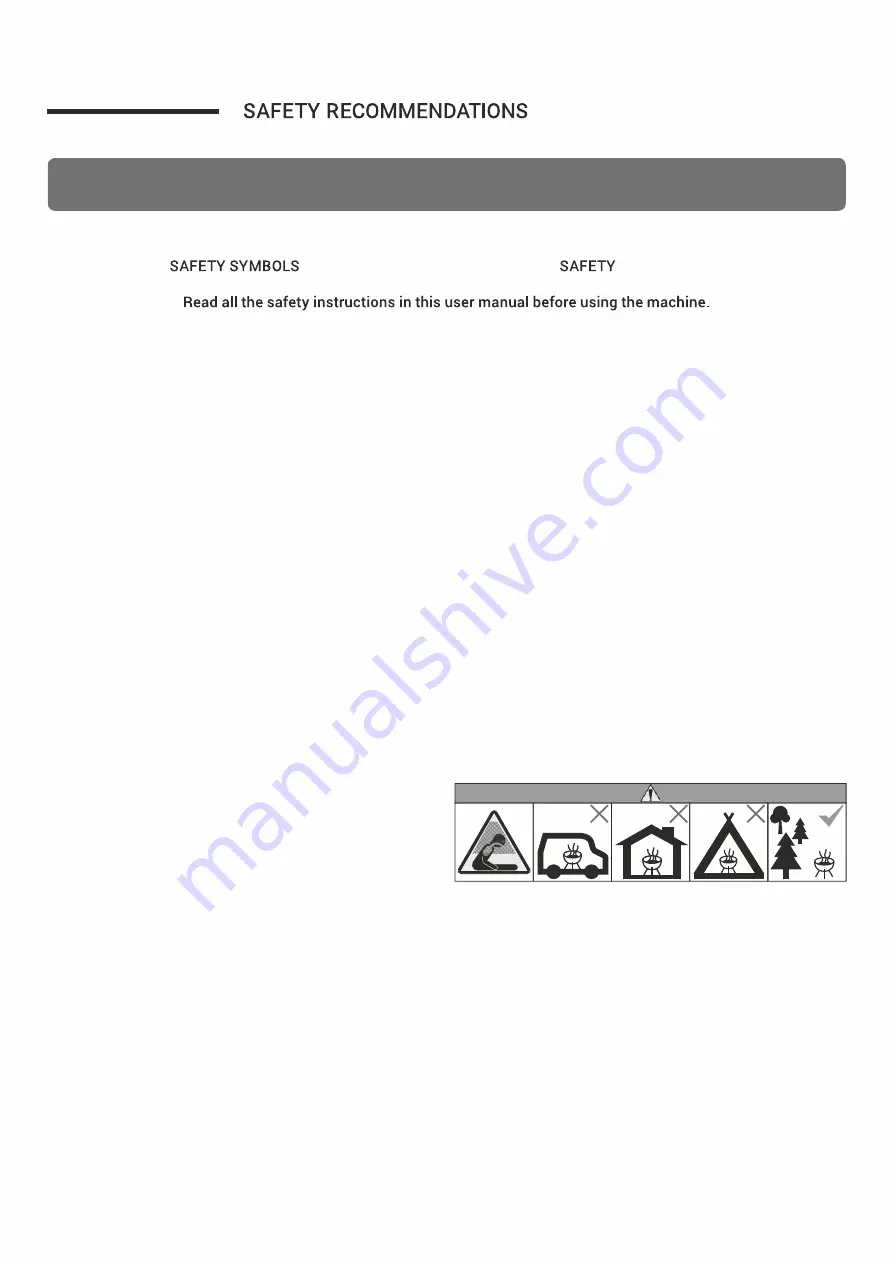
 Do not use in closed spaces!

 Pay particular attention to hot or sharp parts of the

grill. Do not touch the grill with your bare hands. Wear

protective use gloves if necessary.

 Use charcoal or charcoal briquettes as fuel for grilling

food.

 Do not fill up excessively bowl before burning fuel and

always be careful not to overfill the hearth or ashpan,

ash during use - max. the amount of fuel is 1/3 of the

bowl but not more than 1.3kg.

 WARNING! Use only dry lighters or special fluid

lighters compliant with EN 1860-3 as firelighters.

 Before using the barbecue for the first time, it should

be heated with fuel (charcoal or briquette) for

approximately 30 minutes.

 Only place food on the grill after the fuel is covered

with any ash layer!

 The maximum weight of food on the grill is 1.5 kg.

Grilled food should be distributed evenly throughout

the grill.

 WARNING! Do not move the grill during use!

 WARNING! Keep children and pets away!

 Do not allow excessive accumulation of food

remainson the grate, fat or oil that can ignite during

grilling.

 Never use water to quench the hot barbecue. Sand is

recommended.

 Always make sure that the grill is completely cold,

before removing the ash or finished work - removing

ash when it is hot can cause burns or fire!

 When moving the grill on the wheels, pay particular

attention to grate and ashpan, moving can only take

place very slowly with a cold grill on a flat, equal

surface.

 Do not use the barbecue in a confinde and/or habitable

space e.g. houses, tents, caravans, motor homes,

boats. Damger of carbon monoxide poisoning fatality.

IMPORTANT! Please read this manual for proper installation and safe operation before committing to the grill. We

recommend that you keep the following instructions in a safe place in case of any future disassembly / assembly.

⚠ 

(

) inform the user about important 

recommendations.

Summary of Contents for BBQ Line MIR225J

Page 1: ...ASSEMBLY INSTRUCTIONS r csok s tartoz kok...

Page 2: ...M Soha ne mozgassa a r csot ha haszn latban van a grill Forr g si vagy t zvesz lyes FIGYELEM Soha ne hagyjon haszn latban l v grillt fel gyelet n lk l Gyermekeknek s h zi llatoknak biztons gos t vols...

Page 3: ......

Page 4: ...1 4 Leveg bemenet 1 13 A hamutart felszerel se 1 5 R cstart grillez shez 2 14 Sz nsz r 2 6 Grillez r cs 1 15 r vid l b 1 7 1 16 Hossz l b 1 8 Sz n tart 2 17 L bak r gz t je 2 9 1 18 K lyha 1 Nr A r cs...

Page 5: ...rcsa 2 H Biztos t csavar M8 2 22 Bor t 1 I M8 sz rny 1 A M6 x 12 csavar 15 J M5x10mm csavar 1 B M6 x 20 csavar 4 K sz rny M5 1 C Lapos al t t 6x12 mm 17 L Rug s p rna M5 1 D 2 M Lapos al t t 6x22 mm 4...

Page 6: ...on J csavart al t teket R gz tse az L s a K sz rnyas any t biztons gosan 2 II L p s R gz tse a foganty t 1 r sz s a fed lhorgot a fed lhez 22 r sz Haszn lja az A csavart a lapos al t tet C s az F any...

Page 7: ...al t t seg ts g vel C lapos al t t s any k F a r gz t shez Szerelje ssze a r videbb l bat 15 r sz s a hossz l bat 16 s r gz t se 17 r sz Szerelje fel az als polcot 19 r sz a grill l baira A polc menet...

Page 8: ...hamutart t 18 r sz a tart ban l v s nbe 13 r sz az br n l that m don 10 X L p s Helyezze a sz nkosarat 8 r sz a r csra 10 r sz 9 IX L p s Helyezze be a sz nsz r t 14 r sz s a sz nrost lyt 10 r sz a t...

Page 9: ...a r cs al t maszt s ra 7 r sz az br n l that m don R cstart grillez shez 5 r sz a f r cs 6 r sz felemel s re szolg l ha forr 12 XII L p s Helyezze a fedelet 2 r sz a t zolt t lra az br n br n l that...

Page 10: ...g e Gy z dj n meg arr l hogy a szell z ny l sok nyitott helyzetben vannak hogy lehet v tegye a szil rd t zel anyag el get s t A r cson l v szell z ny l ssal szab lyozhatja a grill l g raml s t A szell...

Page 11: ...sszer haszn lat t l elt r haszn lata nem rendeltet sszer haszn lat k vetkezt ben keletkezett k rok zemeltet s be ll t s sszeszerel s telep t s vagy csatlakoztat s nem megfelel karbantart s vagy t rol...

Page 12: ...s covered with any ash layer The maximum weight of food on the grill is 1 5 kg Grilled food should be distributed evenly throughout the grill WARNING Do not move the grill during use WARNING Keep chil...

Page 13: ......

Page 14: ...Grid 1 2 Lid 1 11 BBQ Body 1 3 Temperature Gauge 1 12 Body Handle 1 4 Top Air Vent 1 13 Ash Tray Support 1 5 Cooking Grill Handle 2 14 Charcoal Filter 2 6 Cooking Grill 1 15 Wheel Leg 1 7 Cooking Gri...

Page 15: ...d 1 F Nut M6 17 20 Wheel 2 G Plastic Washer 8 mm 2 21 Wheel Cover 2 H Lock Nut M8 2 22 Lid Hook 1 I WingNut M8 1 A Bolt M6 x 12 mm 15 J Bolt M5x10mm 1 B Bolt M6 x 20 mm 4 K Wing Nut M5 1 C Flat Washer...

Page 16: ...the Lid Part 2 as per illustration Use Bolt J Lock Washer L and Wing Nut K to secure 3 Step II Assemble Lid Handle Part 1 and Lid Hook Part 22 as per illustration Use Bolt A Flat Washer C and Nut F to...

Page 17: ...secure Install the Wheel Leg Part 15 and Long Leg Part 16 onto Leg Support Part 17 Install the Bottom Grid Part 19 onto the legs of the BBQ The threaded end of the Bottom Grid Part 19 is to be install...

Page 18: ...the Ash Tray Support Part 13 as per illustration 8 10 Step X Place the Charcoal Support Part 8 into the BBQ Body as per illustration Step IX Place the Charcoal Grid Part 10 and Charcoal Filter Part 1...

Page 19: ...Grill Part 6 onto the Cooking Grill Support Part 7 as per illustration below The Cooking Grill Handle Part 5 can be used to remove the Cooking Grill Part 6 when hot 12 Step XII Place the Lid onto the...

Page 20: ...Place food on the cooking grill Regularly monitor temperature to ensure food in not under or over cooked Once finish cooking remove left over solid fuel from the BBQ Always ensure BBQ is clean and fre...

Reviews: