Lexmark X560 Maintenance Manual Download Page 5

3

Reinsert the print cartridge and continue printing.

Note: Repeat this procedure multiple times until the print remains faded, and then replace the cartridge(s).

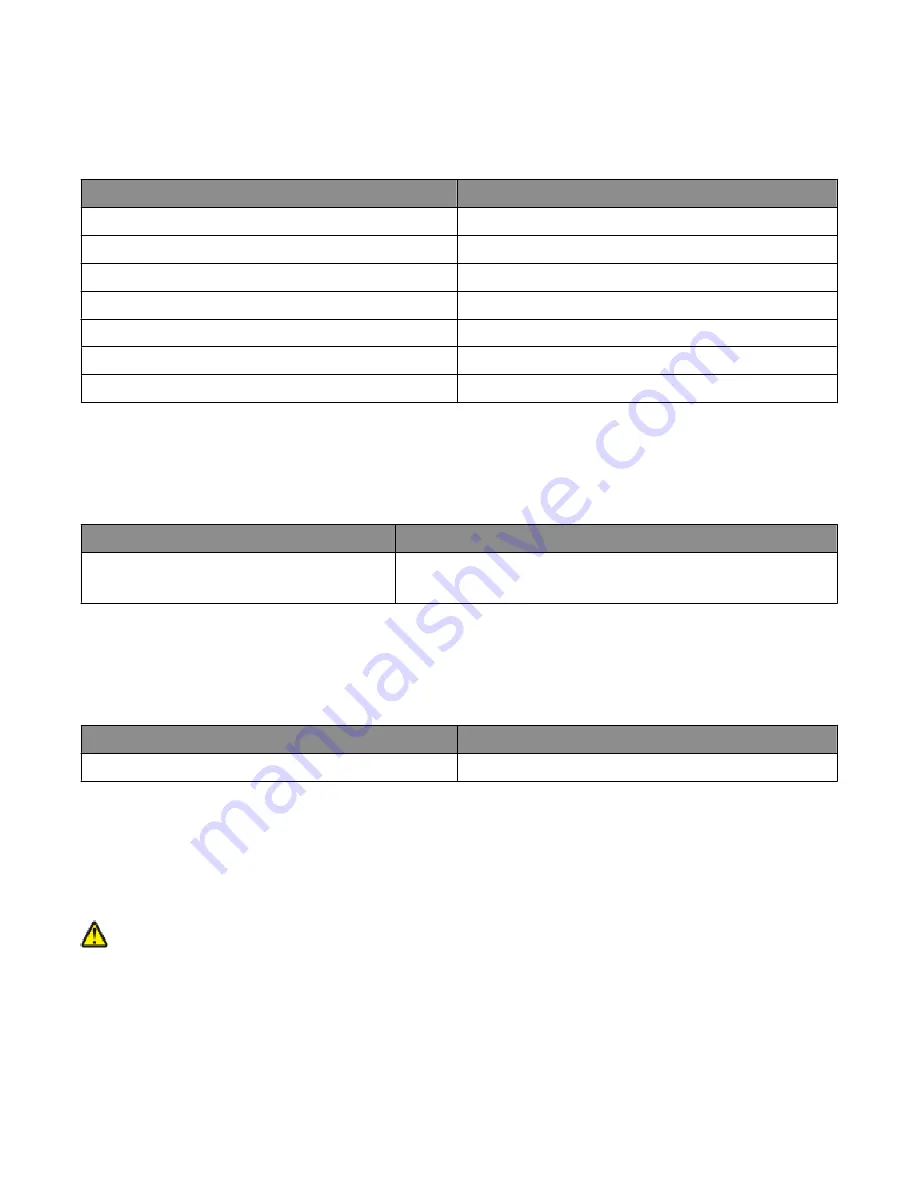
The recommended toner cartridges specifically designed for your printer are:

Part name

Part number

Cyan High Yield Toner Cartridge

X560H2CG

Magenta High Yield Toner Cartridge

X560H2MG

Yellow High Yield Toner Cartridge

X560H2YG

Black High Yield Toner Cartridge

X560H2KG

Cyan Toner Cartridge

X560A2CG

Magenta Toner Cartridge

X560A2MG

Yellow Toner Cartridge

X560A2YG

Ordering a fuser

When 

Replace Fuser Soon

 appears, replace the fuser immediately. For installation information, see the

documentation that came with the fuser.

Part name

Part number

Fuser

40X4860 (120 V/50–60 Hz)
40X4861 (220–240 V/50–60 Hz)

Ordering a transfer belt

When 

Replace Transfer Unit Soon

 appears, replace the transfer belt immediately. For installation

information, see the documentation that came with the transfer belt.

Part name

Part number

Transfer belt

40X4868

Moving the printer

Before moving the printer

CAUTION—POTENTIAL INJURY: The printer weighs 41 kg (97 lb); therefore, it requires at least three people to lift

it safely. Use the handholds on the sides of the printer to lift it, and make sure your fingers are not under the

printer when you set it down.

Maintaining the printer

5

Summary of Contents for X560

Page 1: ...Lexmark X560 Maintenance Guide January 2008 www lexmark com...

Page 2: ...Ordering a fuser 5 Ordering a transfer belt 5 Moving the printer 5 Before moving the printer 5 Locking the scanner 6 Removing the printer from the 550 sheet drawer 7 Moving the printer to another loca...

Page 3: ...int thinner on the printer Cleaning the exterior of the printer 1 Make sure that the printer is turned off and unplugged from the wall outlet CAUTION SHOCK HAZARD To avoid the risk of electric shock u...

Page 4: ...rk authorized supplies dealers in your area In other countries or regions visit the Lexmark Web Site at www lexmark com or contact the place where you purchased the printer Note All life estimates for...

Page 5: ...user Soon appears replace the fuser immediately For installation information see the documentation that came with the fuser Part name Part number Fuser 40X4860 120 V 50 60 Hz 40X4861 220 240 V 50 60 H...

Page 6: ...itch Unplug the power cord from the wall outlet Disconnect all cords and cables from the printer Remove the printer from the optional 550 sheet drawer if installed Remove and store all print cartridge...

Page 7: ...cked position 3 Close the scanner cover Removing the printer from the 550 sheet drawer 1 Turn the printer off and then unplug the power cord from the wall outlet 2 Disconnect all cables from the back...

Page 8: ...3 Grasp the handle and pull the standard tray Tray 2 out Remove the tray completely Maintaining the printer 8...

Page 9: ...Lift the printer off the drawer and set the printer aside CAUTION POTENTIAL INJURY The printer weighs 41 kg 97 lb and requires at least three people to lift it safely Use the handholds on the sides of...

Page 10: ...full footprint of the printer Any cart used to move the options must have a surface able to support the dimensions of the options Keep the printer in an upright position Avoid severe jarring movements...

Page 11: ...ance appears and then press OK 4 Press or repeatedly until Adjust Color Regi appears and then press OK 5 Press or repeatedly until Color Regi Chart appears and then press OK 6 Press OK to print the Co...

Page 12: ...OK to print the Color Registration Chart The Color Registration Chart is printed with the new values and the printer returns to Select Function Verify that 0 is the value nearest the straightest line...

Reviews: