background image

7

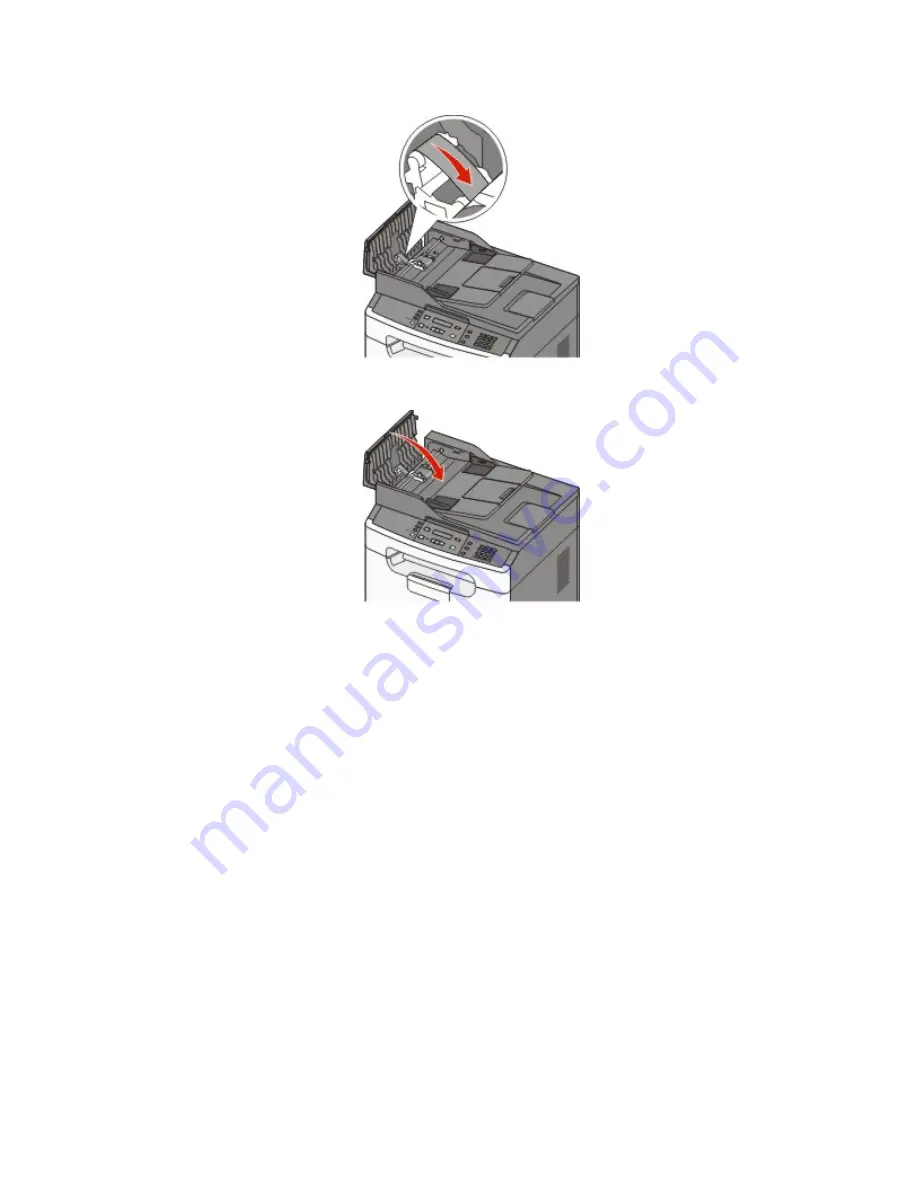
Use a second clean, lint-free cloth dampened with water to wipe the other separator roller while gently rotating it.

8

Close the ADF cover.

Storing supplies

Choose a cool, clean storage area for the printer supplies. Store supplies right side up in their original packing until you 

are ready to use them.
Do not expose supplies to:

Direct sunlight

Temperatures above 35°C (95°F)

High humidity above 80%

Salty air

Corrosive gases

Heavy dust

Checking the status of supplies from a network computer

Note: The computer must be connected to the same network as the printer.

Maintaining the printer

7

Summary of Contents for X203N series

Page 1: ...Lexmark X203n and X204n Series Maintenance Guide February 2011 www lexmark com...

Page 2: ...ollers 5 Storing supplies 7 Checking the status of supplies from a network computer 7 Ordering supplies 8 Ordering toner cartridges 8 Ordering a photoconductor kit 8 Replacing supplies 9 Replacing the...

Page 3: ...wer cord from the wall outlet and disconnect all cables to the printer before proceeding 2 Remove all paper from the printer 3 Dampen a clean lint free cloth with water Warning Potential Damage Do not...

Page 4: ...soft lint free cloth or paper towel with water 2 Open the scanner cover 1 White undersides of the scanner glass cover and the ADF cover 2 Scanner glass and ADF glass 3 ADF tabs 3 Wipe the areas shown...

Page 5: ...r rollers After you have copied over 5 000 pages using the ADF or if streaks are appearing clean the ADF separator rollers 1 Open the ADF cover 2 Unlock the separator roll 3 Remove the separator roll...

Page 6: ...4 Use a clean lint free cloth dampened with water to wipe the separator roller 5 Reinstall the separator roll 6 Lock the separator roll Maintaining the printer 6...

Page 7: ...the printer supplies Store supplies right side up in their original packing until you are ready to use them Do not expose supplies to Direct sunlight Temperatures above 35 C 95 F High humidity above...

Page 8: ...r replacement items not produced by the manufacturer of this printer Note All life estimates for printer supplies assume printing on letter or A4 size plain paper Ordering toner cartridges When 88 Car...

Page 9: ...kseveraltimestoredistributethetoner andthenreinsertitandcontinueprinting When shaking the cartridge no longer improves the print quality replace the toner cartridge Note You can check to see approxima...

Page 10: ...on the base of the photoconductor kit and then pull the toner cartridge out using the handle 3 Unpack the new toner cartridge 4 Shake the cartridge in all directions to distribute the toner Maintaini...

Page 11: ...he photoconductor kit reaches a page maximum by showing 84 PC Kit life warning or 84 Replace PC Kit on the display You can also see the status of the photoconductor kit by printing a menu settings pag...

Page 12: ...r and lowering the front door 2 Pull the photoconductor kit and toner cartridge out of the printer as a unit by pulling on the toner cartridge handle Note The photoconductor kit and toner cartridge fo...

Page 13: ...pack the new photoconductor kit Be careful not to touch the photoconductor drum Warning Potential Damage When replacing the photoconductor kit do not leave the kit exposed to direct light for an exten...

Page 14: ...et that came with the new photoconductor kit Warning Potential Damage Resetting the photoconductor counter without replacing the photoconductor may damage your printer and void your warranty 8 Close t...

Page 15: ...can be safely moved to another location by following these precautions Any cart used to move the printer must be able to support its weight and have a large enough surface to support the full footprin...

Reviews: