

3
Slide the width guide to the far right.
4
Flex the sheets or envelopes back and forth to
loosen them, then fan them. Do not fold or
crease the print media. Straighten the edges on
a level surface.
5
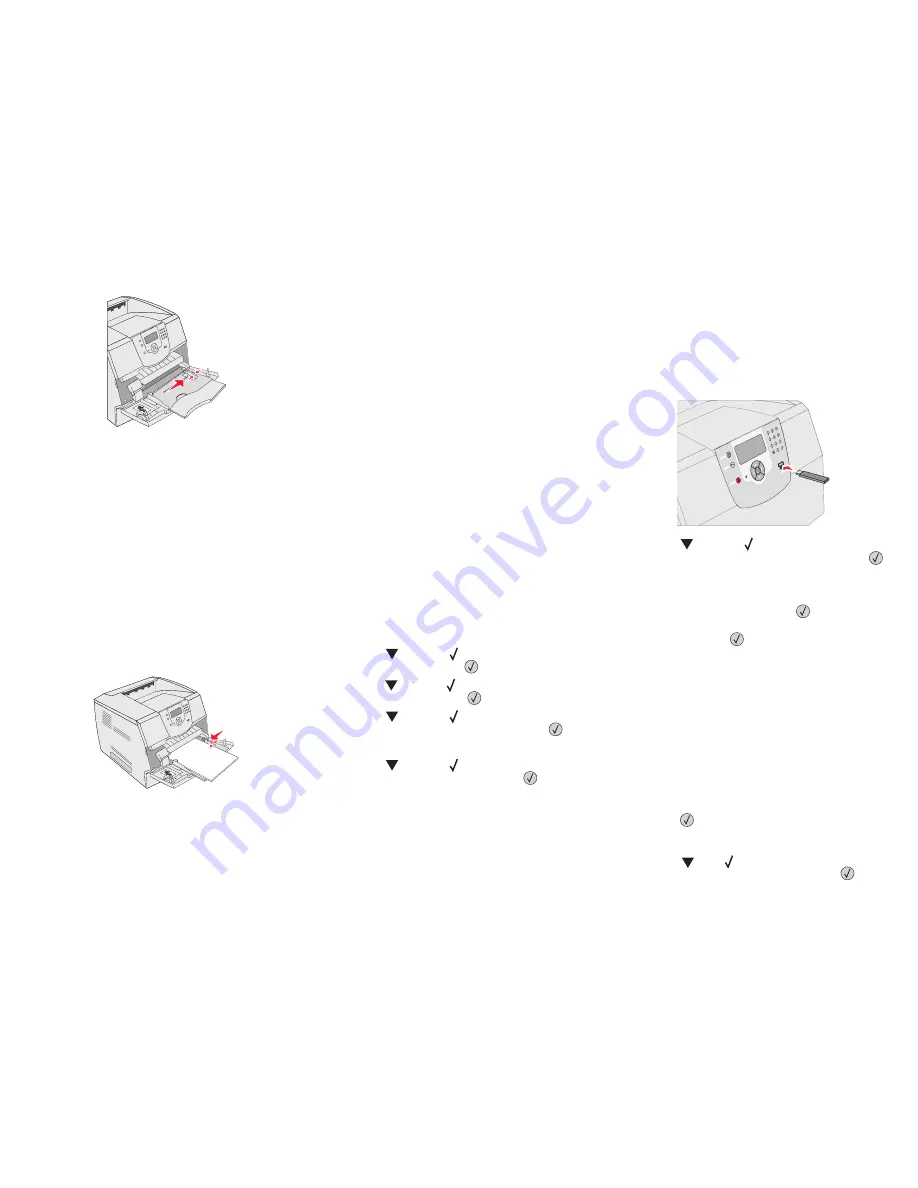
Load the media in the tray.
•
Load paper or transparencies with the left
edge of the stack against the stack height
label and with the recommended print side
faceup.
•
Load envelopes flap side down with the
stamp area and flap on the left. The end of
the envelope with the stamp area enters the
multipurpose feeder first.
6
Slide the side guide toward the inside of the tray
until it lightly rests against the edge of the
media.
7
Set the Paper Size and Paper Type for the
multipurpose feeder.
Printing
Printing a document
1
Open the file you want to print.
2
From the File menu, select
.
3
Verify that the correct printer is selected in the
dialog box.
4
Modify the printer settings as appropriate (such
as the pages you want to print or the number of
copies).
Note:
Click
Properties
or
Setup
to adjust
printer settings not available from
the first screen, and click
OK
.
5
Click
OK
or
to send the job to the selected
printer.
Printing a confidential or held job
1
With the file open, select
File
.
2
Click
Properties
. (If there is no Properties
button, click
Setup
, and then click
Properties
.)
3
Depending on the operating system, you may
have to click the
Other Options
tab
,
and then
click
Print and Hold
.
4
Enter a User Name and PIN.
5
Send your job to the printer.
6
Go to the printer when you are ready to retrieve
your confidential print job
7
Press
until the
appears next to
Held
jobs
, and then press
.
8
Press
until the
appears next to your user
name, and then press
.
9
Press
until the
appears next to
Confidential jobs
, and then press
.
10
Enter your PIN.
11
Press
until the
appears next to the job
you want to print, and then press
.
Printing from a USB flash memory
device
A USB Direct interface is located on the operator
panel so you can insert a USB flash memory device
and print PDF documents. Printing a document from
a USB flash memory device is similar to printing a
held job.
For information regarding tested and approved USB
flash memory devices, see our Lexmark Web site at
http://support.lexmark.com,
and click
KnowledgeBase
to search for Direct USB printing.
1
Make sure the printer is on and
Ready
or
Busy
appears.
2
Insert a USB flash memory device into the USB
Direct interface.
3
Press
until the
appears next to the
document you want to print, and then press
.
A screen asking the number of copies to be
printed will appear.
4
To print only one copy, press
, or manually
input the number of copies with the number
pad, then press
.
Note:
Do not remove the USB flash
memory device from the USB Direct
interface until the document has
finished printing.
Canceling a job from the printer
control panel
If the job is formatting or already printing, and
Cancel a Job
appears on the first line of the
display:
1
Press .
A list of jobs appears.
2
Press
until
appears next to the job
requiring cancelation, and then press
.
The message
Canceling <filename>
appears.


