Lexmark S410 series Quick Reference Manual Download Page 5

About your printer

Finding information about the printer

The 

Quick Reference Guide

 contains instructions on adding your printer to a wireless network, setting up

a fax connection, and accomplishing common printer tasks like printing, copying, scanning, and faxing. It
also includes information on troubleshooting printer setup issues as well as solving basic networking and
faxing problems.

Note: 

Some functions are available only in select printer models.

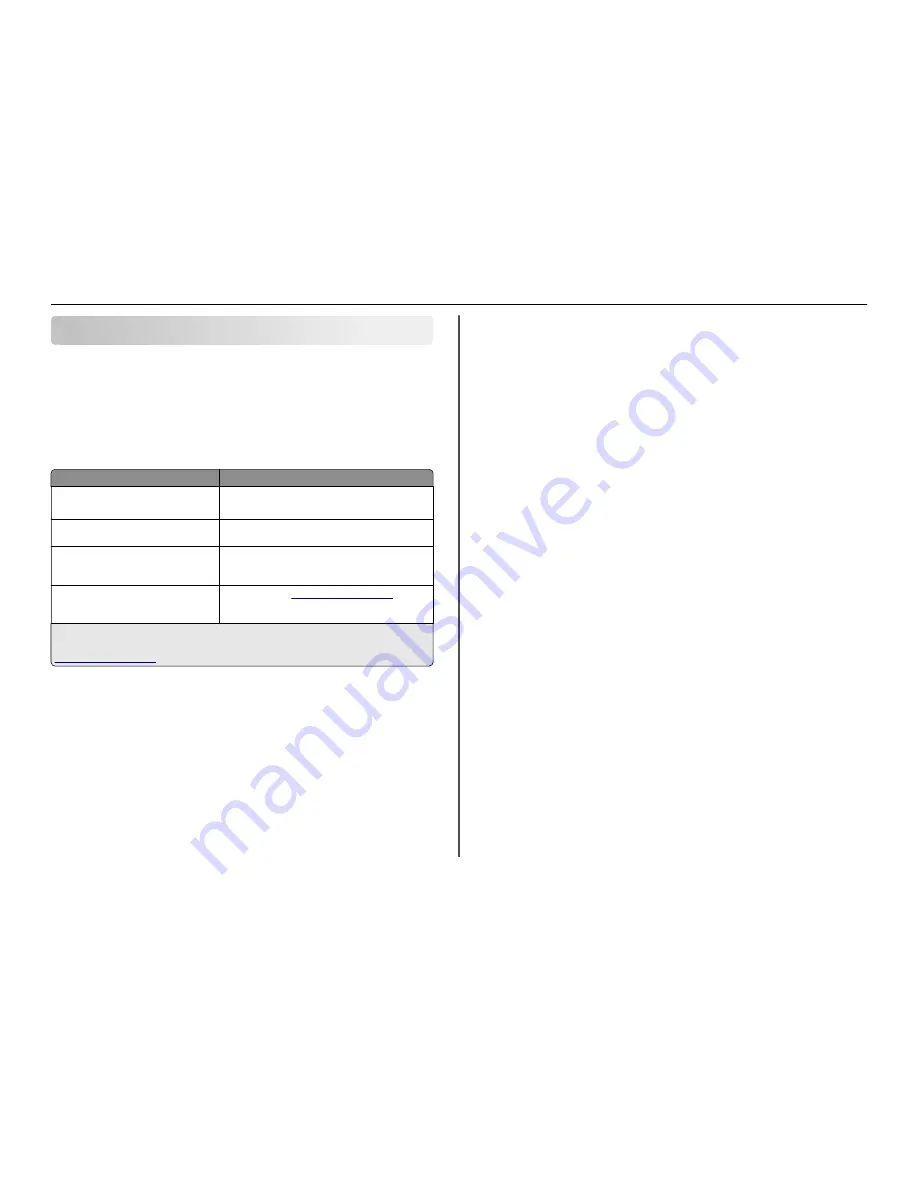
For additional information, see the following:

What are you looking for?

Find it here

Initial setup instructions

Quick Setup Sheet

Hardware Setup Wizard

1

Additional setup and instructions for using the
printer

User’s Guide

2

Help using the printer software

Software Help installed automatically with the printer
software.

2

 Click 

Help

 from any printer software program or

application.

The latest supplemental information, updates,
online customer support, and telephone
support

Support Web site—

http://support.lexmark.com

1

 Available on the 

Software and Documentation

 CD.

2

 Available on the 

Software and Documentation

 CD and on the Lexmark Support Web site at

http://support.lexmark.com

.

Minimizing your printer's environmental impact

We are committed to protecting the environment and are continually improving our printers to reduce
their environmental impact. By selecting certain printer settings or tasks, you may be able to reduce your
printer's environmental impact even further.

Conserving energy

Activate Eco-Mode.

 This feature sets the screen brightness to low and sets the printer to change to

Sleep mode after the printer is left idle for 10 minutes.

Select the lowest Sleep timeout.

 The Sleep feature puts the printer in a minimum

power standby

mode after the printer has been idle for a set amount of time (the Sleep timeout).

Share your printer.

 Wireless/network printers allow you to share a single printer among multiple

computers, thus conserving energy and other resources.

Conserving paper

Print more than one page image on one side of the paper.

 The Pages per Sheet feature allows you

to print multiple pages on one sheet. You can print up to 16 page images on one side of a sheet of
paper.

Print on both sides of the paper.

 Duplexing lets you print on both sides of the paper manually or

automatically (depending on your printer model).

Preview print jobs before printing.

 Use the preview features found in Toolbars, the Print or Print

Preview dialog, or the printer display (depending on your printer model).

Use recycled paper.

Reduce the margins of documents to be printed.

Scan and save.

 To avoid printing multiple copies, you can scan documents or photographs and save

them to a computer program, application, or flash drive for presentation.

Conserving ink

Use Quick Print or Draft Mode.

 These modes can be used to print documents using less ink than

normal and are ideal for printing documents that are mostly text.

Use font types and font settings that requires less ink.

 Most programs or applications let you adjust

the darkness of the colors.

Use high yield cartridges.

 Inks in high yield cartridges allow you to print more pages.

Recycling

Return ink cartridges for reuse or recycling through the Lexmark Cartridge Collection Program.

 To

return an ink cartridge, go to 

www.lexmark.com/recycle

. Follow the instructions to request a

postage

paid bag.

Recycle the product packaging.

Recycle your old printer instead of throwing it away.

Recycle paper from discarded print jobs.

Use recycled paper.

To read the Lexmark Environmental Sustainability Report, see 

www.lexmark.com/environment

.

Note: 

Your printer may not come with some of these programs or some of the functions of these

programs, depending on the features of the printer that you purchased.

Printer models

The installation software CD that came with your printer works for the following printer models:

Lexmark S415

Lexmark S419

About your printer

5

Summary of Contents for S410 series

Page 1: ...S410 Series Quick Reference Guide October 2012 www lexmark com...

Page 2: ...t to a restriction that they may be used only once After this single use the license to use the print cartridges and their contents terminates and you agree to return them only to Lexmark for recyclin...

Page 3: ...ile device 24 Copying 25 Tips for copying 25 Making copies 25 Making a two sided duplex copy automatically 25 Canceling copy jobs 26 Scanning 27 Tips for scanning 27 Scanning to a local computer 27 Sc...

Page 4: ...Notices 54 Edition notice 54 Index 55 Contents 4...

Page 5: ...llow you to share a single printer among multiple computers thus conserving energy and other resources Conserving paper Print more than one page image on one side of the paper The Pages per Sheet feat...

Page 6: ...rtSolutions Simplify printer tasks that you frequently repeat by creating and customizing your printer solutions Using the SmartSolutions toolkit on the Web you can choose the printer tasks that you o...

Page 7: ...ation screen does not appear after a minute then see Installation screen did not appear during installation on page 44 Download the printer driver from www lexmark com 3 Remove tape and packing materi...

Page 8: ...ert the preferred language sheet into the language sheet holder and then attach the language sheet holder to the printer control panel Note The language sheets are in the documentation folder that cam...

Page 9: ...r 1 2 Notes Use the paper guide adjustment lever to adjust the paper guides Do not load more than 100 sheets in the paper support 12 Close the paper feed guard 13 Extend the paper exit tray 14 Connect...

Page 10: ...uage for your Printer Are you sure Yes No 18 Set the country or region and then press OK Country Region Country Region United States Albania Algeria Please choose a country or region and press OK 19 U...

Page 11: ...Number Fax Number Enter Fax Number and press OK 24 Enter your name or company name and then press OK Your fax name identifies you as the sender in all your sent faxes To change a character press the...

Page 12: ...he cartridges 1 2 3 28 Insert each ink cartridge Slide your finger along the ink cartridge until the cartridge clicks into place 3 1 2 Notes Insert the color cartridges first and then the black cartri...

Page 13: ...ycle the alignment page Understanding the parts of the printer 5 6 7 8 9 11 12 1 2 10 4 3 13 Use the To 1 Automatic Document Feeder ADF Scan copy or fax multiple page letter legal and A4 size document...

Page 14: ...the telephone line Use this port if you do not have a dedicated fax line for the printer and if this connection method is supported in your country or region Note Remove the plug to access the port 1...

Page 15: ...ng system Select letters when creating a Speed Dial list Type numbers to enter or edit the date and time shown on the display 6 Back Return to the previous screen Exit from one menu level to a higher...

Page 16: ...he printer Make sure the flash drive contains files that are supported by the printer For more information see Supported file types on page 16 1 Insert a flash drive into the USB port FLASH DRIV E Not...

Page 17: ...eld cyan color cartridge 160XL 160XLA Magenta color cartridge 160 Not available High yield magenta color cartridge 160XL 160XLA 1 Licensed for a single use only After use return this cartridge to Lexm...

Page 18: ...cap to avoid exposing the ink to air 3 Close the printer Maintaining ink cartridges In addition to the following tasks that you can perform your printer performs an automatic maintenance cycle every...

Page 19: ...ctrical outlet to allow it to perform automatic maintenance cycles Notes Cleaning the printhead nozzles uses ink so clean them only when necessary Deep cleaning uses more ink so try the Clean Printhea...

Page 20: ...1 11 Solaris SPARC 10 9 and 8 Solaris SPARC x86 10 The printer driver for this operating system is available only at http support lexmark com Note Information on additional operating system versions t...

Page 21: ...il settings of your printer Status Messenger Learn more about the printing problems encountered Status Monitor Center Check the supplies status of your printer Order supplies online Product Update Rec...

Page 22: ...inter folder 1 From the Finder navigate to Applications select your printer folder Web Links 2 Double click the Web link that you want to visit Use To Customer Support Contact customer support Lexmark...

Page 23: ...Properties Preferences Options or Setup 3 Navigate to Layout tab Print on Both Sides Duplex area Print on both sides Click Long edge for print jobs with pages that are bound along the long edge of the...

Page 24: ...Cancel the print job If you want to cancel a particular print job then right click the document name and then select Cancel If you want to cancel all print jobs in the queue then click Printer Cancel...

Page 25: ...ct the copy mode Press to switch to color mode Press to switch to black and white mode When you select color or black only printing the light that corresponds to your choice comes on 7 Press Note The...

Page 26: ...Canceling copy jobs To cancel a copy job press and then press OK Scanning stops and the printer returns to the previous menu Copying 26...

Page 27: ...tion computer 3 Press the up or down arrow button to scroll to the scan option you want to set and then press the left or right arrow button to scroll to the setting you want Set the color quality ori...

Page 28: ...e information 5 Set the e mail application as the scan destination and then start the scan job 6 Compose your e mail message Scanning to a PDF For Windows users 1 Load an original document faceup into...

Page 29: ...your printer does not support duplex scanning or the ADF does not support the original document size When using the ADF adjust the paper guide on the ADF to the width of the original document To easi...

Page 30: ...le to your telephone service Scenario 1 Standard telephone line Setup 1 Printer is connected to a dedicated fax line EXT LINE To connect Connect the cable from the wall jack to the port of the printer...

Page 31: ...elephone company then make sure that you set the correct ring pattern for the printer Otherwise the printer will not receive faxes even if you have set it to receive faxes automatically Setup 3 Printe...

Page 32: ...between the two channels and ensure a quality connection you need to install a DSL filter for the analog devices fax machine telephone answering machine in your network Interference causes noise and...

Page 33: ...Make sure you use a phone splitter not a line splitter To make sure that you are using the correct splitter plug an analog telephone into the splitter and then listen for a dial tone Scenario 4 Digita...

Page 34: ...devices into the cable modem Your cable telephone service comes from the wall jacks EXT LINE To connect 1 Connect the cable from the wall jack to the port of the printer 2 Remove the protective plug f...

Page 35: ...p plug from the port of the printer The printer may not come with an RJ 11 adapter in your country or region If the additional device telephone or answering machine has an RJ 11 connector then you can...

Page 36: ...It is necessary for the proper functioning of the devices on the telephone line EXT LINE To connect Connect the cable from the wall jack to the port of the printer Connecting the printer to a wall ja...

Page 37: ...on includes your name or your company name your fax number your fax number is your telephone number unless you have a dedicated fax telephone line and the time and date on your fax machine when a tran...

Page 38: ...inter control panel navigate to Touch screen models Non touch screen models Address Book Setup OK Fax Setup OK Address Book OK 2 Use the menus to add a contact or a fax group You can add up to 89 cont...

Page 39: ...he Color Black button to select a color or black and white fax 5 Press to start the fax job Warning Potential Damage Do not touch the cables or the and ports while actively sending a fax Tip You can s...

Page 40: ...nal on the line and takes over the call If the printer is on a dedicated fax line then you may set the printer to pick up on any number of rings If you have multiple numbers on a single line or if you...

Page 41: ...Windows only The Wireless Setup Utility lets you Configure the printer to join an existing wireless network Add a printer to an existing ad hoc network Change the wireless settings after installation...

Page 42: ...i Fi Protected Setup Wi Fi Protected Setup WPS is a simple and secure configuration that allows you to establish a wireless home network and enable network security without requiring prior knowledge o...

Page 43: ...ICATION NUMBER PIN METHOD 1 From the printer control panel navigate to Setup OK Network Setup OK Wireless 802 11b g n OK Network Connection Setup OK Wireless OK Wi Fi Protected Setup OK WPS PIN Mode O...

Page 44: ...on page 46 Cannot delete documents from the print queue on page 46 Cannot print through USB on page 46 Installation screen did not appear during installation If the Before you troubleshoot checklist...

Page 45: ...re inserted correctly The cartridges should click firmly into the matching color slot of the printhead 3 Close the printer SELECT YOUR PRINTER FROM THE PRINT DIALOG BEFORE SENDING THE PRINT JOB Note T...

Page 46: ...is problem persists then check our Web site for updates for your printer software or firmware RECONNECT THE PRINTER POWER SUPPLY 1 Turn off the printer Note Make sure the printer is not in Sleep mode...

Page 47: ...m thenmakesurethattheprinterisplugged into the first phone port If you are using a splitter then make sure that you are using a phone splitter Do not use a line splitter Cannot send faxes If the Fax t...

Page 48: ...e PBX You may need a digital line converter that converts digital signals into analog signals MAKE SURE THAT THE PRINTER MEMORY IS NOT FULL The printer saves an incoming fax to the printer memory befo...

Page 49: ...ully connected The printer driver is installed on the computer from which you are performing a task The correct printer port is selected The computer and printer are both connected to the same wireles...

Page 50: ...ireless network If you are using one of these boxes and need more information then see the documentation that came with your box or contact your internet service provider ISP MOVE YOUR ACCESS POINT AW...

Page 51: ...er navigate to Applications Internet Connect AirPort The SSID of the network that the computer is connected to appears in the Network menu 2 Write down the SSID For Macintosh users with an access poin...

Page 52: ...ere is a problem with your wireless network Try the following Make sure your access point wireless router is turned on and is working Remove any objects that could be blocking the signal Temporarily t...

Page 53: ...ype control printers c Press Enter or click OK 2 Right click the printer and then select Properties for Windows Vista or earlier or Printer properties for Windows 7 or later 3 Click the Ports tab 4 Cl...

Page 54: ...rved GOVERNMENT END USERS The Software Program and any related documentation are Commercial Items as that term is defined in 48 C F R 2 101 Computer Software and Commercial Computer Software Documenta...

Page 55: ...ing automatic 23 duplex unit 14 E emission notices 54 energy conserving 5 EXT port 14 e mail function setting up 29 e mailing canceling 29 scanned documents 27 setting up e mail function 29 tips 29 F...

Page 56: ...ion 32 setting up printer 6 setup troubleshooting cannot print through USB 46 incorrect language appears on display 44 installation screen did not appear automatically 44 page does not print 45 printe...

Page 57: ...unching 42 Wireless Setup Utility Windows only installing 41 Wireless Setup Utility Windows using 41 wireless troubleshooting cannot print over wireless network 50 Wi Fi Protected Setup configuring ma...

Reviews: