LevelOne KVM-8901, User Manual
The LevelOne KVM-8901 is a high-quality KVM switch that allows users to easily control multiple computers with just one set of peripherals. To learn how to set up and use this device, make sure to download the free user manual from our website.
Share
Download


Reviews:
No comments
Related manuals for KVM-8901
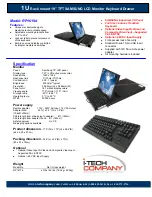
RP1619D
Brand: I-Tech Pages: 1

DCS RF24DE
Brand: Fisher & Paykel Pages: 16

WS55162
Brand: V-ZUG Pages: 24

Cyberview WS-119
Brand: Austin Hughes Electronics Pages: 2

CyberView RKP215-1601
Brand: Austin Hughes Electronics Pages: 19

5713407COM
Brand: Little Seeds Pages: 41

RKP2415-1602
Brand: I-Tech Pages: 30

NX117 Series
Brand: NetView Pages: 16

NL20T8100WK
Brand: Samsung Pages: 48

WD1410B
Brand: Gorenje Pages: 23

Avab Jaguar
Brand: ETC Pages: 36

PARAGON HC-78
Brand: GARFIELD INTL. CO., INC. Pages: 2

SlimRack Slide-out
Brand: LCI Pages: 8


