background image


58 


4.8.3 Backup Setting 


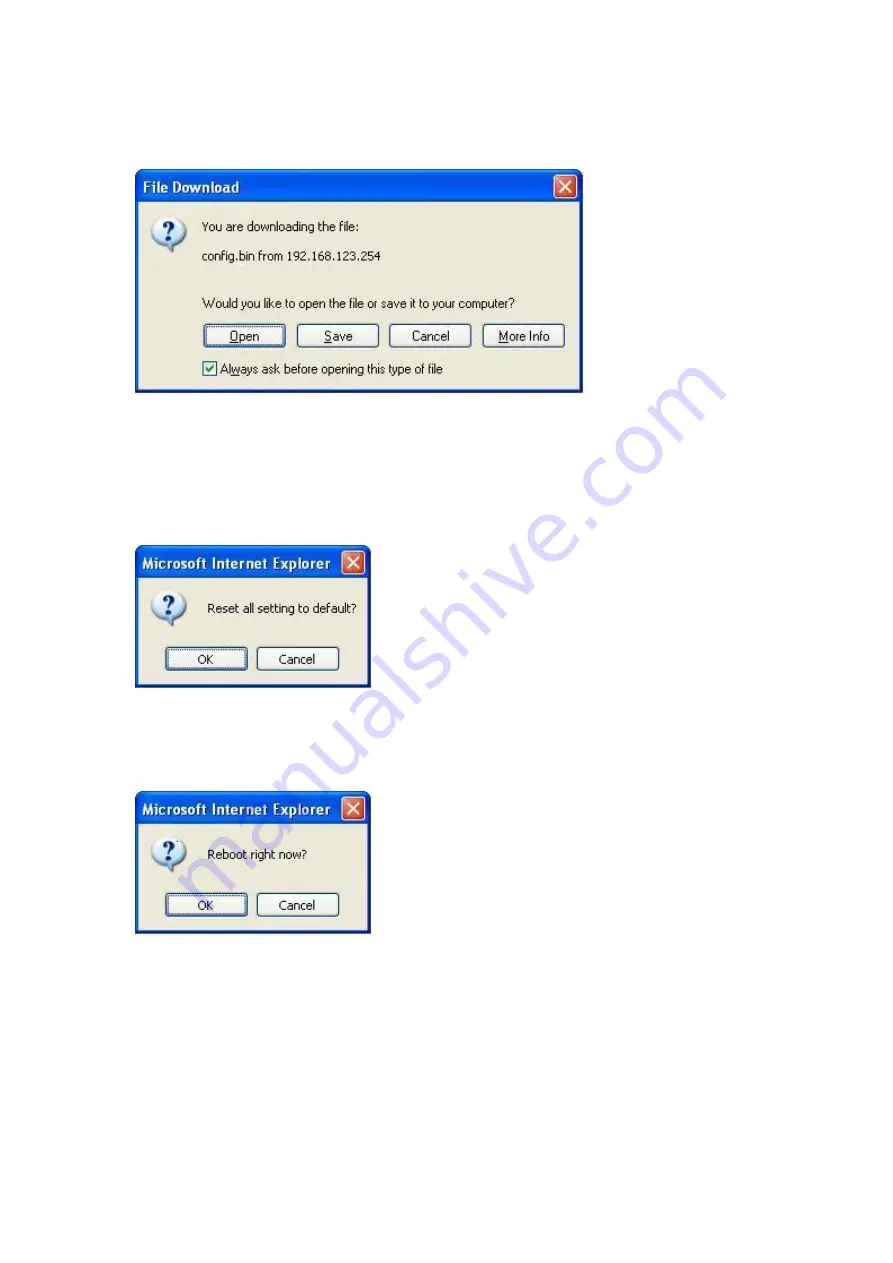
You can backup your settings by clicking the 

Backup Setting 

button and save it as a 

bin file. Once you want to restore these settings, please click 

Firmware Upgrade


button and use the bin file you saved. 


4.8.4 Reset to default 


You can also reset this product to factory default by clicking the 

Reset to default

 button. 


4.8.5 Reboot 


You can also reboot this product by clicking the 

Reboot

 button. 


Summary of Contents for FBR-1413TX

Page 1: ...1 LevelOne FBR 1413TX 1W 4L Broadband Router User Manual V1 0...

Page 2: ...e or transmitted in any form or by any means mechanical magnetic electronic optical photocopying manual or otherwise without the prior written permission Trademarks All product company brand names are...

Page 3: ...s manual may cause harmful interference to radio communications Operation of this equipment in a residential area is likely to cause interference in which case the user at his own expense will be requ...

Page 4: ...1 Start up and Log in 13 4 2 Status 14 4 3 Wizard 14 4 4 Basic Setting 17 4 4 1 Primary Setup 18 4 4 2 DHCP Server 23 4 4 3 Change Password 25 4 5 Forwarding Rules 26 4 5 1 Virtual Server 27 4 5 2 Sp...

Page 5: ...4 8 3 Backup Setting 58 4 8 4 Reset to default 58 4 8 5 Reboot 58 4 8 6 Miscellaneous Items 59 Appendix A TCP IP Configuration for Windows 95 98 61 A 1 Install TCP IP Protocol into Your PC 61 A 2 Set...

Page 6: ...om outside intruders are blocked to protect your Intranet DHCP server supported All of the networked computers can retrieve TCP IP settings automatically from this product Web based configuring Config...

Page 7: ...etwork by polling and setting terminal values and monitoring network events Routing Table Supported Routing Tables allow you to determine which physical interface address to use for outgoing IP data g...

Page 8: ...tem is alive WAN WAN port activity Green On The WAN port is linked Link Act 1 4 Link status Green Blinking The WAN port is sending or receiving data On An active station is connected to the correspond...

Page 9: ...ults please follow the steps 1 Power off the device 2 Press the reset button and hold 3 Power on the device 4 Keep the button pressed about 5 seconds 5 Release the button 6 Watch the Status LED it wil...

Page 10: ...our office or house No special wiring or cooling requirements is needed However you should comply with the following guidelines to install Place this product on a flat horizontal plane Keep this produ...

Page 11: ...hernet backbone 3 Power on Connecting the power cord to power inlet and turning the power switch on this product will automatically enter the self test phase When it is in the self test phase the STAT...

Page 12: ...ng command to check if your computer has successfully connected to this product The following example shows the ping procedure for Windows 95 platforms First execute the ping command ping 192 168 123...

Page 13: ...s IP address in the Location for Netscape or Address for IE field and press ENTER For example http 192 168 123 254 After the connection is established you will see the web user interface of this produ...

Page 14: ...rking status A WAN Port Status If the WAN port is assigned a dynamic IP there may appear a Renew or Release button on the Sidenote column You can click this button to renew or release IP manually B St...

Page 15: ...15 Setup Wizard will guide you through a basic configuration procedure step by step Press Next...

Page 16: ...16 Setup Wizard Select WAN Type For detail settings please refer to 4 4 1 primary setup...

Page 17: ...17 4 4 Basic Setting...

Page 18: ...18 4 4 1 Primary Setup Press Change...

Page 19: ...llowing four options A Static IP Address ISP assigns you a static IP address B Dynamic IP Address Obtain an IP address from ISP automatically C Dynamic IP Address with Road Runner Session Management e...

Page 20: ...f you don t want to change the password leave it empty 2 PPPoE Service Name optional Input the service name if your ISP requires it Otherwise leave it blank 3 Maximum Idle Time the amount of time of i...

Page 21: ...ess 3 Server IP Address the IP address of the L2TP server 4 L2TP Account and Password the account and password your ISP assigned to you If you don t want to change the password keep it empty Maximum I...

Page 22: ...22 Example1 Static IPAddress Example2 Dynamic IPAddress...

Page 23: ...23 4 4 2 DHCP Server Press More...

Page 24: ...HCP server include the following items 1 DHCP Server Choose Disable or Enable 2 IP pool starting Address IP pool starting Address Whenever there is a request the DHCP server will automatically allocat...

Page 25: ...25 4 4 3 Change Password You can change Password here We strongly recommend you to change the system password for security reason...

Page 26: ...26 4 5 Forwarding Rules...

Page 27: ...Mapping A virtual server is defined as a Service Port and all requests to this port will be redirected to the computer specified by the Server IP Virtual Server can work with Scheduling Rules and give...

Page 28: ...the firewall function these applications cannot work with a pure NAT router The Special Applications feature allows some of these applications to work with this product If the mechanism of Special App...

Page 29: ...ass through the firewall This product provides some predefined settings Select your application and click Copy to to add the predefined setting to your list Note At any given time only one PC can use...

Page 30: ...o be exposed to unrestricted 2 way communication for Internet games Video conferencing Internet telephony and other special applications NOTE This feature should be used only when needed Non standard...

Page 31: ...31 4 6 Security Settings...

Page 32: ...e two filtering policies 1 Allow all to pass except those match the specified rules 2 Deny all to pass except those match the specified rules You can specify 8 rules for each direction inbound or outb...

Page 33: ...ibility on Access control For Detail please refer to Scheduling Rule Each rule can be enabled or disabled individually Inbound Filter To enable Inbound Packet Filter click the check box next to Enable...

Page 34: ...net news port 119 and transfer files via FTP port 21 Others are all allowed After Inbound Packet Filter setting is configured click the save button Outbound Filter To enable Outbound Packet Filter cl...

Page 35: ...sary to resolve the domain name 192 168 123 10 192 168 123 20 They can do everything block nothing Others are all blocked Example 2 192 168 123 100 192 168 123 119 They can do everything except read n...

Page 36: ...on when someone accesses the specific URLs Privilege IPAddresses Range Setting a group of hosts and privilege these hosts to access network without restriction Domain Suffix A suffix of URL to be rest...

Page 37: ...ction will be record in log file 2 URL include girl com will not be blocked but the action will be record in log file 3 URL include erotica com will be blocked but the action will not be record in log...

Page 38: ...o input a keyword only In other words Domain filter can block specific website while URL Blocking can block hundreds of websites by simply a keyword URL Blocking Enable Checked if you want to enable U...

Page 39: ...n will be record in log file 2 URL include erotica will be blocked but the action will be record in log file 3 URL include girl will not be blocked but the action will be record in log file 4 URL incl...

Page 40: ...ll of the settings in this page will take effect only when Enable is checked Connection control Check Connection control to enable the controlling of which wired clients can connect to this device If...

Page 41: ...ce In this page we provides the following Combobox and button to help you to input the MAC address You can select a specific client in the DHCP clients Combobox and then click on the Copy to button to...

Page 42: ...ddress is 0 0 0 0 any host can connect to this product to perform administration task You can use subnet mask bits nn notation to specified a group of trusted IP addresses For example 10 1 2 0 24 NOTE...

Page 43: ...43 4 7 Advanced Setting 4 7 1 System Time...

Page 44: ...NTP Protocol Time Server Select a NTP time server to consult UTC time Time Zone Select a time zone where this device locates Set Date and Time manually Selected if you want to Set Date and Time manua...

Page 45: ...etup including IPAddress for Syslogd Host IP of destination where syslogs will be sent to Check Enable to enable this function IPAddress of Outgoing Mail Server Input the IP Address of Outgoing Mail S...

Page 46: ...your host to your current IP address which changes each time you connect your Internet service provider Before you enable Dynamic DNS you need to register an account on one of these Dynamic DNS serve...

Page 47: ...47 Username E mail Password Key You will get this information when you register an account on a Dynamic DNS server Example After Dynamic DNS setting is configured click the save button...

Page 48: ...ues and monitoring network events Enable SNMP You must check either Local or Remote or both to enable SNMP function If Local is checked this device will response request from LAN If Remote is checked...

Page 49: ...ice will response to SNMP client which s get community is set as public 2 This device will response to SNMP client which s set community is set as private 3 This device will response request from both...

Page 50: ...to find proper routing path and allow different subnets to communicate with each other Routing Table settings are settings used to setup the functions of static and dynamic routing Static Routing For...

Page 51: ...send an IP data gram to 192 168 3 88 it would use the above table to determine that it had to go via 192 168 1 33 a gateway And if it sends Packets to 192 168 5 77 will go via 192 168 1 55 Each rule...

Page 52: ...You can set the schedule time to decide which service will be turned on or off Select the enable item Press Add New Rule You can write a rule name and set which day and what time to schedule from Star...

Page 53: ...53 After configure Rule 1...

Page 54: ...he schedule rule Delete To delete the schedule rule and the rule of the rules behind the deleted one will decrease one automatically Schedule Rule can be apply to Virtual server and Packet Filter for...

Page 55: ...55 Exanple2 Packet Filter Apply Rule 1 ftp time everyday 14 10 to 16 20...

Page 56: ...56 4 8 Toolbox 4 8 1 System Log You can View system log by clicking the View Log button...

Page 57: ...57 4 8 2 Firmware Upgrade You can upgrade firmware by clicking Firmware Upgrade button...

Page 58: ...bin file Once you want to restore these settings please click Firmware Upgrade button and use the bin file you saved 4 8 4 Reset to default You can also reset this product to factory default by click...

Page 59: ...you to power up a networked device remotely In order to enjoy this feature the target device must be Wake on LAN enabled and you have to know the MAC address of this device say 00 11 22 33 44 55 Click...

Page 60: ...60...

Page 61: ...ot please refer to your network card manual Moreover the Section B 2 tells you how to set TCP IP values for working with this NAT Router correctly A 1 Install TCP IP Protocol into Your PC 1 Click Star...

Page 62: ...list And choose TCP IP in the Network Protocols Click OK button to return to Network window 6 The TCP IP protocol shall be listed in the Network window Click OK to complete the install procedure and...

Page 63: ...n click Control Panel 2 Double click Network icon Select the TCP IP line that has been associated to your network card in the Configuration tab of the Network window 3 Click Properties button to set t...

Page 64: ...64 a Select Obtain an IP address automatically in the IP Address tab...

Page 65: ...65 b Don t input any value in the Gateway tab...

Page 66: ...66 c Choose Disable DNS in the DNS Configuration tab...

Page 67: ...a Select Specify an IP address in the IP Address tab The default IP address of this product is 192 168 123 254 So please use 192 168 123 xxx xxx is between 1 and 253 for IP Address field and 255 255 2...

Page 68: ...68 b In the Gateway tab add the IP address of this product default IP is 192 168 123 254 in the New gateway field and click Add button...

Page 69: ...69 c In the DNS Configuration tab add the DNS values which are provided by the ISP into DNS Server Search Order field and click Add button...

Reviews: