background image


- 8 - 

3.


Touch Pad 

FUNCTION


Basic Function


Cursor Move 

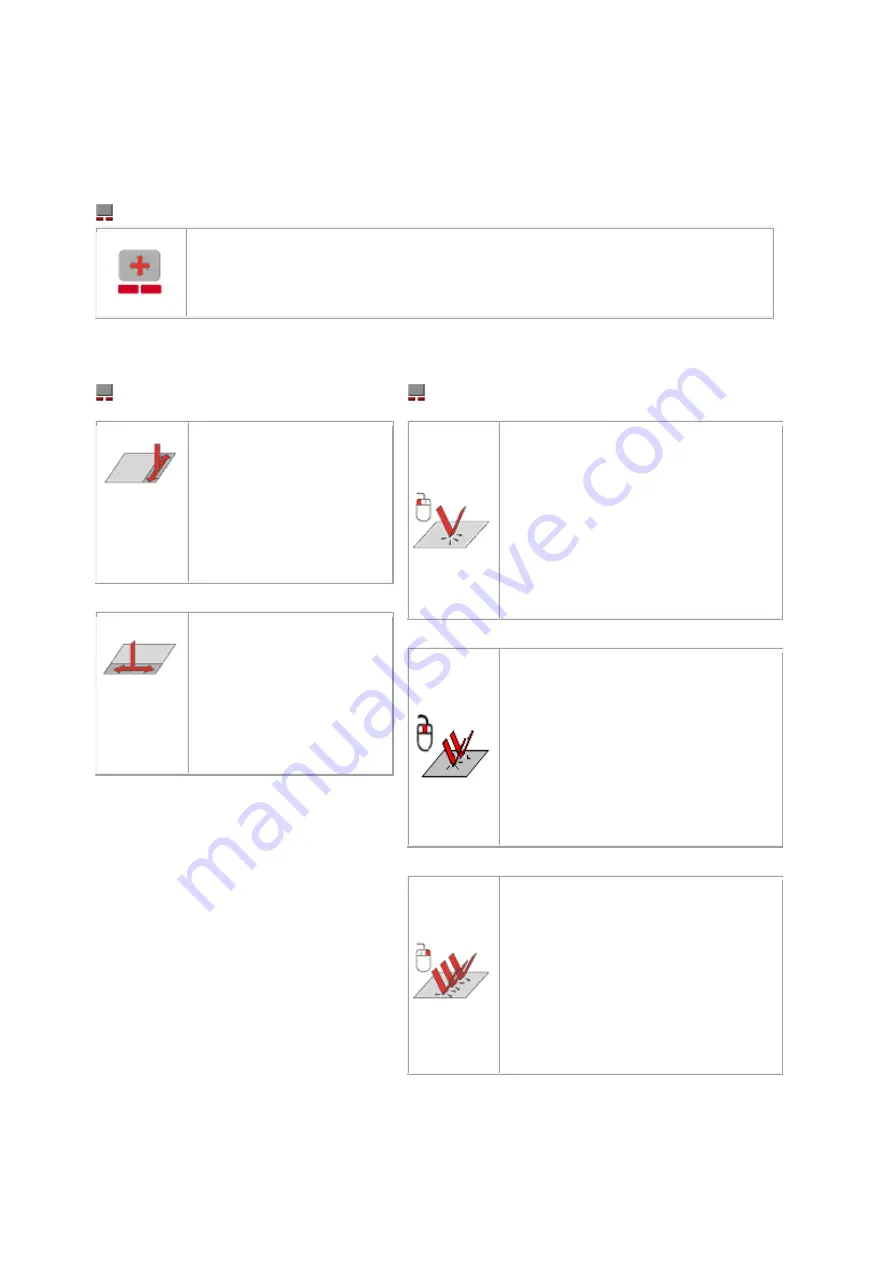
This function is enabled when the finger moving on touchpad device. 


Scroll 
Function


Multiple 
Finger


Vertical Scroll 

vertical scrolling is 

enabled when tap right 

side of touchpad then 

move finger. 


Horizontal Scroll 

horizontal scrolling is 

enabled when tap down 

side of touchpad then 

move finger. 


1 Finger (Left Button) 

It’s same as the left button of 

mouse. 

And it could be setup as the 

function as selected. for example: 

Click/Select, Content Menu, 

Run ...etc. 


2 Finger (Middle Button) 

It’s same as the middle button of 

mouse. 

And it could be setup as the 

function as selected but expect 

Click/Select. for example: Content 

Menu, Run, Zoom in ...etc. 


3 Finger (Right Button) 

It’s same as the right button of 

mouse. 

And it could be setup as the 

function as selected. for example: 

Click/Select, Content Menu, 

Run ...etc. 


Summary of Contents for 590628

Page 1: ...KVM 8901 19 Widescreen LCD KVM Rack Console User Manual V1 1...

Page 2: ...ntrast 5 2 3 Brightness 6 2 4 Color Adjust 6 2 5 Color Temperature 6 2 6 Language 7 3 Touch Pad 8 4 KVM Module 9 4 1 Introduction 9 4 2 KVM Features 10 4 3 KVM s Switch Operation 11 4 4 Remarks 13 5 I...

Page 3: ...M 8901 is the 3 in 1 model LCD Keyboard and Touchpad KCM 0832 and KCM 1632 is the 8 16 port KVM module The power source of all the models is 12V DC in from an external power adapter Model Name Descrip...

Page 4: ...up to 1920X1440 bandwidth 200MHz it might be limited by the monitor resolution No software required easy PC selection via KVM OSD manual push buttons or hot Keys Support eight characters password pro...

Page 5: ...B15 Female Combo 8x HDB15 Female Combo 16x HDB15 Female Combo Daisy chain port 1x HDB15 Female Combo 1x HDB15 Female Combo Console port 1x USB KB 1x USB MS 1x HDB15 Female VGA 1x USB KB 1x USB MS 1x H...

Page 6: ...he item Up Left 1 Scroll up the menu bar 2 Decrease setting Down Right 1 Scroll down the menu bar 2 Increase setting Power Turn on or off the LCD 2 1Auto Tune Press the Auto Tune button The panel will...

Page 7: ...e display 7 Press the Menu button to save and finish this setting 2 4Color Adjust 1 Press the Menu button 2 Use the Up or Down button to scroll to the item Color 3 Press the Menu button to enter 4 Use...

Page 8: ...in the menu by the item English Fran ais Deutsch Espa ol and respectively 1 Press the Menu button 2 Use the Up or Down button to scroll to the item OSD Menu 3 Press the Menu button to enter 4 Use the...

Page 9: ...touchpad then move finger 1 Finger Left Button It s same as the left button of mouse And it could be setup as the function as selected for example Click Select Content Menu Run etc 2 Finger Middle Bu...

Page 10: ...e function by daisy chain enables to link other KVM switches at any time to expand connected computers With the on screen display OSD you can view all computer situation and able to name and set passw...

Page 11: ...B correct Monitor type detection for each port at any time Compatible with MS DOS Windows Linux Unix FreeBSD VGA resolution up to 1920x1440 it might be limited by the resolution of the display Front p...

Page 12: ...on up or down 1 8 Bank 01 16 Port The first digit is bank number starting with 1 The first KVM Switch on the daisy chain line is bank 1 the Master A standalone KVM Switch is fixed in bank 1 The second...

Page 13: ...affect your computers or software function in any way Example 2 To switch to Bank 1 Port1 press Caps Lock Caps Lock and 1 0 1 Example 3 To switch to Bank 3 Port12 press Caps Lock Caps Lock and 3 1 2 w...

Page 14: ...vendor s liability for direct or indirect special incidental or consequential damages loss of profit loss of business or financial loss which hay be caused by the use of the product exceeds the price...

Page 15: ...on 5 1 Cabinet Installation Below is the steps to install the LCD drawer with the standard 19 inch cabinet Step 1 Figure 1 Attach the left and right mounting rails to the rack Step 2 Figure 2 Remove t...

Page 16: ...15 Figure 3 Let the LCD drawer slide in the rack mount bracket Step 4 Figure 4 Screw in the LCD drawer at the left right position...

Page 17: ...ence mouse keyboard then video to PC s ports FIG 1 Single Console Connection between drawer and PC KVM 8901 1 8M cable DB15 to DB15 USB PS2 USB to Ps2 changer PS2 to USB converter PC Connecting to PC...

Page 18: ...on between the drawer and the external KVM Module KVM 8901 1 8M cable DB15 to DB15 USB PS2 USB to Ps2 changer PS2 to USB converter External KVM Module Since the signal from the drawer DB15 contains on...

Page 19: ...and plug the other end of the cable with mouse keyboard video to PC s ports FIG 3 Connection between 4 in 1 drawer and PC KVM 8901 KCM 0832 FIG 4 Cascade Connection KCM 1632 External 16 port KVM Casc...

Page 20: ...19 6 Package Contents KVM 8901 Control Center LCD drawer 1 PCS User s manual 1 PCS AC to DC Power Adapter 1 PCS Rack Mount Kit 1 SET KVM cable 1 SET...

Page 21: ...of the FCC Rules Operation is subject to the following two conditions 1 This device may not cause harmful interference 2 This device must accept any interference received CE Certificate This equipmen...

Page 22: ...is not detected during PC boot up Make sure the mouse works when directly plugged into the computer Make sure the mouse is a true PS 2 mouse A combo mouse will work just as long as it is set for PS 2...

Reviews: