background image

12

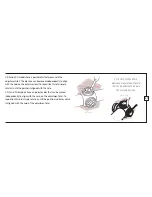
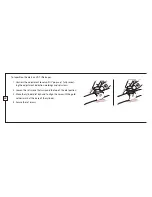
If your Leupold scope is one of our models with an eyepiece that has 
a lock ring, follow these simple steps:

  1 .  grasp the eyepiece with your hand and back it away from the 

lock ring . once the lock ring is free from the eyepiece, turn it 
clockwise away from the eyepiece to keep it out of the way 
during the adjustment .

  2 .  If you tend to hold things away from yourself to see them 

clearly (you are farsighted) turn the eyepiece counterclockwise 
a couple of turns . If you hold things close to yourself to see 
them clearly (you are nearsighted) turn the eyepiece clockwise 
a couple of turns .

  3 .  Looking through the scope when pointed at the sky, take a 

few quick glances at the reticle . The focus of the reticle should 
be noticeably different from when you started . Continue this 
process until the reticle appears clear and sharp .

  4 .  When you are satisfied with the image of the reticle, turn the 

lock ring so that it rests firmly against the eyepiece .

Summary of Contents for FX-3

Page 1: ...Leupold Stevens P O Box 688 Beaverton OR 97075 USA 1 800 LEUPOLD 538 7653 Leupold Stevens 14400 NW Greenbrier Parkway Beaverton OR 97006 USA 503 526 1400 PART 59809 ARTWORK 59458 www leupold com ...

Page 2: ...e and Elevation Adjustments 17 What You Should Know About Variable Power Scopes 25 Using the Illuminated Reticle 33 Changing the Battery 35 Leupold Means Minimal Maintenance 37 Leupold Product Service 40 The Best Consumer Protection in the Business 41 Français 44 Español 48 Deutsch 53 Italiano 57 ...

Page 3: ... buck on the soggy western slopes of Oregon s Cascade Range His scope had fogged as was common for scopes of that era Frustrated by the experience Marcus set out to build a better scope The rest as they say is history Marcus Leupold s quest for quality has continued on to the present In the words of the firm s founder Frederick Leupold We solemnly promise never to let down on quality the customer ...

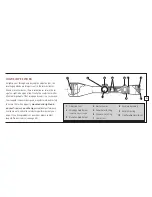
Page 4: ...o back they are 1 The objective lens or front lens is critical to a superior sight picture 2 The internal erector lenses which right the image 3 The reticle often referred to as the crosshair provides the aiming point 4 The ocular lens or eyepiece lens works with the other lenses to magnify the image provide correct eye relief and make diopter corrections Know your Scope ...

Page 5: ...own image is sent to the internal lenses Known as erector lenses these internal lenses return the im age to a right side up position Finally the ocular lens makes a final enlargement of that image and sends it on to your eye Your Leupold scope was designed manufactured and tested to ensure that when properly mounted and sighted in on your firearm you will enjoy exceptional performance A solid moun...

Page 6: ...equired but the scope must clear the bolt handle hammer on lever actions and handguns sights and barrel When installed be sure that your scope does not interfere with firearm operation and does not contact anything except the mount rings How to Install the Scope C A U T I O N Always check and be certain that the firearm is unloaded before undertaking any work upon it Please read this entire handbo...

Page 7: ...adjustments on new Leupold scopes are centered as part of the assembly process If you are mounting a scope that was previously mounted on another rifle you should center the adjustments please see Zeroing Windage and Elevation Adjustments on page 20 for more details NOTE Use care in mounting the 2 5x28mm Scout riflescope It is necessary to place the back edge of the rearmost ring at least 3 4 for ...

Page 8: ... should be set at the highest magnification for this process 2 Slowly move the scope to the rear just until you can see a full field of view 3 Position your scope here for maximum eye relief 4 Proceed to COMPLETING THE INSTALLATION NOTE To confirm that your scope is mounted in the best possible position try assuming various positions kneeling seated prone and aiming both uphill and downhill Rememb...

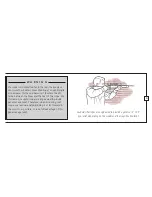
Page 9: ...ce can injure the shooter s brow Shooting at an uphill angle also increases this hazard because it shortens the dis tance between the brow and the rear of the scope For this reason Leupold scopes are engineered to provide generous eye relief Therefore when mounting your scope we recommend positioning it as far forward in the mounts as possible to take full advantage of this generous eye relief ...

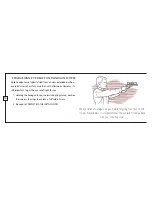
Page 10: ...it s still important to get the eye relief right for you 1 Holding the handgun in your normal shooting stance position the scope in the rings to achieve a full field of view 2 Proceed to COMPLETING THE INSTALLATION The eye relief of handgun scopes is more forgiving than that of rifle scopes Nevertheless it is important that the eye relief is compatible with your shooting style ...

Page 11: ... a firing position check to be sure that the vertical hair of the reticle aligns with the vertical axis of the firearm Misalignment will not affect accuracy at moderate distances but it can diminish long range accuracy 3 When you are satisfied tighten the ring screws evenly and securely Focusing the reticle Secure the scope and firearm in a firm rest Safely point the scope at a light colored backg...

Page 12: ...o see them clearly you are farsighted turn the eyepiece counterclockwise a couple of turns If you hold things close to yourself to see them clearly you are nearsighted turn the eyepiece clockwise a couple of turns 3 Looking through the scope when pointed at the sky take a few quick glances at the reticle The focus of the reticle should be noticeably different from when you started Continue this pr...

Page 13: ...earsighted turn the eye piece ring clockwise until the reticle is sharp and clear If your eyesight changes readjust the eyepiece As we age eyesight normally changes You may want to check the sharpness of the reticle on your scope every few years to ensure it is still adjusted cor rectly for your eye NOTE To protect the integrity of the waterproof seal of every Leupold Golden Ring scope an internal...

Page 14: ...he scope s windage adjustment NOTE Bore sighting alone is not sufficient to sight in a scope You must make final adjustments by shooting the firearm using the same ammunition you use in the field Using the Leupold zero point illuminated Magnetic Boresighter This tool fits any rifle shotgun or pistol and helps you get on the paper fast without barrel spuds It works with any optical sight and can ev...

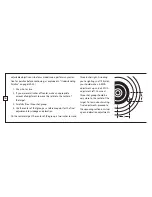
Page 15: ...get inside the barrel as shown in Figure A 4 Hold the rifle steady With the bull s eye centered when viewed through the bore make windage and elevation adjustments to the scope until the very center of the reticle is aligned with the bull s eye of the target as shown in Figure B Target as seen through the bore Figure A Figure B The final step three shot groups Whichever bore sighting method you ve...

Page 16: ...refully fire a three shot group 4 Use the center of that group as a reference point for the final adjustments to windage and elevation On the sample target the center of the group is two inches low and three inches right Assuming you re sighting in at 100 yards you should make a 2 MOA adjustment up and a 3 MOA adjustment left Your next three shot group should be very close to the center of the tar...

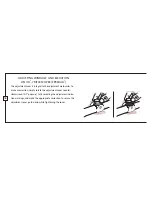
Page 17: ...ks from zero to and including the number one on an adjustment knob then the value of each increment of adjustment on that knob is 1 4 MOA It is the same with all Leupold adjustment dials One MOA moves the point of impact at 100 yards by 1 inch At 100 meters it moves 29mm The letters found on the windage and elevation dials refer to the direction that the point of impact of the bullet is moved when...

Page 18: ...is integral to the adjustment mechanism To make a correction simply rotate the adjustment cover counter clockwise until it pops up fully revealing the adjustment indica tion markings and make the appropriate correction To secure the adjustment cover push down while tightening the cover ...

Page 19: ...dage and elevation adjustments A click for each adjustment division can be both heard and felt so adjustments to the scope can be made without looking at the dials Indicators on the micrometer portion of the dial show the number of complete 360 rotations that have been made Target style adjustments for range and wind adjustments in the field ...

Page 20: ...align the marked zero of the dial with the position indicator without changing the adjustment setting of the scope This allows the shooter to know the original zero of the rifle in the event that further adjustments are made in the field To reposition the dials on Rifleman VX I and FX I models place a coin or screwdriver in the slot in the numbered dial and rotate it so that the zero aligns with t...

Page 21: ...be moved independently to align with the zero on the outermost dial To reposition this dial simply rotate it until the pointer is aligned with the zero VX 3 and FX 3 models have an indicator dial that can be moved independently to align with the zero on the adjustment dial To reposition this dial simply rotate it until the position indicator notch is aligned with the zero of the adjustment dial VX...

Page 22: ...until it pops up fully reveal ing the adjustment indication markings and set screws 2 Loosen the set screws that surround the top of the dial portion 3 Move the cylinder dial by hand to align the zero with the gold witness mark at the base of the cylinder 4 Secure the set screws ...

Page 23: ... cylinder turns freely 2 Move the cylinder dial by hand to align the zero with the white perpendicular mark at the base of the cylinder 3 Tighten the set screws until the cylinder is secure Target style dials can be adjusted to the new zero position by loos ening the set screws rotating the dial and tightening the set screws ...

Page 24: ...sult of having been mounted on a non adjustable mount the adjustments won t provide equal travel in all directions To regain full balanced travel you must recenter the adjustment as follows 1 Turn the windage adjustment to the point that it stops moving 2 Counting the clicks or hash marks turn it all the way in the other direction 3 Turn the dial back half the amount of clicks or hash marks counte...

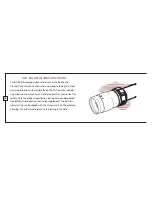
Page 25: ...e internal gas that keeps the scope fog free Loosening the screw will also disconnect a pin that controls the internal operations causing other problems that would require factory repairs Do not lubricate the power selector ring doing so is unnecessary All variable power scopes have a power selector ring in front of the eyepiece assembly Turn the ring to align the number indicating the desired mag...

Page 26: ...with multiple loads The VX 7 ballistics indicator ring allows you to manually set a reference point for your current tra jectory Once the proper magnification setting has been determined see Ballistics Aiming System instruction supplement the ballistics indicator ring can be aligned with the witness mark on the eyepiece allowing fast and accurate return to this setting in the field ...

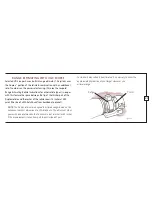
Page 27: ...post of the Duplex reticle and the center of the reticle covers 16 inches at 200 yards the size of a Whitetail buck from backbone to brisket NOTE The Duplex reticle was designed to estimate ranges based on the backbone to brisket dimension of a Whitetail buck The distance of other game with a body dimension that is known to be 16 inches or 32 inches if the measurement is taken from post to post in...

Page 28: ... follow these steps 1 View the target through the scope 2 When targeting an animal with a body that is 16 inches from backbone to brisket adjust the power selector until that area of the animal s body fits between the center of the crosshair and the top of the lower heavy post 3 Read the number on the power selector ring to determine the approximate distance in yards Bracket the animal from backbo...

Page 29: ... short distances the parallax effect does not affect accuracy Using the same 4x scope at 100 yards the maximum error is less than 2 10ths of an inch It is also good to remember that as long as you are sighting straight through the middle of the scope or close to it parallax will have virtually no effect on accuracy in a hunting situation About fixed parallax distance scopes Any fixed focus optical...

Page 30: ...ve a scope with a parallax adjustment dial for precise shooting at various ranges The parallax adjustment can be located either at the objective end of the scope or on the side of the adjustment turret housing The adjustment moves a lens within the scope causing the target image and the reticle to fall on the same optical plane This ensures optimal accuracy at the distance of the target Side Paral...

Page 31: ... numbers on the adjustable objective ring you can get your parallax adjustments close to the proper setting before assuming a shooting position NOTE Settings may vary slightly per individual preferences air temperature and atmospheric conditions NOTE The side parallax adjustment knob is not to be used to focus the target image If the reticle is first focused and the parallax then properly set the ...

Page 32: ... when the ring is turned clockwise from the shooting position 4 Adjust the ring as you would a standard adjustable objective model installing a lens attachment Many Leupold scopes offer threaded objective and eyepiece rings to allow for the attachment of lens covers and a variety of Alumina accessories These attachments thread directly into the objective or eyepiece rings Turn until finger tight d...

Page 33: ...nated the reticle performs the same as the reticle in a standard Leupold scope Illuminating the reticle allows a better distinction to be made in poorly lighted conditions between the target and the precise position of the aiming point The control dial for the Leupold Illuminated Reticle is located above the eyepiece Using the Illuminated Reticle ...

Page 34: ...e illumination is required continue turning the dial clockwise until the reticle is clearly visible against the target To preserve the life of the battery always remember to turn the illumination dial to the OFF position when the scope is not in use For prolonged storage remove the battery If the reticle fails to illuminate or appears dim even on the highest illumination setting it is necessary to...

Page 35: ...ated around the top of the illumination dial and twisting the cover counterclockwise while holding the sides of the illumination dial to keep the entire dial from turning 2 Remove the old battery from its position in the center of the dial The battery for the Leupold Illuminated Reticle is located inside the control dial and can be changed without tools Battery Changing the Battery ...

Page 36: ... new battery positive side up 4 Replace the battery cover on the illumination dial and turn it clockwise until it is secure while holding the sides of the illumination dial to keep the entire dial from turning Replacement 3 volt lithium batteries There may be other lithium batteries that are acceptable with your Leupold Illuminated Reticle scope Check with your local retailer for other options Dur...

Page 37: ...n swab Windage elevation adjustments These adjustments are permanently lubricated There is no need to lubricate them Keep the adjustment covers on except when adjusting to keep out dust and dirt It s worth noting that unlike competitive brands Leupold scopes are waterproof even without the caps in place Eyepiece adjustment This adjustment is permanently lubricated There is no need to lubricate it ...

Page 38: ... lubrication is ever required on the power selector ring DO NOT LOOSEN OR REMOVE THE HEX HEAD SCREW IN THE POWER SELECTOR RING Adjustable objective side Parallax dial No lubrication is required Trouble shooting tips Before you ship a scope back to the factory for service or repair please check the following items 1 Check the mount Make sure the scope is mounted securely to the rifle Try with bare ...

Page 39: ... try another brand or bullet weight 5 Be certain that both the barrel and chamber are clean Heavy factory grease or copper fouling on an older one can diminish the accuracy of the firearm Leupold PRODUCT Service If your Leupold Golden Ring scope fails to perform in any way you may return it directly to the factory or one of our international service centers for service We recommend contacting Leup...

Page 40: ...490 Okotoks AB T1S 1A7 Canada Germany Harold Ros Coburger Strasse 71 98673 Eisfeld Germany Sweden HDF Gyttorp Jakt AB Svarvaregatan 5 S 302 50 Halmstad Sweden Our Product Service telephone numbers are 503 526 1400 or 800 LEUPOLD 538 7653 fax is 503 352 7621 They can also be contacted through our Web site at www leupold com Parcel Service Leupold Product Service 14400 NW Greenbrier Parkway Beaverto...

Page 41: ...vinced of the high quality and reliability of its Golden Ring products This is why each U S customer is afforded a lifetime guarantee For legal reasons this guarantee must be restricted to 30 years in Germany and other countries where an unlimited lifetime guarantee is prohibited Each owner even those that acquired a Golden Ring product used can make use of this 30 year guarantee The Leupold elect...

Page 42: ...l at our option repair or replace it Leupold makes more than scopes See our complete line of rangefinders mounting systems binoculars spotting scopes and accessories at your nearest Leupold dealer For a free Leupold catalog write to Leupold Stevens Inc P O Box 688 Beaverton OR 97075 call 503 526 1400 or 800 LEUPOLD 538 7653 or send us an E mail through our Web site at www leupold com ...

Page 43: ...e We reserve the right to make design and or material modifications without prior notice Leupold products are manufactured under one or more of the following patents U S Patents 5 035 487 5 231 535 5 671 088 5 866 048 6 005 711 6 279 259 6 295 754 6 351 907 6 359 418 6 469 829 6 519 890 6 691 447 6 816 305 7 088 506 D347 441 D403 393 D413 153 D414 835 D415 546 D416 972 D420 718 D420 807 D421 286 D...

Page 44: ... est montée très loin vers l arrière l oculaire de visée pourrait blesser le front du tireur Tirer dans un angle en amont augmente aussi ce danger car cela réduit la distance entre le front et l arrière de la lunette de visée Pour cette raison les lunettes de visée Leupold sont aussi fabriquées pour offrir une bonne position de l œil Donc en montant votre lunette de visée nous recommandons de la p...

Page 45: ...pour les cadrans d ajustement Leupold Un MOA déplace le point d impact à 100 verges par pouce À 100 mètres il se déplace de 29 mm Les lettres qui se trouvent sur les cadrans d élévation et de dérive portent sur la direction de déplacement du point d impact de la balle lors d un ajustement Ajustements de dérive et d élévation des lunettes de visée pour carabine VX 7 SPEEDIAL Le couvercle d ajusteme...

Page 46: ...ligner le zéro avec la marque blanche perpendiculaire à la base du barillet 3 Resserrez les vis de réglage jusqu à ce que le barillet soit fixé solidement Centrer les ajustements de dérive et d élévation pour obtenir un déplacement optimal Les ajustements de dérive et d élévation déplacent tout le système érecteur horizontalement et verticalement à l intérieur de la lunette de visée Si le système ...

Page 47: ...ez les anneaux et tous les autres accessoires de la lunette de visée 2 Enregistrez le numéro de série de la lunette de visée et conservez le pour vos dossiers 3 Ajoutez une note avec votre nom votre adresse votre numéro de téléphone votre courriel et une description du problème 4 Emballez la lunette de visée dans sa boîte originale si vous l avez car ceci est le contenant d expédition le plus sûr ...

Page 48: ...e mira Para iluminar la retícula 1 Sujete el cuadrante de iluminación ubicado en la parte superior del cuerpo del ocular 2 Gire a la derecha el cuadrante desde la posición de apagado OFF hasta el primer número indicado en el mismo 3 Observe el objetivo a través de la mira telescópica para determinar si la retícula es lo suficientemente brillante como para destacarse con claridad con respecto al ob...

Page 49: ... aprovechar al máximo esta ventaja práctica para la reducción de la fatiga ocular PARA TERMINAR LA INSTALACIÓN 1 Sin perturbar la posición óptima para evitar la fatiga visual gire la mira telescópica hasta que el cuadrante de ajuste de elevación se encuentre en la parte superior de la mira telescópica 2 Desde una posición de tiro verifique que la línea vertical de la retícula esté alineada con el ...

Page 50: ...da al mecanismo de ajuste Si desea efectuar una corrección sencillamente gire la cubierta de ajuste hacia la izquierda hasta que ésta salte y revele completamente las marcas de indicación de ajuste y entonces realice la corrección apropiada Para fijar la cubierta de ajuste haga presión hacia abajo a la vez que aprieta la cubierta Ajustes de precisión por efecto del viento y de la elevación en mira...

Page 51: ...n por efecto del viento y de la elevación para lograr un desplazamiento de ajuste óptimo Al hacer ajustes de corrección por efecto del viento y de la elevación se desplaza la totalidad del sistema erector horizontal y verticalmente en la mira telescópica Si este sistema está desviado hacia un lado como resultado de haberlo instalado sobre una base de montaje no ajustable los ajustes no proporciona...

Page 52: ...nillos y otros accesorios de la mira telescópica 2 Registre el número de serie de la mira telescópica y consérvelo para referencia futura 3 Incluya una nota con su nombre dirección número de teléfono correo electrónico y una descripción del problema 4 Empaque la mira telescópica en la caja original si aún la conserva ya que éste es el embalaje más seguro para el envío Envuelva bien el paquete con ...

Page 53: ...ächtlich verändern kann Warnung Wird ein Zielfernrohr zu weit hinten montiert besteht die Gefahr dass das Okular den Schützen an der Braue verletzt Schießen in einem Aufwärtswinkel erhöht diese Gefahr weil dabei der Abstand zwischen der Braue und dem Okular des Zielfernrohrs verkürzt wird Leupold Zielfernrohre sind aus diesem Grund mit großzügigem Augenabstand konzipiert Leupold empfiehlt dass Sie...

Page 54: ...an diesem Knopf 1 4 MOA Dies ist bei allen Leupold Skalenscheiben identisch 1 MOA verschiebt den Treffpunkt bei 100 Metern um 29 mm Die Buchstaben an den Skalenscheiben für die Windabdrift und Höheneinstellung beziehen sich auf die Richtung in die der Treffpunkt des Geschosses bei Vornahme einer Einstellung verschoben wird Windabdrift und Höheneinstellung an VX 7 Zielfernrohren SPEEDIAL Die Einste...

Page 55: ...rauben welche die Oberseite des Knopfs umgeben lösen bis sich der Zylinder ungehindert drehen lässt 2 Die zylinderförmige Skalenscheibe von Hand verschieben um die Null mit der weißen Senkrechtmarkierung an der Zylinderbasis auszurichten 3 Die Stellschrauben festziehen bis der Zylinder fest sitzt Zentrieren der Windabdrift und Höheneinstellungen zu Erzielung eines optimalen Einstellwegs Durch Vorn...

Page 56: ...m Bestimmen ob eine Werksüberarbeitung erforderlich ist sehr hilfreich sein Bitte beachten Sie die folgenden Versandanweisungen 1 Entfernen Sie Ringe und anderes Zubehör vom Zielfernrohr 2 Notieren Sie sich die Seriennummer des Zielfernrohrs und bewahren Sie die Notiz auf 3 Legen Sie dem Paket eine Notiz mit den folgenden Informationen bei Name Adresse Telefonnummer E Mail Adresse und Beschreibung...

Page 57: ...lla distanza dell oculare dall occhio Avvertenza Se il cannocchiale è montato troppo indietro l oculare può ferire la fronte del tiratore in corrispondenza delle sopracciglia Quando si spara verso l alto si aumenta questo pericolo perché si diminuisce la distanza tra il sopracciglio e la parte posteriore del cannocchiale Per questa ragione i cannocchiali Leupold sono progettati in modo da consenti...

Page 58: ...e lettura Se per esempio vi sono quattro tacche da zero a uno compreso sulla manopola di regolazione il valore di ogni regolazione con quella manopola è pari a 1 4 di minuto d angolo Lo stesso vale per tutte le manopole di regolazione Leupold Un minuto d angolo sposta il punto di impatto di 1 pollice a 100 iarde A 100 metri lo sposta di 29 mm Le lettere sulle manopole di regolazione della derivazi...

Page 59: ...tare a mano il cilindro graduato fino ad allineare lo zero con la tacca dorata alla base del cilindro 4 Serrare i grani Riposizionamento dei quadranti dei modelli Target e Tactical 1 Allentare i grani situati sulla corona esterna della parte superiore della manopola finché il cilindro ruota liberamente 2 Spostare a mano il cilindro graduato fino ad allineare lo zero con la tacca bianca perpendicol...

Page 60: ...inare se è necessaria l assistenza della fabbrica Istruzioni per la spedizione 1 Togliere i collari ed eventuali altri accessori dal cannocchiale 2 Annotare e conservare il numero di serie del cannocchiale 3 Allegare un foglio su cui siano scritti il proprio nome e cognome indirizzo numero di telefono eventuale indirizzo di posta elettronica e la descrizione del problema 4 Imballare il cannocchial...

Page 61: ...61 ...

Page 62: ...RIFLESCOPE OWNERS MANUAL Complete Installation Operation Instructions A M E R I C A S O P T I C S A U T H O R I T Y ...

Reviews: