


CALIBRATING
THE
DRONE:
**Ensure
pairing
the
drone
with
the
app
is
done
outdoors
to
achieve
great
GPS
signal,
if
your
location
can
not
receive
GPS
signal,
please
re
‐
locate
to
a
better
position
which
can.
Do
not
pair
indoors
and
away
from
sources
which
can
cause
interference
to
the
GPS,
eg:
electricity
towers,
electricity
sources
with
high
voltage.**
1.
Ensure
the
battery
is
fully
charged
and
the
remote
controller
has
batteries
installed
in
it
with
an
adequate
amount
of
charge.
2.
Power
the
drone
on,
by
holding
the
power
button
for
5
seconds.
The
lights
on
the
drone
will
begin
to
flash,
indicating
that
the
drone
is
ready
to
be
paired.
3.
Pair
the
drone
and
the
controller
by
moving
the
left
joystick
upwards
to
the
12
o’clock
position
and
then
downwards
to
the
6
o’clock
position.
The
lights
on
the
drone
will
not
be
flashing
and
remain
on.
The
rear
light
on
the
right
hand
side
of
the
drone
will
remain
blinking
(can
not
receive
GPS
signal).
4.
After
Pairing,
access
the
settings
on
your
smart
phone
and
open
the
WIFI
settings.
Find
the
WIFI
network
HK
‐
GPS
‐
720
‐
XXXXX
and
connect
to
that
WIFI
network.
When
the
connection
has
been
made
successfully,
exit
out
of
the
settings
on
your
smart
phone.
5.
Open
the
app
HK
GPS
on
your
smart
phone.
6.
Choose
drone
model
FX
‐
8G
in
the
top
left
hand
corner
(if
applicable).
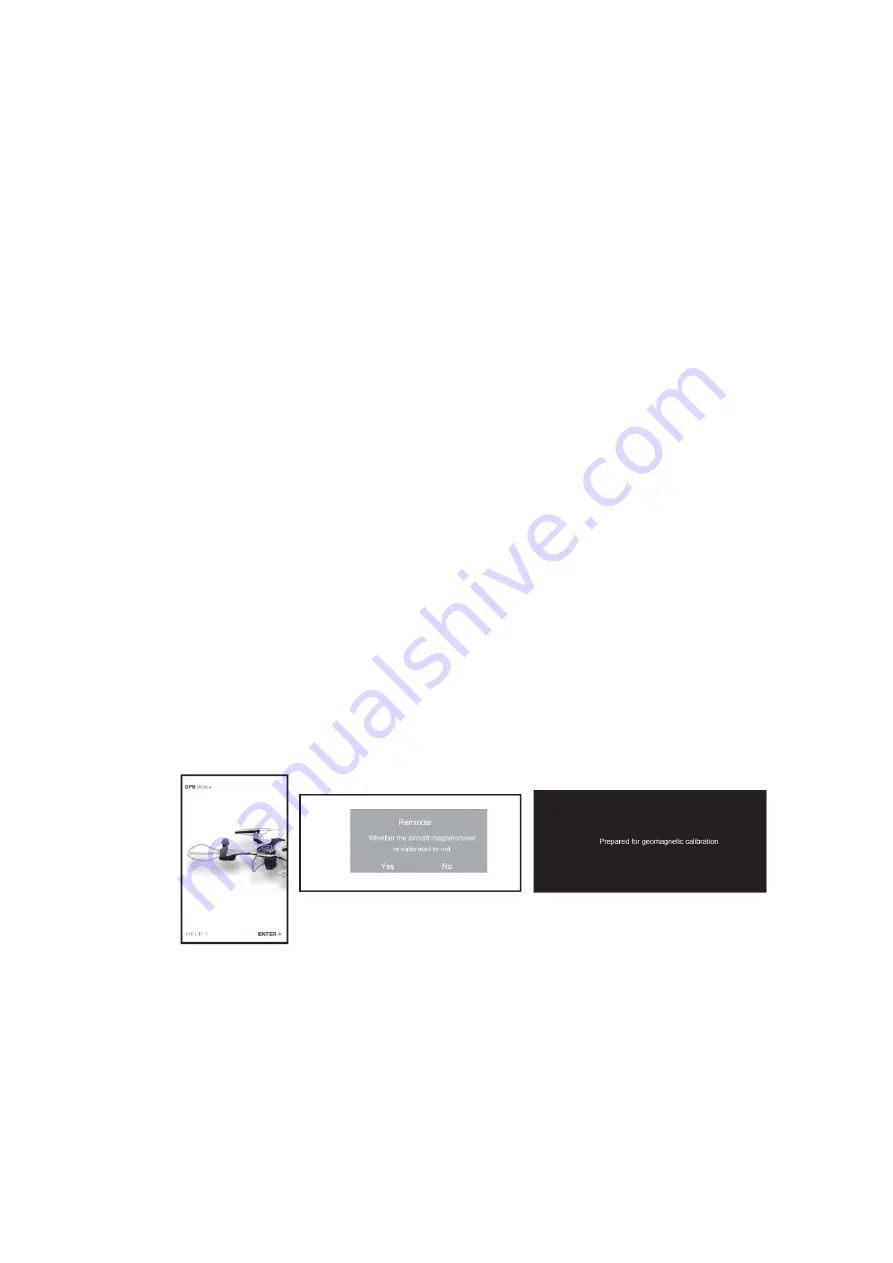
7.
Press
ENTER
on
the
opening
screen
on
the
app.
A
message
will
have
shown
on
the
screen
“Whether
the
aircraft
magnetomer
is
calibrated
or
not,
yes
or
no.
Press
no.
The
next
message
on
the
screen
will
show
“Prepare
for
geomagnetic
calibration”.
8.
The
rear
lights
on
the
drone
will
be
flashing
quickly
when
it
is
in
geomagnetic
calibration
mode.
Pick
up
the
drone
and
rotate
it
horizontally
clockwise
until
the
light
in
the
left
corner
remains
on.
Then
turn
the
drone
vertically
and
rotate
it
until
the
light
in
the
right
corner
remains
on.
When
this
is
done,
it
means
that
calibration
has
been
completed
successfully.
Summary of Contents for FD1550
Page 4: ...PARTS INCLUDED CONTROLLER ...
Page 11: ...BASIC OPERATION ...
Page 15: ...APP FUNCTIONS ...


