background image

IB-CD968(CDM85B-60F9)-WM-E-010705

IMPORTANT INFORMATION REQUIRED BY THE FCC

SAFETY  CERTIFICATION

This  Compact  Disc  Player  is  made  and tested  to  meet  safety standards  of  the  FCC

requirements and compliance with safety performance of the U.S. Department of Health

and  Human  Services,  and also  with  FDA  Radiation  Performance  Standards  21  CFR
Subchapter  J.

WARNING

To prevent  fire or  shock hazard,  do not  expose  this  appliance  to  rain or  moisture.

Since the CD circuitry  may cause interference to other radios  nearby, switch this set

off when not in use  or move it away from  the affected radios.

This  device  complies  with  Part  15  of  the  FCC  Rules.  Operation  is  subject  to  the

following two conditions: (1) This device may not cause harmful interference, and (2)

This  device  must  accept  any interference  received,  including  interference  that  may

cause undesirable  operation.

NOTE:

This  equipment  has  been  tested  and  found  to  comply  with  the  limits  for  a

Class  B digital  device, pursuant  to Part  15  of  the  FCC  Rules.  These  limits

are designed  to  provide  reasonable protection  against  harmful  interference

in a  residential  installation.  This equipment  generates,  uses  and  can  radiate

radio frequency energy  and, if not installed and used in accordance with the

instructions,  may  cause  harmful  interference  to radio  communications.

However,  there  is  no  guarantee  that  interference  will  not  occur  in  a

particular  installation.  If  this equipment  does  cause  harmful  interference  to

radio  or  television  reception,  which  can  be  determined  by  turning  the

equipment off and on, the user is encouraged to try to correct the interference

by one or more of the following measures:

Reorient  or  relocate  the receiving  antenna.

Increase  the separation  between  the  equipment  and  receiver.

 Connect the equipment into an outlet on a circuit different from that to which

the  receiver is  connected.

Consult  the  dealer  or  an  experienced  radio/TV  technician  for  help.

LASER  SAFETY

THIS  SET  EMPLOYS  AN  OPTICAL  LASER  BEAM  SYSTEM  IN  THE  CD  MECHANISM,
DESIGNED  WITH  BUILT-IN  SAFEGUARDS.  DO  NOT  ATTEMPT  TO  DISASSEMBLE.
EXPOSURE TO THIS INVISIBLE LASER LIGHT BEAM MAY  BE  HARMFUL  TO  HUMAN
EYES. THIS IS  A CLASS-1 LASER PRODUCT. USE OF  ADJUSTMENTS OTHER THAN
THOSE  SPECIFIED  HEREIN,  MAY  RESULT  IN  HAZARDOUS  LASER  LIGHT  BEAM
EXPOSURE. THIS COMPACT DISC PLAYER SHOULD NOT BE ADJUSTED OR REPAIRED
BY  ANYONE  EXCEPT  QUALIFIED  SERVICE  PERSONNEL.  THE  LASER  MECHANISM
IN  THE  SET  CORRESPONDS  TO  THE  STYLUS  (NEEDLE)  OF  A  RECORD  PLAYER.
ALTHOUGH THIS PRODUCT USES A LASER PICK-UP LENS, IT IS COMPLETELY SAFE
WHEN  OPERATED ACCORDING TO DIRECTIONS.

16

IB-CD968(CDM85B-60F9)-WM-E-010705.pmd

2/3/2005, 5:44 PM

17

Summary of Contents for CD-968

Page 1: ...ailable PUSH BUTTON ELECTRONIC VOLUME CONTROL BASS BOOST SYSTEM 60 SECOND ESP PLUSTM ON CD PLAY 120 SECOND MP3 ANTI SKIP ON MP3 PLAY FULLY PROGRAMMABLE PLAYBACK REPEAT 1 REPEAT ALL PLAYBACK INTRO RANDOM PLAY LINE OUT JACK CONNECTS TO YOUR STEREO SYSTEM USES 2 SIZE AA BATTERIES NOT INCLUDED MP3 CD PERSONALPLAYER WITH DELUXE HEADPHONES IB CD968 CDM85B 60F9 WM E 010705 pmd 2 3 2005 5 44 PM 1 ...

Page 2: ...ctronics products ever developed With it you can now enjoy listening to your favorite music wherever you go through the supplied headphones HEARING COMFORT WELL BEING Do not play your headphones at a high volume Hearing experts advise against continuous extended play If you experience a ringing in your ears reduce volume or discontinue use TRAFFIC SAFETY Do not use while operating a motorized vehi...

Page 3: ...cal life for 2 size AA alkaline batteries is about 8 hours of continuous use for CD play 2 POWER SOURCES 1 Using with Batteries 2 AC Adaptor optional Insert 2 size AA fresh alkaline batteries according to the and markings on the bottom of the set NOTE Player will not work and batteries will be drained if batteries are not inserted as shown on the bottom of the set Power your CD player by connectin...

Page 4: ... s volume control NOTE 3 If you plug the headphones into the LINE OUT jack the music may be low Make sure you plug the headphones into the green PHONES jack only NOTE 2 To insure that the headphones are not accidentally put into the LINE OUT jack we have covered this jack with a plastic plug You may leave this small plug in the LINE OUT jack for normal headphones use To connect your CD player to y...

Page 5: ...CURRENTLY PLAYING ELAPSED PLAYING TIME OF THE CURRENT TRACK NOTE The ANTI SKIP function will turn on automatically when the PLAY PAUSE button is pressed NOTE To turn off the ANTI SKIP function press and hold the 10 ALBUM button for 2 or 3 seconds Push here Disc TO PHONES JACK NOTE The default volume level is 20 every time you turn off the CD player and play it again the volume level will go back t...

Page 6: ...BASS BOOST switch This switch enhances the low frequency bass sounds at low listening levels Slide the BASS BOOST switch at the bottom of the set ON or OFF to suit your taste PLAY PAUSE button PLAY PAUSE button STOP OFF button To turn off the power STOP OFF button once and wait 30 seconds or press STOP OFF button twice Get your set into STOP mode for PROGRAMMED play 5 To skip to the next track s S...

Page 7: ...y INTRO This plays the first 10 seconds of all songs in sequential order 1 During play or in stop mode press the REPEAT button 3 times the symbol INTRO will flash in the display 2 Press the PLAY PAUSE button The first 10 seconds of each song on the CD will play in sequential order 3 When you find a song you like press the PLAY PAUSE button the symbol INTRO will disappear from the display normal pl...

Page 8: ...on to confirm Track 2 is now programmed Program number 2 will now show in the display ready for your next selection of track 4 Repeat steps 2 and 3 to program other tracks till you finish up to 20 selections 5 After programming is finished press the PLAY PAUSE button to begin programmed play Music begins with PROG shown in the display NOTE The player will stop automatically after all programmed tr...

Page 9: ...anti skip system allows gentle swaying of the set as in walking without music skipping This function may not work during heavy jogging 8 The mark changes to the mark indicating that the memory buffer basket is full If the set is subject to a shock or a bump during play the data stored in memory continues to be decoded and played This gives the pickup time to stabilize and continue reading new musi...

Page 10: ...nd song names can be viewed by the text display of your CD 968 But in most cases above you will need to enter the names of the songs Also if you put all songs in one album it may be difficult for you to locate a particular song We recommend several albums on a single CD with each album containing multiple songs CDDB www cddb com is a database which can help you name songs and artists and has usefu...

Page 11: ...are recorded on your MP3 disc please be patient NOTE 3 If your MP3 disc is not made properly the words BAD MEDIA or BAD DISC will show in the display DECREASES VOLUME 10 STEREO HEADPHONES ALBUM NUMBER CURRENTLY PLAYING TRACK NUMBER CURRENTLY PLAYING TITLE OF THE CURRENT TRACK ELAPSED PLAYING TIME OF THE CURRENT TRACK TO PHONES JACK PUSH BUTTON VOLUME CONTROLS MP3 NOTE The default volume level is 2...

Page 12: ... buy pre recorded MP3 discs from on line sources 2 When saving songs audio files onto your CD R or CD RW you must save them as MP3 DOT MP3 files Do not save them as DOC TEXT or PDF etc when downloading converting or saving files as MP3 files 3 Do not save TEXT files as MP3 files because they will not play and they may interfere with the set 4 Do not attempt to combine normal CD audio tracks and MP...

Page 13: ...on the disc in a random order 1 During play or in stop mode press the REPEAT button 5 times the symbol RND will flash in the display 2 Press the PLAY PAUSE button this will play all of the songs in random order selected by the MP3 CD player 3 Press the SKIP SEARCH button to skip to the next random song All Tracks Repeat REPT ALL Repeats all songs in order till you press STOP OFF During play press ...

Page 14: ...After programming is finished press PLAY PAUSE to begin programmed play Music begins with PROG shown in the display NOTE The player will stop automatically after all programmed tracks have been played To quit programmed play press the STOP OFF button twice You may press the PLAY PAUSE button to restart normal play Your programmed memory will be lost When the disc door is opened When the batteries ...

Page 15: ...t discs have no grooves to collect dust and microscopic dirt so gently wiping them with a soft cloth should remove most particles Wipe in a straight motion from the center to the edge Handling Compact Discs Dirty scratched or warped discs may cause skipping or noise Handle the disc only by the edges To keep clean do not touch its surface Never use thinner benzine record cleaner or antistatic spray...

Page 16: ... listening while allowing you to hear some outside sounds when listening at normally low volume levels Listening at extremely high volume levels minimizes the intrusion of outside noise sounds In the interest of safety it is strongly advised against the use while engaging in activities where the exclusion of external sounds whistles horns sirens traffic etc could be hazardous Also loud volume can ...

Page 17: ...ed in accordance with the instructions may cause harmful interference to radio communications However there is no guarantee that interference will not occur in a particular installation If this equipment does cause harmful interference to radio or television reception which can be determined by turning the equipment off and on the user is encouraged to try to correct the interference by one or mor...

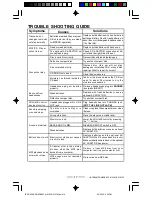
Page 18: ...c or clean the lens BASS BOOST is ON Slide BASS BOOST switch to OFF Weak batteries Music is too loud Sound is distorted Buttons do not work Electronic or static error caused circuitry to lock Remove batteries and the optional AC ADAPTOR Wait 15 seconds and re insert Make sure batteries are fresh or the optional AC ADAPTOR has power Replace both batteries or use an optional AC ADAPTOR Lower the VOL...

Page 19: ...riod after original purchase we will service or exchange at no charge the set that is returned to LENOXX ELECTRONICS CORP After the initial 90 day period expires and for a period of 12 months from original purchase we will repair the unit covering any part s that need to be replaced at no charge but will charge for the cost of labor return postage paid by Lenoxx This warranty does not apply to any...

Reviews: