


hardware” on page 104. Connect all cables to the new system board. See “Parts on the system
board” on page 38.
d. Connect the external cables and the power cord to the computer.
The failing system board must be returned with microprocessor socket covers to protect the pins during
shipping and handling. Install the microprocessor socket covers removed from the new system board on the
failing system board.
Note:
Ensure that each microprocessor socket on the failing system board is installed with a microprocessor
socket cover.
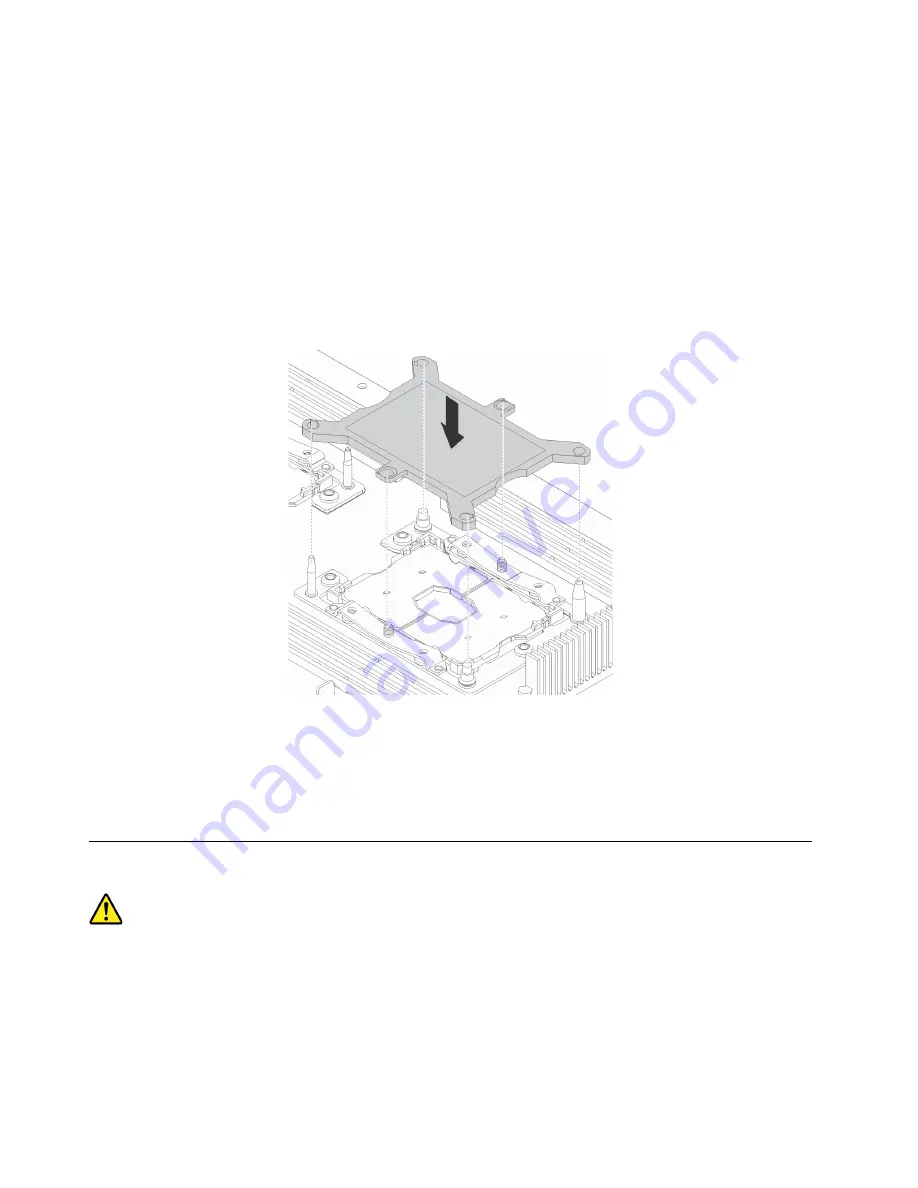
To install the microprocessor socket cover, position the cover on the microprocessor socket as shown and
lower the cover straight down into the socket on the system board.
Figure 193. Installing the microprocessor socket cover
What to do next:
• To work with another piece of hardware, go to the appropriate section.
• To complete the installation or replacement, go to “Completing the parts replacement” on page 210.
Completing the parts replacement
CAUTION:
After replacing a CRU, reinstall all protective covers, including the computer cover, before connecting
power and operating the computer. This action is important to help prevent unexpected electrical
shock and help ensure the containment of an unexpected fire that could happen under extremely rare
conditions.
After completing the removal or installation for all parts, reinstall the computer cover and reconnect cables.
Depending on the parts you removed or installed, you might need to confirm the updated information in the
Setup Utility program. Refer to “Using the Setup Utility program” on page 67.
210
P920 Hardware Maintenance Manual
Summary of Contents for ThinkStation P920
Page 1: ...P920 Hardware Maintenance Manual Machine Types 30BD 30BV and 30BC ...
Page 6: ...iv P920 Hardware Maintenance Manual ...
Page 8: ...vi P920 Hardware Maintenance Manual ...
Page 16: ...8 P920 Hardware Maintenance Manual ...
Page 20: ...12 P920 Hardware Maintenance Manual ...
Page 21: ...1 2 Chapter 1 Read this first Important safety information 13 ...
Page 22: ...14 P920 Hardware Maintenance Manual ...
Page 28: ...20 P920 Hardware Maintenance Manual ...
Page 32: ...24 P920 Hardware Maintenance Manual ...
Page 36: ...28 P920 Hardware Maintenance Manual ...
Page 43: ...Figure 4 Major FRUs and CRUs Chapter 2 Product overview 35 ...
Page 68: ...60 P920 Hardware Maintenance Manual ...
Page 74: ...66 P920 Hardware Maintenance Manual ...
Page 102: ...94 P920 Hardware Maintenance Manual ...
Page 220: ...212 P920 Hardware Maintenance Manual ...
Page 224: ...216 P920 Hardware Maintenance Manual ...
Page 226: ...218 P920 Hardware Maintenance Manual ...
Page 228: ...220 P920 Hardware Maintenance Manual ...
Page 236: ...228 P920 Hardware Maintenance Manual ...
Page 240: ...232 P920 Hardware Maintenance Manual ...
Page 242: ...234 P920 Hardware Maintenance Manual ...
Page 244: ...236 P920 Hardware Maintenance Manual ...
Page 245: ......
Page 246: ......