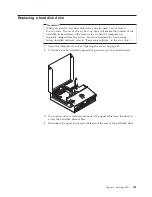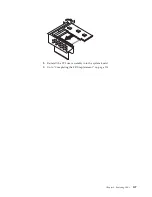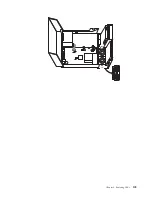
Replacing
an
optical
drive
1.
Open
the
computer
cover.
See
“Opening
the
cover”
on
page
83.
2.
Pivot
the
drive
bay
assembly
upward
to
gain
access
to
the
hard
disk
drive.
3.
Disconnect
the
signal
and
power
cables
from
the
rear
of
the
optical
drive.
4.
Slide
the
optical
drive
lock
1
to
the
unlocked
position.
5.
Open
the
door
at
the
front
of
the
optical
drive
and
slide
it
out
the
front
of
the
computer.
6.
Install
the
new
optical
drive
into
the
bay.
Slide
the
optical
drive
lock
to
the
locked
position.
7.
Connect
the
signal
and
power
cables
to
the
rear
of
the
optical
drive.
8.
Go
to
“Completing
the
FRU
replacement”
on
page
114.
104
Hardware
Maintenance
Manual
Summary of Contents for ThinkCentre A55
Page 1: ...Hardware Maintenance Manual Types 9636 9638 9640 9641 9642 9643 9644 9645 ...
Page 2: ......
Page 3: ...Hardware Maintenance Manual ...
Page 16: ...10 Hardware Maintenance Manual ...
Page 17: ...Chapter 2 Safety information 11 ...
Page 18: ... 18 kg 37 lbs 32 kg 70 5 lbs 55 kg 121 2 lbs 1 2 12 Hardware Maintenance Manual ...
Page 22: ...16 Hardware Maintenance Manual ...
Page 23: ...1 2 Chapter 2 Safety information 17 ...
Page 24: ...18 Hardware Maintenance Manual ...
Page 25: ...1 2 Chapter 2 Safety information 19 ...
Page 32: ...26 Hardware Maintenance Manual ...
Page 33: ...Chapter 2 Safety information 27 ...
Page 34: ...1 2 28 Hardware Maintenance Manual ...
Page 38: ...32 Hardware Maintenance Manual ...
Page 39: ...1 2 Chapter 2 Safety information 33 ...
Page 54: ...48 Hardware Maintenance Manual ...
Page 102: ...96 Hardware Maintenance Manual ...
Page 115: ...Chapter 8 Replacing FRUs 109 ...
Page 122: ...116 Hardware Maintenance Manual ...
Page 206: ...200 Hardware Maintenance Manual ...
Page 209: ......
Page 210: ...Part Number 42Y4652 Printed in USA 1P P N 42Y4652 ...


