00
Adapter
Adapter
Expansion
filler
Expansion
filler
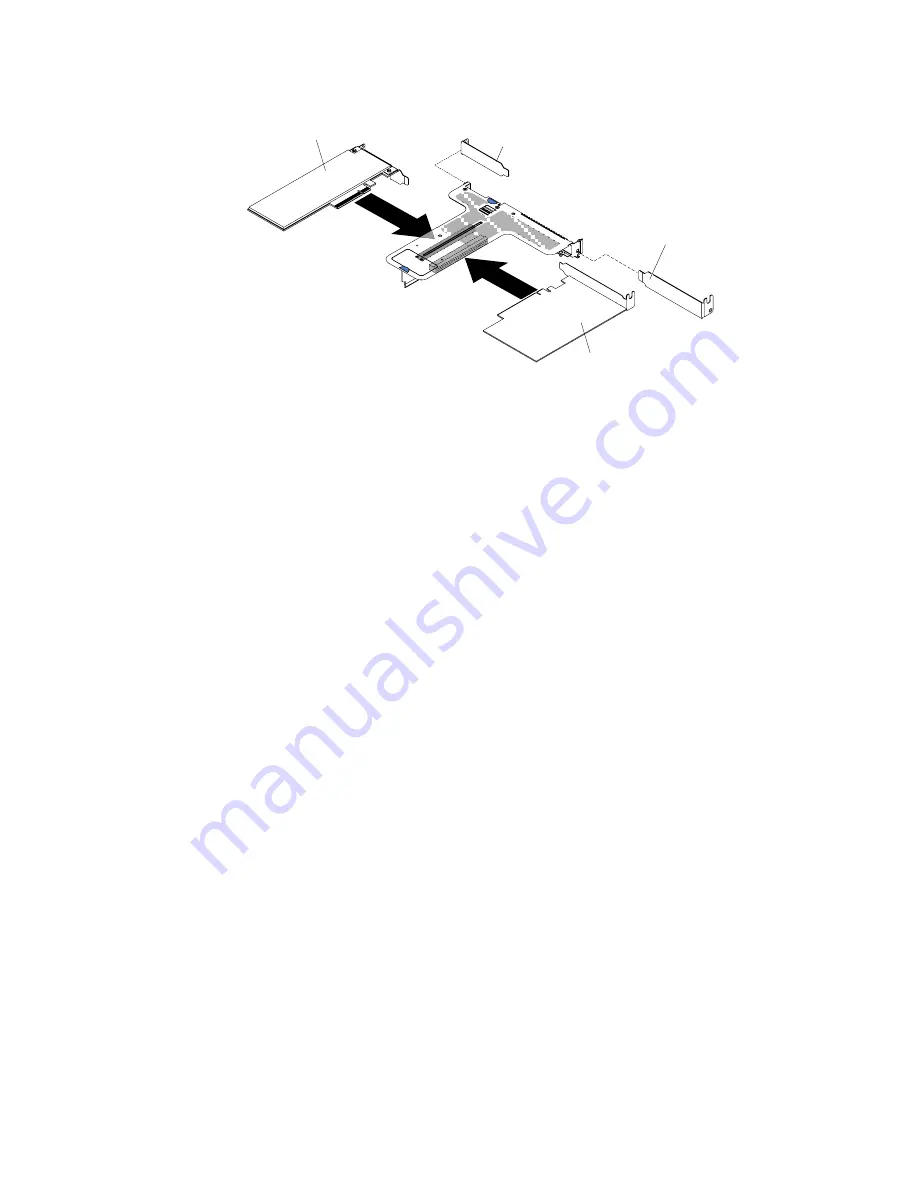
Figure 109. Adapter installation into a PCI riser-card assembly that has one low-profile slot and one full-height
half-length slot (for PCI riser-card assembly connector 2 on system board)
Attention:
When you install an adapter, make sure that the adapter is correctly seated in the
riser-card assembly and that the riser-card assembly is securely seated in the riser-card connector
on the system board before you turn on the server. An incorrectly seated adapter might cause
damage to the system board, the riser-card assembly, or the adapter.
Step 6.
Install the PCI riser-card assembly in the server (see “Replacing a PCI riser-card assembly” on
page 172).
Step 7.
Connect the cable to the newly-installed adapter.
Step 8.
Perform any configuration tasks that are required for the adapter.
Step 9.
Reinstall the cover (see “Replacing the cover” on page 120).
Step 10. Slide the server into the rack.
Step 11. Reconnect the power cords and any cables that you removed.
Step 12. Turn on the peripheral devices and the server.
Step 13. If you are replacing a ServeRAID adapter, import your RAID configuration to the replacement
adapter as a foreign configuration. See the
ServeRAID-M Software User Guide
at
https://www-947.ibm.com/support/entry/portal/docdisplay?lndocid=migr-5086126 for
instructions.
Removing a ServeRAID SAS/SATA controller
Use this information to remove a ServeRAID SAS/SATA controller.
The ServeRAID SAS/SATA controller can be installed in the dedicated connector on the system board or PCI
riser-card slots (see “System-board internal connectors” on page 26 for the location of the connectors).
You can replace the ServeRAID controller with another supported ServeRAID controller. For a list of
supported ServeRAID controllers, see http://www.lenovo.com/ serverproven/.
Note:
For brevity, in this documentation the ServeRAID SAS/SATA controller is often referred to as the
SAS/SATA adapter
or the
ServeRAID adapter
.
To remove the SAS/SATA adapter from the system board, complete the following steps:
184
Lenovo System x3550 M5 Installation and Service Guide
Summary of Contents for System x3550 M5
Page 1: ...Lenovo System x3550 M5 Installation and Service Guide Machine Type 8869 ...
Page 6: ...iv Lenovo System x3550 M5 Installation and Service Guide ...
Page 66: ...52 Lenovo System x3550 M5 Installation and Service Guide ...
Page 298: ...284 Lenovo System x3550 M5 Installation and Service Guide ...
Page 1120: ...1106 Lenovo System x3550 M5 Installation and Service Guide ...
Page 1124: ...1110 Lenovo System x3550 M5 Installation and Service Guide ...
Page 1132: ...Taiwan BSMI RoHS declaration 1118 Lenovo System x3550 M5 Installation and Service Guide ...
Page 1134: ...1120 Lenovo System x3550 M5 Installation and Service Guide ...
Page 1142: ...1128 Lenovo System x3550 M5 Installation and Service Guide ...
Page 1143: ......
Page 1144: ......


