Step 5.
Remove the rear cover. Refer to Removing the rear cover.
Step 6.
Remove the stand holder. Refer to Removing the stand holder.
Step 7.
Remove the EMI cover. Refer to Removing the EMI cover.
Step 8.
Remove the memory modules. Refer to Replacing the memory module.
Step 9.
Remove the system fan. Refer to Replacing the system fan.
Step 10. Remove the heat-sink. Refer to Replacing the heat-sink.
Step 11. Remove the Wi-Fi card. Refer to Replacing the Wi-Fi card.
Step 12. Remove all the cables from the motherboard.
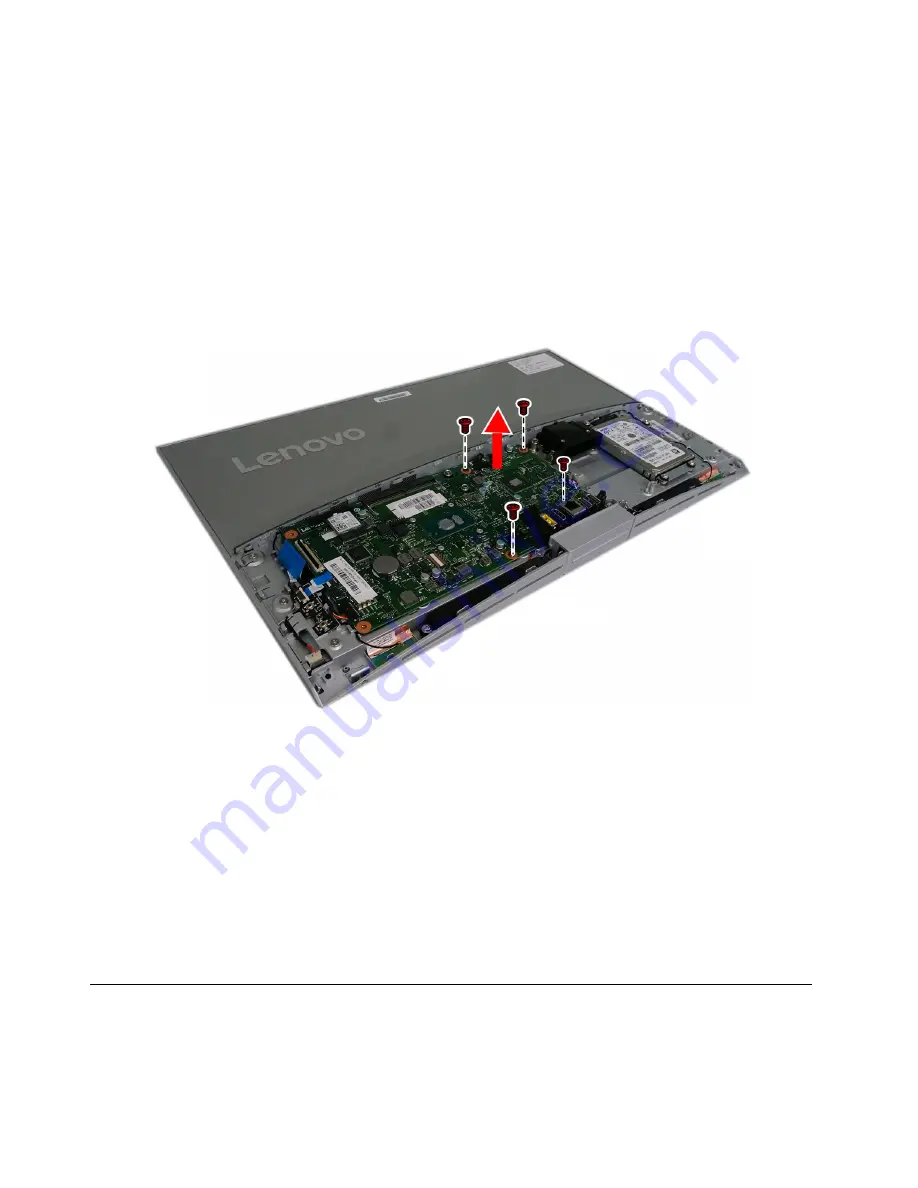
Step 13. Remove the four screws that secure the motherboard to the chassis, and then lift the motherboard
up to remove it.
Step 14. To install the new motherboard:
a.
Align the four screw holes in the new motherboard with the screw holes in the chassis.
b.
Secure the new motherboard to the chassis with four screws.
c.
Connect all the cables to the new motherboard.
Step 15. Install the following parts to the new motherboard:
• Wi-Fi card
• Heat-sink
• System fan
• Memory module
Step 16. Reattach the EMI cover, stand holder, rear cover, and stand base.
Replacing the speaker system
Note:
Turn off the computer and wait 3 to 5 minutes to let it cool down before removing the cover.
42
ideacentre All-In-One 510S Computer Hardware Maintenance Manual
Summary of Contents for ideapad 510S
Page 2: ......
Page 6: ...iv ideacentre All In One 510S Computer Hardware Maintenance Manual ...
Page 8: ...2 ideacentre All In One 510S Computer Hardware Maintenance Manual ...
Page 16: ...10 ideacentre All In One 510S Computer Hardware Maintenance Manual ...
Page 18: ...12 ideacentre All In One 510S Computer Hardware Maintenance Manual ...
Page 24: ...18 ideacentre All In One 510S Computer Hardware Maintenance Manual ...
Page 32: ...26 ideacentre All In One 510S Computer Hardware Maintenance Manual ...
Page 68: ...62 ideacentre All In One 510S Computer Hardware Maintenance Manual ...


