


Power-On Password
When a Power-On Password is set, you cannot start the Lenovo BIOS Setup Utility program until a valid
password is typed from the keyboard.
Setting, changing, or deleting a Power-On Password
Note:
A password can be any combination of letters and numbers up to 16 characters (a-z and 0-9).
To set a Power-On Password, do the following:
1. Start the Lenovo BIOS Setup Utility program (see ”Starting the Lenovo BIOS Setup Utility program” on
page 13).
2. From the
Security
menu, select
Set Power-On Password
and press the
Enter
key.
3. The password dialog box will be displayed. Type the password, then press the
Enter
key.
4. Retype the password to confirm. If you typed the password correctly, the password will be installed.
5. Return to the Lenovo BIOS Setup Utility program menu and select the
Exit
option.
6. Select
Save Changes and Exit
from the menu.
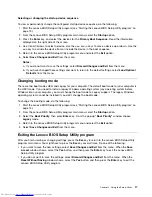
To change a Power-On Password, do the following:
1. Start the Lenovo BIOS Setup Utility program (see ”Starting the Lenovo BIOS Setup Utility program” on
page 13).
2. From the
Security
menu, select
Set Power-On Password
and press the
Enter
key.
3. The password dialog box will be displayed. Type the current password then press the
Enter
key.
4. Type the new password, then press the
Enter
key. Retype the new password to confirm it. If you typed
the new password correctly, the new password will be installed. A Setup Notice will be displayed
confirming that your changes have been saved.
5. Return to the Lenovo BIOS Setup Utility program menu and select the
Exit
option.
6. Select
Save Changes and Exit
from the menu.
To delete a previously set Power-On Password, do the following :
1. Start the Lenovo BIOS Setup Utility program (see ”Starting the Lenovo BIOS Setup Utility program” on
page 13).
2. From the
Security
menu, select
Set Power-On Password
and press the
Enter
key.
3. The password dialog box will be displayed. Type the current password and press the
Enter
key.
4. Leave each new password line item blank, then press Enter. A Setup Notice will be displayed confirming
that your changes have been saved.
5. Return to the Lenovo BIOS Setup Utility program menu and select the
Exit
option.
6. Select
Save Changes and Exit
from the menu.
Enabling or disabling a device
The
Devices
options is used to enable or disable user access to the following:
USB Functions
Select whether to enable or disable
USB
(Universal Serial
Bus) functions. If the functions are disabled, no
USB
devices can be used.
Chapter 5
.
Using the Setup Utility
15
Summary of Contents for C20-00
Page 1: ...Lenovo C20 00 Non Touch All In One PC Hardware Maintenance Manual Machine Types F0BB C20 00 ...
Page 2: ......
Page 3: ...Lenovo C20 00 Non Touch All In One PC Hardware Maintenance Manual Machine Types F0BB C20 00 ...
Page 6: ...iv Lenovo C20 00 Non Touch All In One PC Hardware Maintenance Manual ...
Page 8: ...2 Lenovo C20 00 Non Touch All In One PC Hardware Maintenance Manual ...
Page 16: ...10 Lenovo C20 00 Non Touch All In One PC Hardware Maintenance Manual ...
Page 18: ...12 Lenovo C20 00 Non Touch All In One PC Hardware Maintenance Manual ...
Page 24: ...18 Lenovo C20 00 Non Touch All In One PC Hardware Maintenance Manual ...
Page 33: ...Chapter 7 Replacing hardware 27 ...
Page 49: ...Chapter 7 Replacing hardware 43 ...
Page 52: ...46 Lenovo C20 00 Non Touch All In One PC Hardware Maintenance Manual ...
Page 60: ...54 Lenovo C20 00 Non Touch All In One PC Hardware Maintenance Manual ...