


USER GUIDE • LVR3X-G2
4
Wiring the Device Drawers
1.
Open the rear access door.
2.
Plug the
USB Power Bricks
(included with the VR
Classroom Kit) into the outlets in each of the three
drawers (12 bricks per drawer).
Note:
Within each
drawer, leave the center outlet empty.
3.
While still facing the back of the cart, route four of the
power brick cables in the top drawer through the hole on
the left side, and route the other eight cables through
the hole on the right side. This will bring all 12 cables
into the interior of the top drawer.
4.
Once all of the cables have been routed to the interior of
the drawer, move to the front of the cart.
5.
Pull the top drawer out to its fully-extended position.
6.
Remove the two thumb screws at the back of the drawer
and then remove the cover.
7.
Lay the set of four cables into the cable management
channel in the bottom right of the drawer, and then lay
the set of eight cables into the cable management
channel in the bottom left of the drawer.
8.
Replace the cover (do not replace thumb screws at this
time) and route each cable through its nearest
Cable
Retention Slot
and move it to the desired hole location.
9.
Once the cables have been routed to their proper
resting place, re-install the thumb screws.
10. Repeat steps 3-9 for the middle drawer and then for the
bottom drawer.
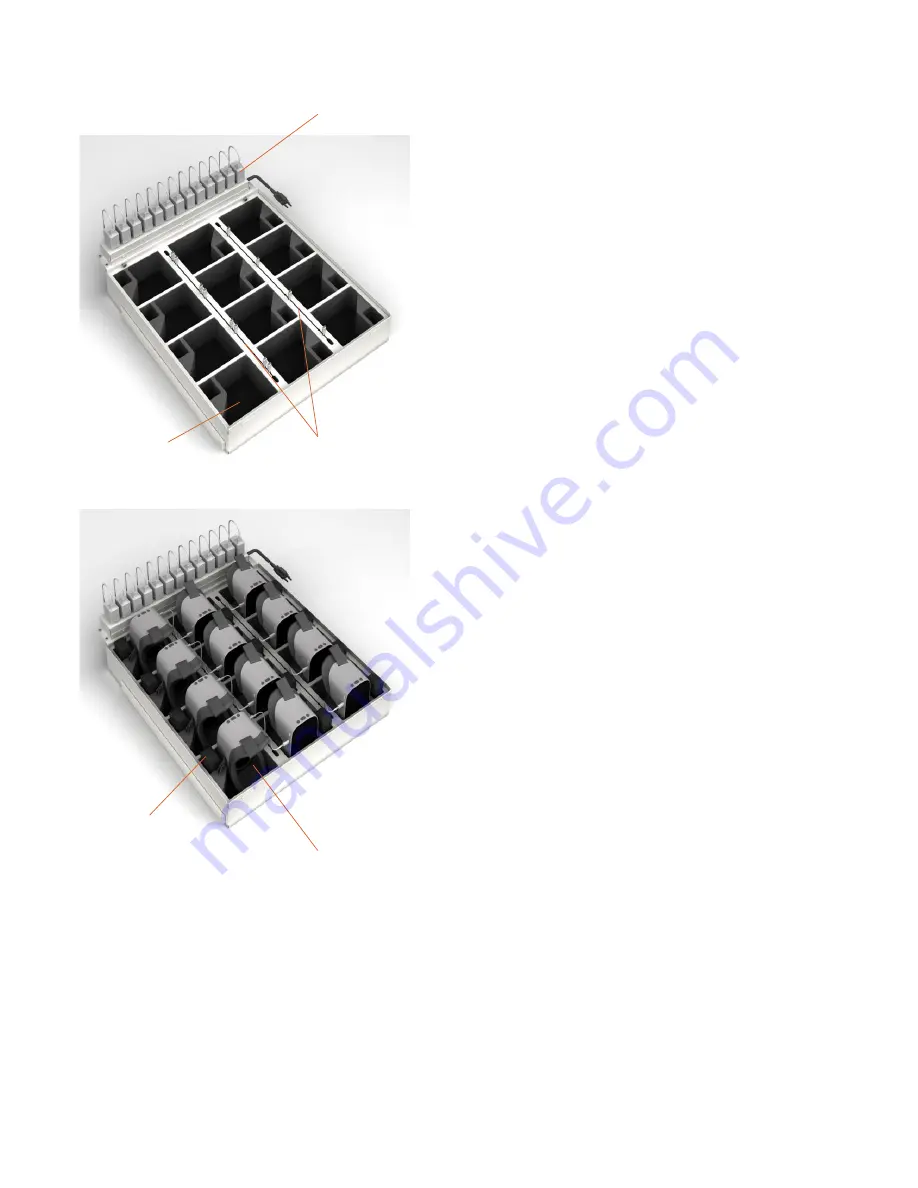
11. Place the
VR Headsets
(USB-C port facing up) and
Wireless Controllers
into their respective storage
areas (see picture to the left for proper orientation of
headsets) and plug the cables into the headsets.
Wireless Controller
Storage
VR Headset Storage
(headsets in middle and
right rows face forward with
USB-C ports facing up;
headsets in left row face
backward with USB-C ports
facing up)
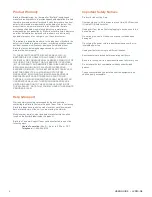
Protective Rubber Mat
USB Power Bricks
Cable Retention Slots
Instructions
Summary of Contents for Bretford LVR3X-G2
Page 1: ...USER GUIDE LVR3X G2 ...


