

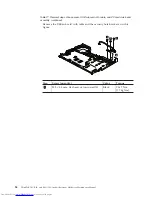


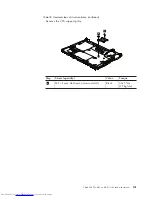


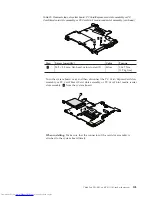


Table
30.
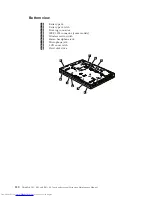
Removal
steps
of
LCD
front
bezel
and
LCD
rear
cover
(LCD
cover
kit)
(continued)
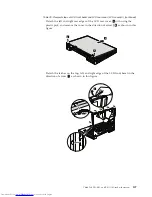
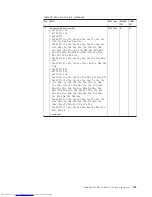
Detach
the
latches
on
the
front
edge
of
the
LCD
front
bezel
in
the
direction
of
arrow
8
as
shown
in
this
figure.
Note:
The
LCD
front
bezel
is
secured
with
a
double-faced
adhesive
tape.
8
8
8
8
8
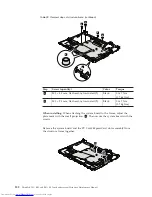
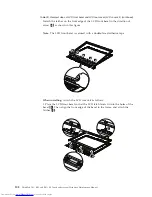
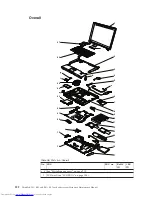
When
installing:
Attach
the
LCD
cover
kit
as
follows:
1.
Place
the
LCD
front
bezel
so
that
the
LCD
latch
levers
fit
into
the
holes
of
the
bezel
1
.
Then
align
the
front
edge
of
the
bezel
to
the
frame,
and
attach
the
latches
2
.
2
2
2
1
1
108
ThinkPad
T61,
R61,
and
R61i
(14.1-inch
widescreen)
Hardware
Maintenance
Manual
Summary of Contents for 646066U - ThinkPad T61 6460
Page 1: ...ThinkPad T61 R61 and R61i 14 1 inch widescreen Hardware Maintenance Manual ...
Page 2: ......
Page 3: ...ThinkPad T61 R61 and R61i 14 1 inch widescreen Hardware Maintenance Manual ...
Page 8: ...vi ThinkPad T61 R61 and R61i 14 1 inch widescreen Hardware Maintenance Manual ...
Page 22: ...14 ThinkPad T61 R61 and R61i 14 1 inch widescreen Hardware Maintenance Manual ...
Page 28: ...20 ThinkPad T61 R61 and R61i 14 1 inch widescreen Hardware Maintenance Manual ...
Page 38: ...30 ThinkPad T61 R61 and R61i 14 1 inch widescreen Hardware Maintenance Manual ...
Page 252: ...244 ThinkPad T61 R61 and R61i 14 1 inch widescreen Hardware Maintenance Manual ...
Page 255: ......
Page 256: ...Part Number 42X3547_05 1P P N 42X3547_05 42X3547_05 ...