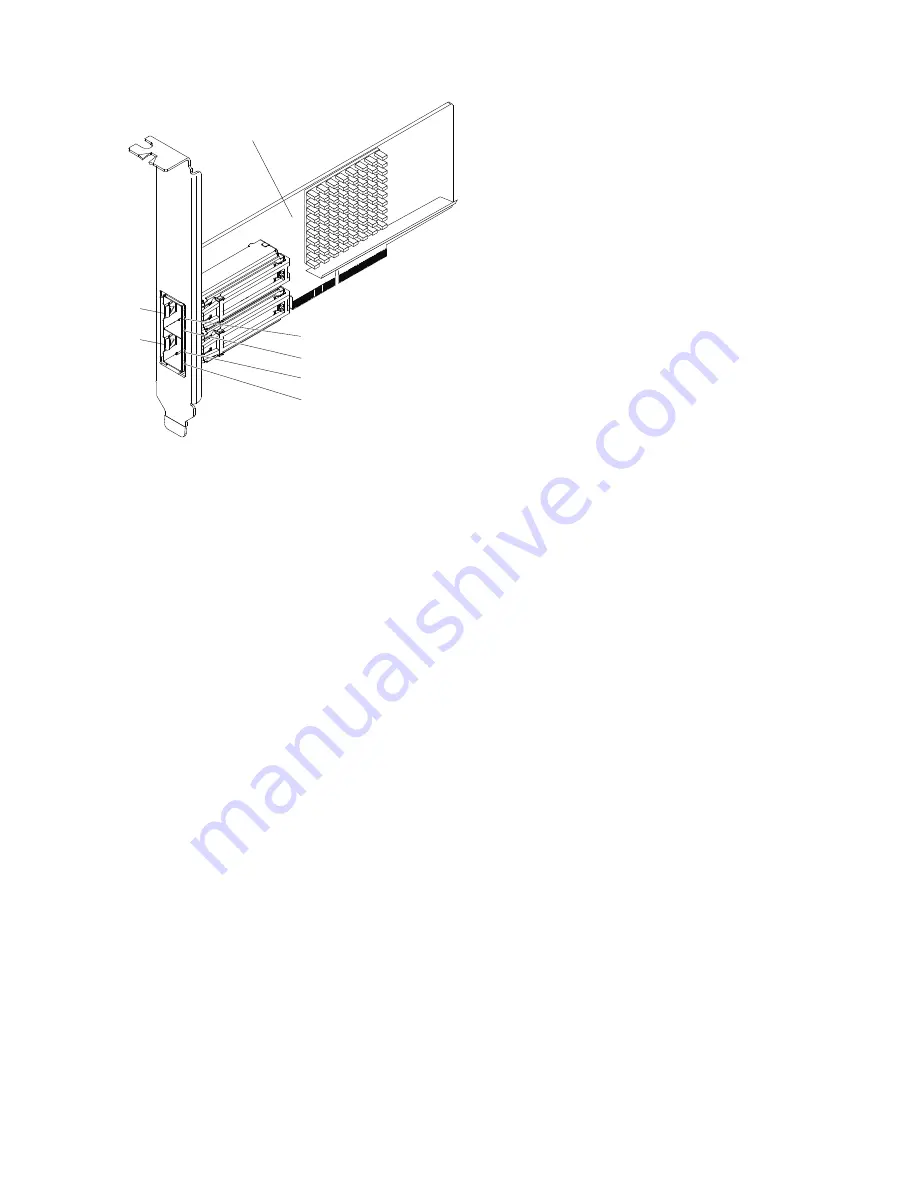
Broadcom NetXtremeII
ML2 Dual-port 10 Gb
SFP+ Ethernet adapter
Link LED
Activity LED
Activity LED
Link LED
Port 1
Port 2
To replace an Ethernet adapter, complete the following steps:
Note:
The illustration in this document might differ slightly from your hardware.
Step 1. Make sure that the adapter retention latch is in the open position.
Step 2. Touch the static-protective package that contains the new adapter to any unpainted metal surface
on the server. Then, remove the adapter from the package.
Step 3. Align the edge connector on the adapter with the connector on the standard I/O book board. Press
the edge of the connector
firmly
into the standard I/O book board connector and make sure that
the adapter snaps into the connector securely.
Attention:
When you install an adapter, make sure that the adapter is correctly seated in the
connector before you turn on the server. An incorrectly seated adapter might cause damage to the
standard I/O book board or the adapter.
Step 4. Close the adapter retention lever.
Step 5. Reinstall the standard I/O book in the server (see “Replacing the standard I/O book” on page 227.
Step 6. Perform any configuration tasks that are required for the adapter.
Step 7. Reconnect the power cord and any cables that you removed.
Step 8. Turn on the peripheral devices and the server.
Removing a RAID adapter flash power module from the standard I/O book
Use this information for instructions on how to remove a RAID adapter flash power module from the standard
I/O book.
If a RAID adapter flash power module is installed in the standard I/O bookand you need to replace the flash
power module, complete the following steps:
Step 1. Before you begin, read “Safety” on page v and “Installation guidelines” on page 44 .
Step 2. Turn off the server (see “Turning off the server” on page 40) and all attached peripheral devices.
Disconnect all power cords; then, disconnect all external cables as necessary to replace the
device.
.
Removing and replacing components
265
Summary of Contents for 6241
Page 1: ...System x3850 X6 and x3950 X6 Installation and Service Guide Machine Type 6241 ...
Page 6: ...iv System x3850 X6 and x3950 X6 Installation and Service Guide ...
Page 56: ...42 System x3850 X6 and x3950 X6 Installation and Service Guide ...
Page 82: ...68 System x3850 X6 and x3950 X6 Installation and Service Guide ...
Page 132: ...118 System x3850 X6 and x3950 X6 Installation and Service Guide ...
Page 158: ...144 System x3850 X6 and x3950 X6 Installation and Service Guide ...
Page 214: ...200 System x3850 X6 and x3950 X6 Installation and Service Guide ...
Page 358: ...344 System x3850 X6 and x3950 X6 Installation and Service Guide ...
Page 1938: ...1924 System x3850 X6 and x3950 X6 Installation and Service Guide ...
Page 1964: ...1950 System x3850 X6 and x3950 X6 Installation and Service Guide ...
Page 1968: ...1954 System x3850 X6 and x3950 X6 Installation and Service Guide ...
Page 1975: ...Taiwan Class A compliance statement Appendix F Notices 1961 ...
Page 1976: ...Taiwan BSMI RoHS declaration 1962 System x3850 X6 and x3950 X6 Installation and Service Guide ...
Page 1988: ...1974 System x3850 X6 and x3950 X6 Installation and Service Guide ...
Page 1989: ......
Page 1990: ......


